
Tracker 4x2 L4-1.6L SOHC TBI (1994)
Fuel Injector: Service and Repair
Injector Installation
CAUTIONS:
^
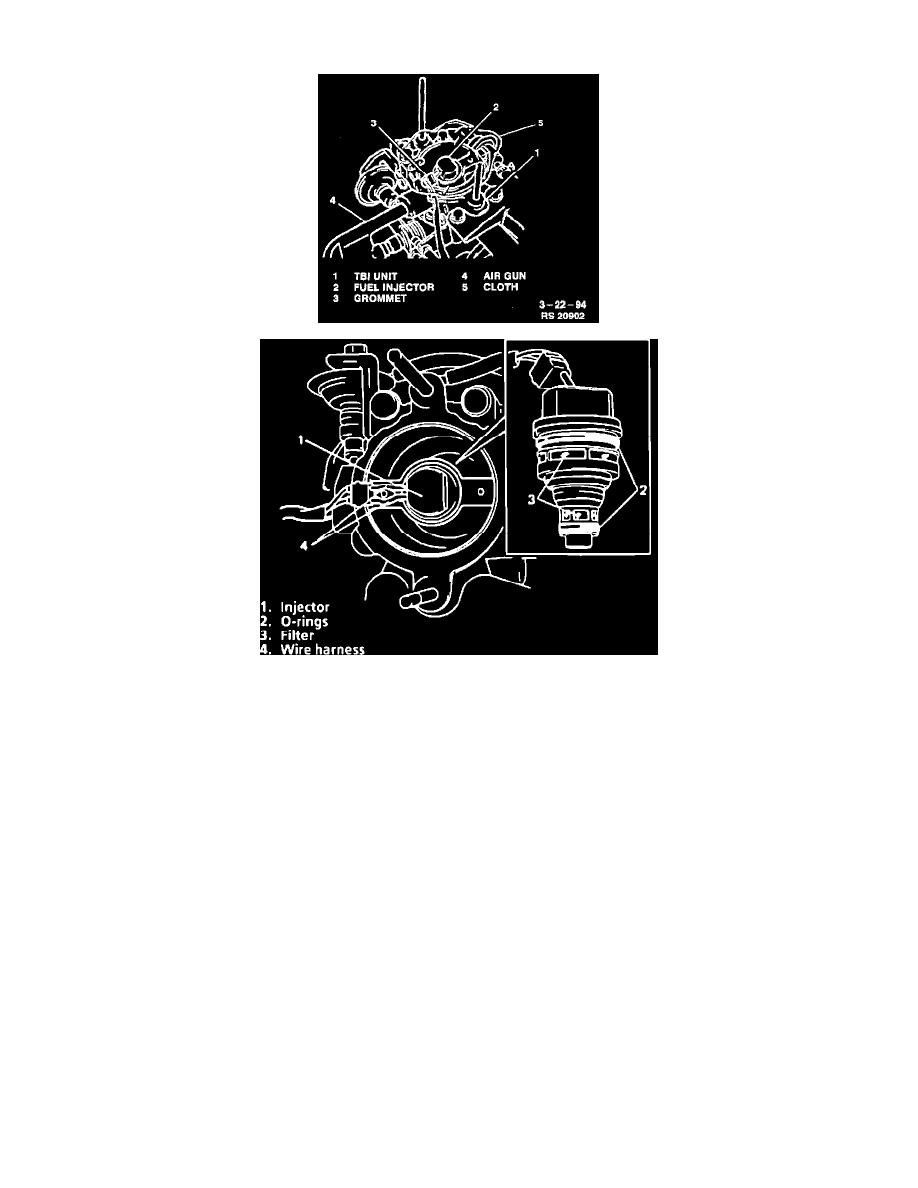
Use care when handling the injector, to prevent damage especially to the filter, injector needle and wire harness connection. Also, because the
injector is an electrical component, it should not be immersed in any type of liquid solvent or cleaner, as damage may occur.
^
Be sure to replace injector with an identical part. Other injectors may appear to be the same, but they are calibrated differently for different flow
rates. Never twist injector while installing as damage or misplacement of O-rings may occur.
REMOVE OR DISCONNECT
1. Negative battery cable.
2. Relieve fuel system pressure, refer to Fuel Pressure Release.
3. Air intake case.
4. Fuel feed pipe clamp from the intake manifold and disconnect feed pipe from the throttle body.
5. Injector cover.
6. Disconnect the injector coupler, release its wire harness from clamp and remove its grommet from the throttle body.
7. To free fuel injector, hold a shop towel over the injector. Using an air gun, blow about 600 kPa (87 psi) of compressed air into the inlet port of the
TBI unit.
CAUTION: Be precise about the pressure of compressed air. Blowing air under excessively high pressure may force injector out and cause
damage not only to the injector itself but also to other parts.
8. Inspect the fuel injector for evidence of dirt and contamination. If present, check for presence of dirt in fuel lines and fuel tank. Clean or replace as
necessary.
INSTALL OR CONNECT
1. Inspect the fuel injector O-rings for any damage or deterioration. Replace as necessary.
2. Apply a thin coat of oil to the O-rings and then install injector into the throttle body.