
Tracker 4x4 L4-1.6L SOHC TBI (1994)
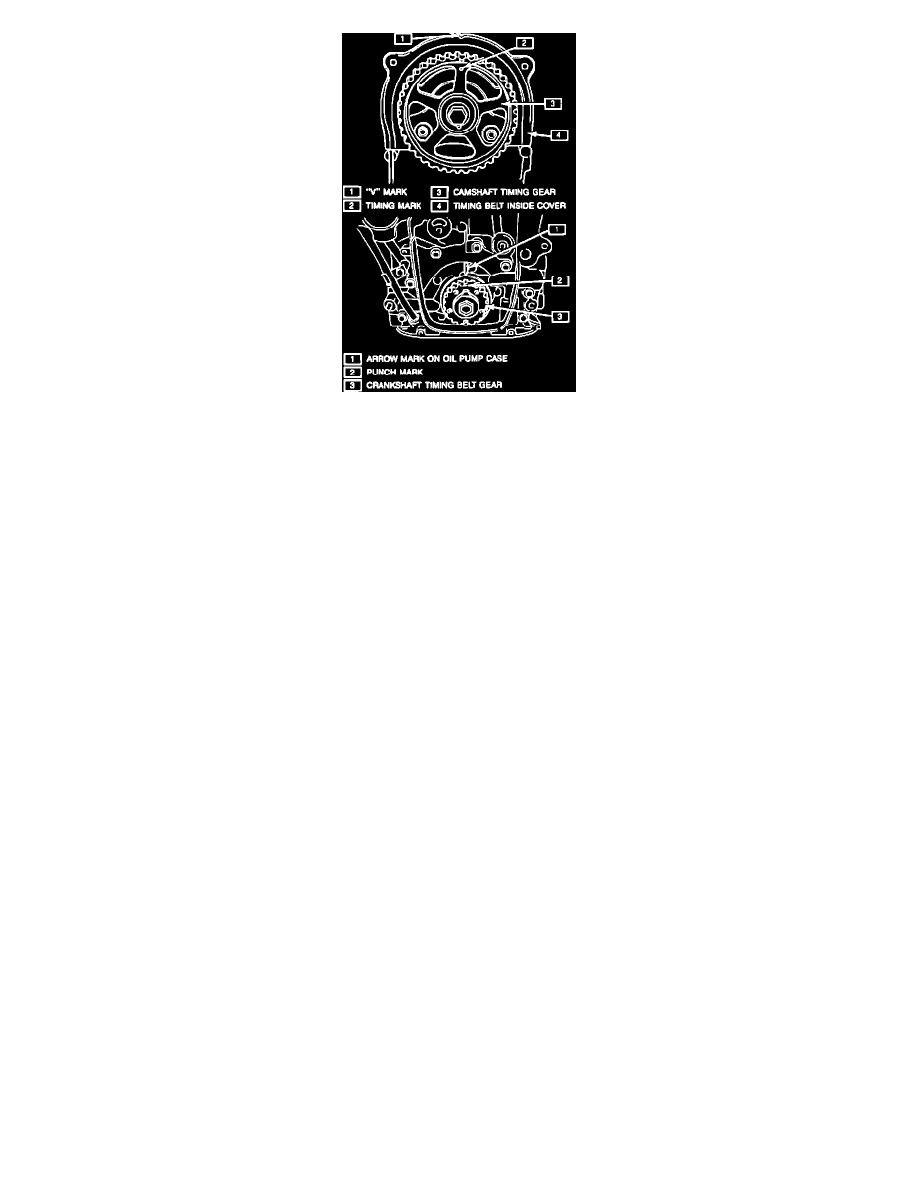
Fig. 18 Timing Belt Pulley Marks
INSTALLATION
1.
Insert lock tab of tensioner plate into the lock tab slot of the tensioner.
2.
Install tensioner and tensioner plate. Do not tighten bolt by wrench, tighten by hand only.
3.
Remove cylinder head cover. Refer to Cylinder Head Assembly / Valve Cover / Service and Repair. See: Engine, Cooling and
Exhaust/Engine/Cylinder Head Assembly/Valve Cover/Service and Repair
4.
Loosen all valve lash adjusting screws and lock nuts.
5.
Turn crankshaft pulley clockwise and align timing mark on camshaft pulley with the ``V'' mark on the inner belt cover, Fig. 18.
6.
Turn crankshaft clockwise and align punch mark on crankshaft with arrow on oil pump, Fig. 18.
7.
Install timing belt so there is no slack on the drive side of the belt.
8.
Hook tensioner spring to tensioner plate and screw and tighten tensioner stud only.
9.
Turn crankshaft two full rotations clockwise after belt installation.
10.
Tighten tensioner stud and nut to specifications.
11.
Install timing belt outer cover.
12.
Install crankshaft pulley and tighten to specification.
13.
Install radiator shroud, water pump pulley, radiator cooling fan and A/C compressor flexible suction hose.
14.
Install compressor and water pump drive belts and adjust tension.
15.
Adjust valve lash. Refer to Engine / Cylinder Head Assembly / Valve, Intake/Exhaust / Adjustments for procedure. See: Tune-up and Engine
Performance Checks/Valve Clearance/Adjustments
16.
Replace cylinder head cover and connect battery ground cable.
17.
On models with A/C, evacuate and charge A/C system.