
Tracker 4x4 L4-1.6L VIN 6 (1995)
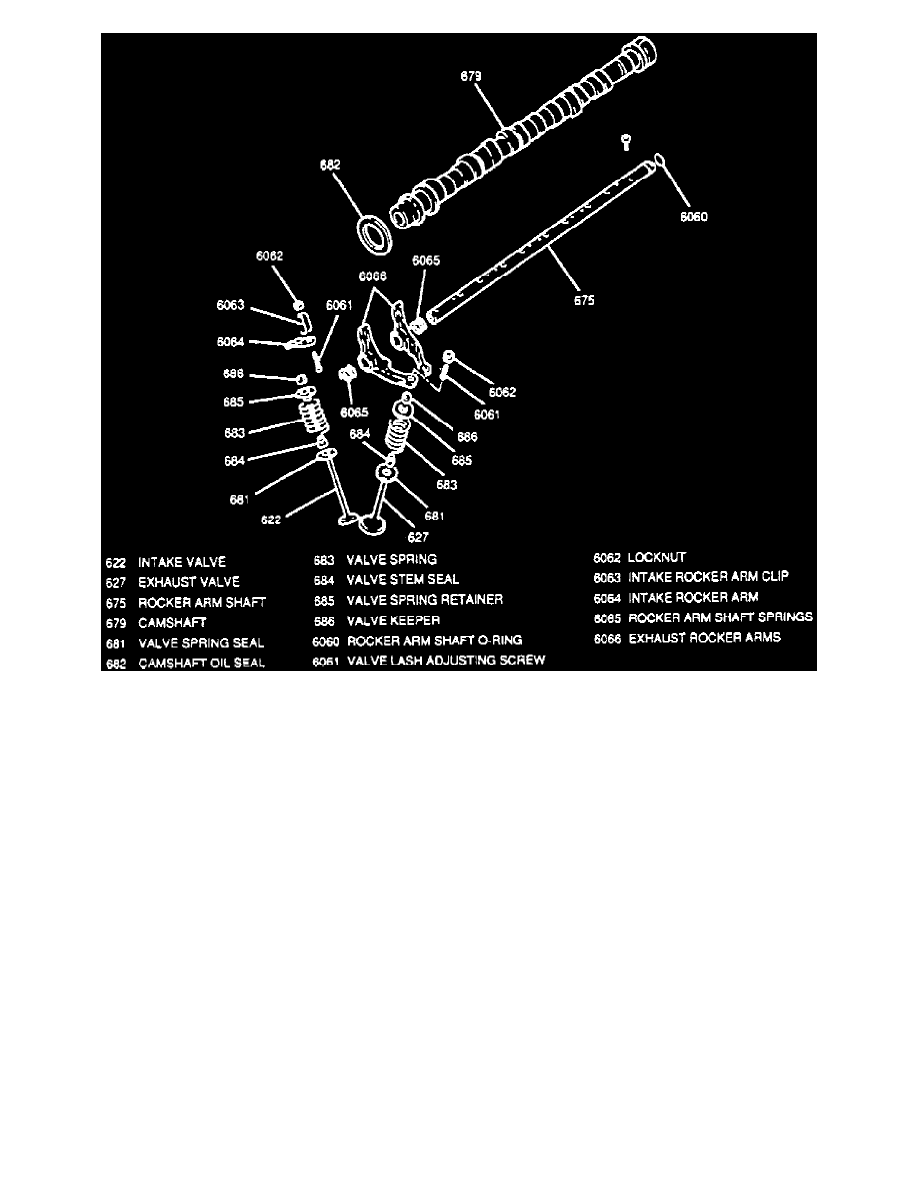
Fig. 34 Exploded View Camshaft & Rocker Arm Components.
16. Remove all intake rocker arms with clips, Fig. 33 from rocker arm shaft, Fig. 34.
17. Remove six rocker arm attaching bolts from cylinder head.
18. Push rocker arm shaft back through rear of cylinder head and remove O-ring.
19. Remove exhaust rocker arms, rocker arm springs, and rocker arm shaft by pulling rocker arm shaft through front of cylinder head.
Installation
Prior to assembly, apply a coating of clean engine oil to all rocker arm components.
1. Push rocker arm shaft through front of cylinder head, slide exhaust rocker arms and rocker arm springs on shaft.
2. Push rocker arm shaft back through rear of cylinder head until end of shaft appears, then install new O-ring.
3. Place flat machined surface of rocker arm shaft facing down and mating with flat in cylinder head surface.
4. Install six rocker arm shaft bolts in cylinder head and tighten to specifications.
5. Fill rocker arm shaft bolt holes with clean engine oil.
6. Install all intake rocker arms with clips on rocker arm shaft.
7. Install camshaft and camshaft carrier caps noting the following:
a. Apply a coating clean engine oil to camshaft.
b. Camshaft carrier caps are marked with numbers and directional arrows.
c. Number one cap is installed at the front of cylinder head with arrow pointing toward the front of cylinder head.
d. Install remaining carrier caps in numerical order with arrows facing toward front of cylinder head.
e. Apply RTV silicone rubber sealant to bottom of number six carrier cap.