
Acadia FWD V6-3.6L (2007)
Some customers may comment on seeing a separation or gap, shown above, between the armrest and pull cup on the driver or passenger door trim panel.
Cause
Because it is not secured to the armrest reinforcement, the inner side of the molded pull cup pocket has a tendency to pull away from the armrest.
Correction
Install two tie straps following the procedure below:
1. Remove the door trim panel. Refer to Front Side Door Trim Panel Replacement - Left Side (Acadia) or Front Side Door Trim Panel Replacement -
Right Side (Acadia) in SI.
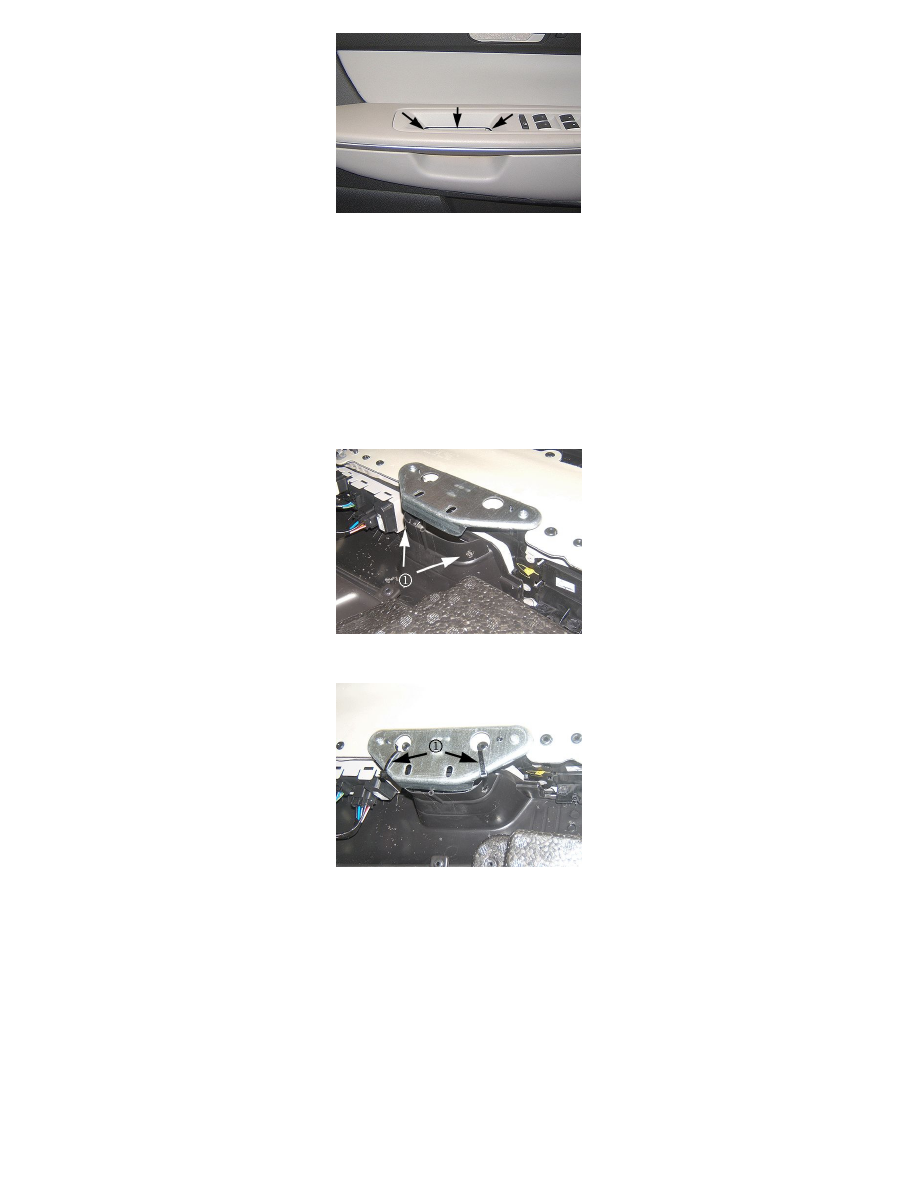
2. Drill two 6 mm (1/4 in) holes in the black inward-standing flange of the pull cup pocket at the locations (1) shown above.
Note
Approximate size of the tie strap should be 4.5 mm (0.177 in) width and 300 mm (12 in) length.
3. Install tie straps (1) , obtained locally, into each of the drilled holes. Route the strap through the larger holes in the armrest reinforcement and
secure as shown above.
4. Ensure that the tie straps are snug and are pulling the pull cup pocket upward, closing the gap to the armrest. Trim off the extra length of the tie
wraps.
5. Install the door trim panel. Refer to Front Side Door Trim Panel Replacement - Left Side (Acadia) or Front Side Door Trim Panel Replacement -
Right Side (Acadia) in SI.
Warranty Information