
Acadia FWD V6-3.6L (2007)
Shift Solenoid: Service and Repair
Control Solenoid Valve and Transmission Control Module Assembly Replacement
Removal Procedure
1. Remove the control valve body cover.
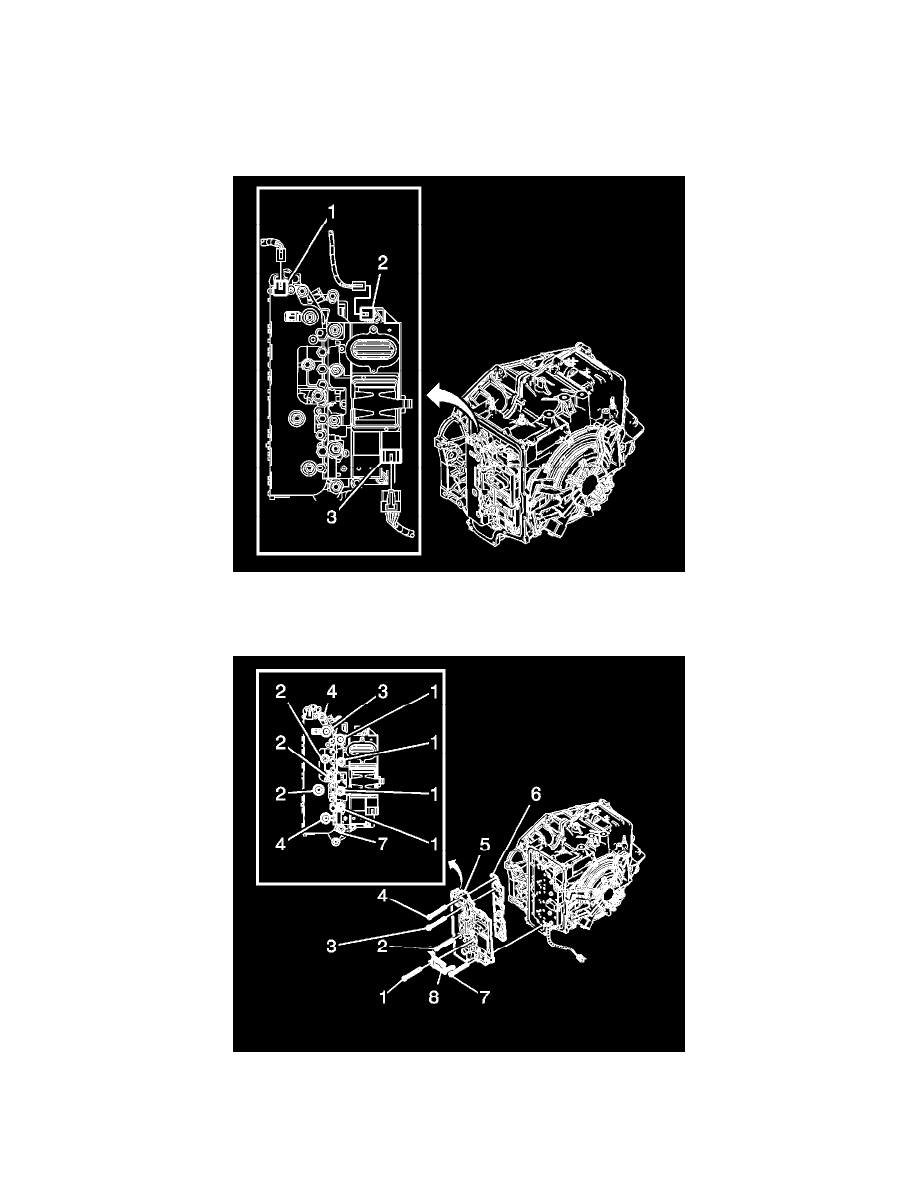
2. Disconnect the input speed sensor electrical connector (1).
3. Disconnect the output speed sensor electrical connector (2).
4. Disconnect the shift position switch electrical connector (3).
5. Remove the 4 control valve body bolts (1) M6 x 80 (Quantity: 4).
6. Position the 8 control solenoid valve spring (8) to the side. Spring will be released with removal of lower control valve body.
7. Remove the 2 control valve body bolts (4) M6 x 65.
8. Remove the control valve body bolt (3) M6 x 42.