
C 1500 Truck 2WD V6-262 4.3L VIN Z (1992)
-
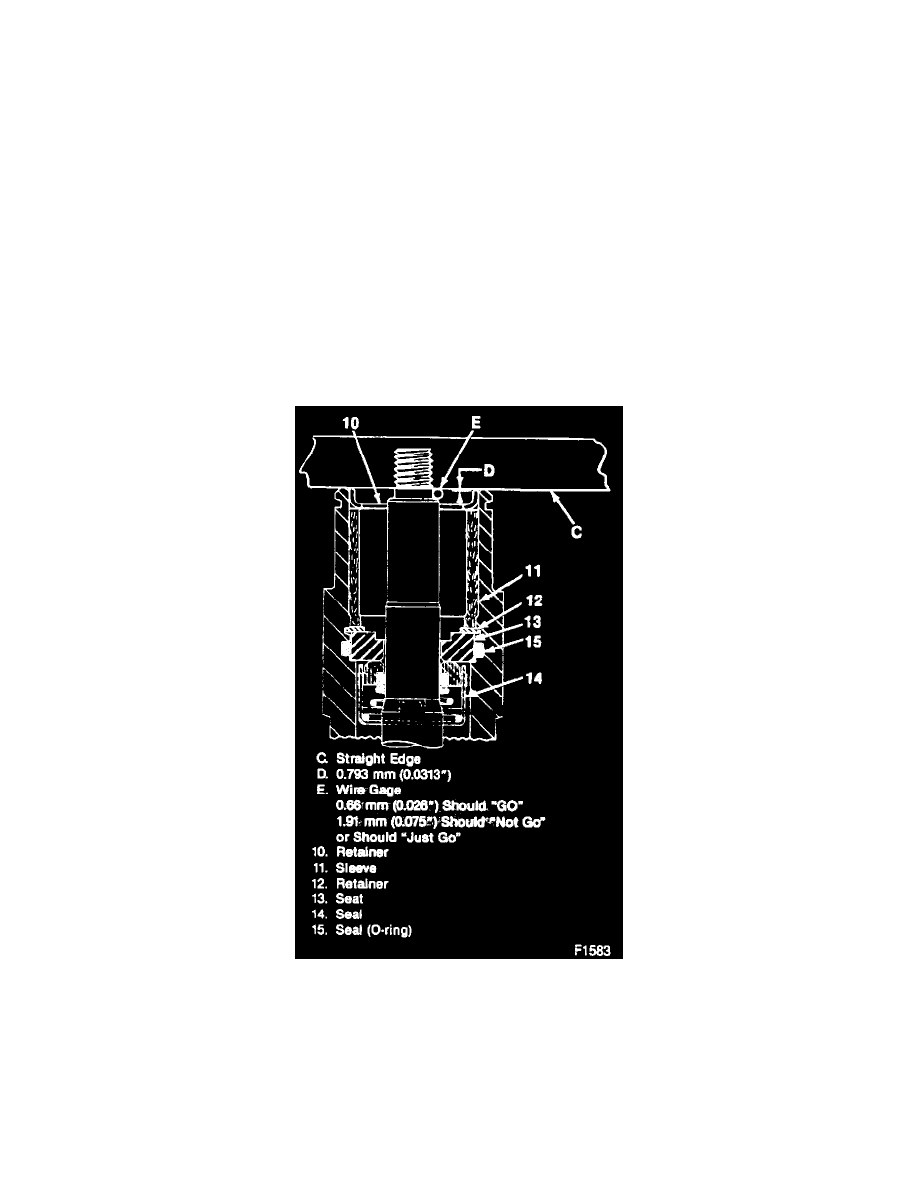
Install J 23128-A and the seal (13) over the compressor shaft (39).
-
Push the seal (13) into place with a rotary motion.
Important
-
Do not dislodge the seal (O-ring) (15).
4. Shaft seal seat retaining ring (12) with J 5403.
-
Place the flat side against the seal seat.
-
Use the sleeve of J 23128-A to press the ring into its groove.
5. J 9625-A to the rear head of the compressor:
-
Gage charging lines or pressurize the suction side (low pressure side) of the compressor with refrigerant to equalize the pressure to the drum
pressure.
6. New absorbent sleeve (11).
-
Roll the material into a cylinder, overlapping the ends.
-
Slip the sleeve into the compressor front head with the overlap toward the top of the compressor.
-
With a screwdriver spread the sleeve ends of the sleeve butt at the top vertical centerline.
7. Sleeve retainer (10) with J 9393-A.
-
Place the flange face against the front end of the sleeve.
Shaft/Seal Position And Correct Position Gaging Guide
-
Press and tap with a mallet to set the retainer and sleeve into place. Place the retainer 0.7937 mm (0.03125-inch) from the face of the
compressor neck.
8. Clutch plate and hub assembly (2).
Important
-
Using improper procedures, pounding or collisions can damage the shaft seal and the axial plate. If the axial plate is out of position, the carbon
face of the shaft seal may not contact the seal seat.