
C 1500 Truck 2WD V6-262 4.3L VIN Z TBI (1995)
-
Set the parking brake.
1. Oil cooler lines from the connector.
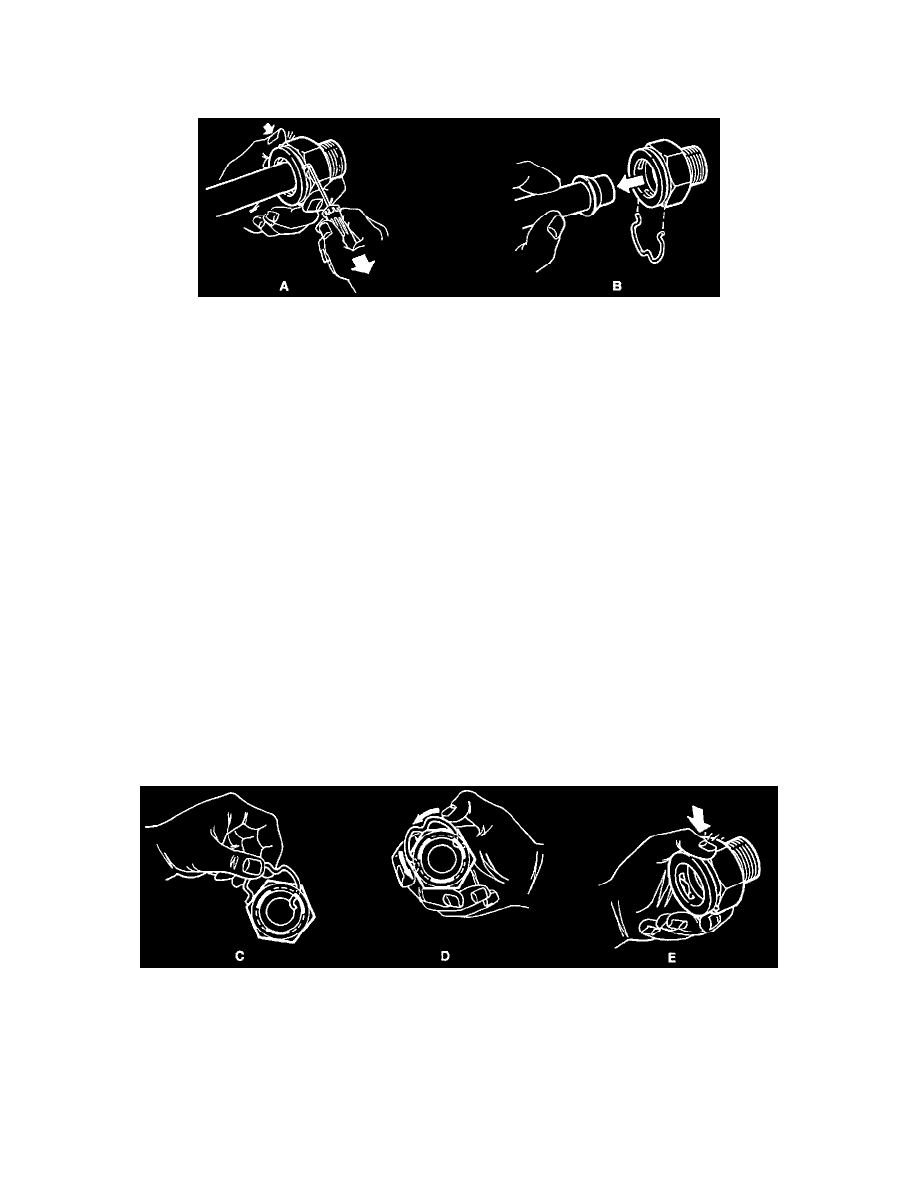
Removing Oil Cooler Line From Connector
-
Using a small pick-type tool and your thumb (A in image), grasp the connector end and pull the clip from the connector (B in image). This
releases the cooler line from the connector.
NOTICE: Do not use more than 690 kPa (100 psi) air to clean the cooler and lines. Exceeding 690 kPa (100 psi) could damage the cooler or
lines.
A. Using clean solvent and compressed air, back-flush the oil cooler and lines.
B. Using compressed air, remove the cleaning solvent.
C. Flush the system using the same type of oil normally circulated through the cooler.
2. Bolt or nut from bracket or clamp.
3. Oil filter and discard.
4. Oil cooler lines from the clip or strap.
5. Oil cooler lines from the oil cooler at fitting.
CLEAN
-
All components in a suitable solvent and dry with compressed air.
INSPECT
-
All fittings, connectors, and cooler lines for damage or distortion.
INSTALL OR CONNECT
NOTICE: Do not use more than 690 kPa (100 psi) air to clean the cooler and lines. Exceeding 690 kPa (100 psi) could damage the cooler or
lines.
Installing Oil Cooler Line Clip Into Connector
-
Using your thumb and forefinger, insert the connector clip into one of the three recesses in the connector (C in image). With one end of the clip
engaged in the connector slot, use your thumb and rotate the clip around the connector until it snaps into place (D and E in image).
NOTICE: Make sure the connector clip engages all three slots in the connector. Failure to properly install the connector clip could cause the oil
cooler line to come loose and cause damage to the engine.
1. Oil cooler lines to the oil cooler.