
C 1500 Truck 2WD V8-5.3L VIN T (1999)
2.
Adjust the door striker.
3.
Verify the door closing effort. If the effort has not improved, replace the weatherstrips as necessary.
Important:
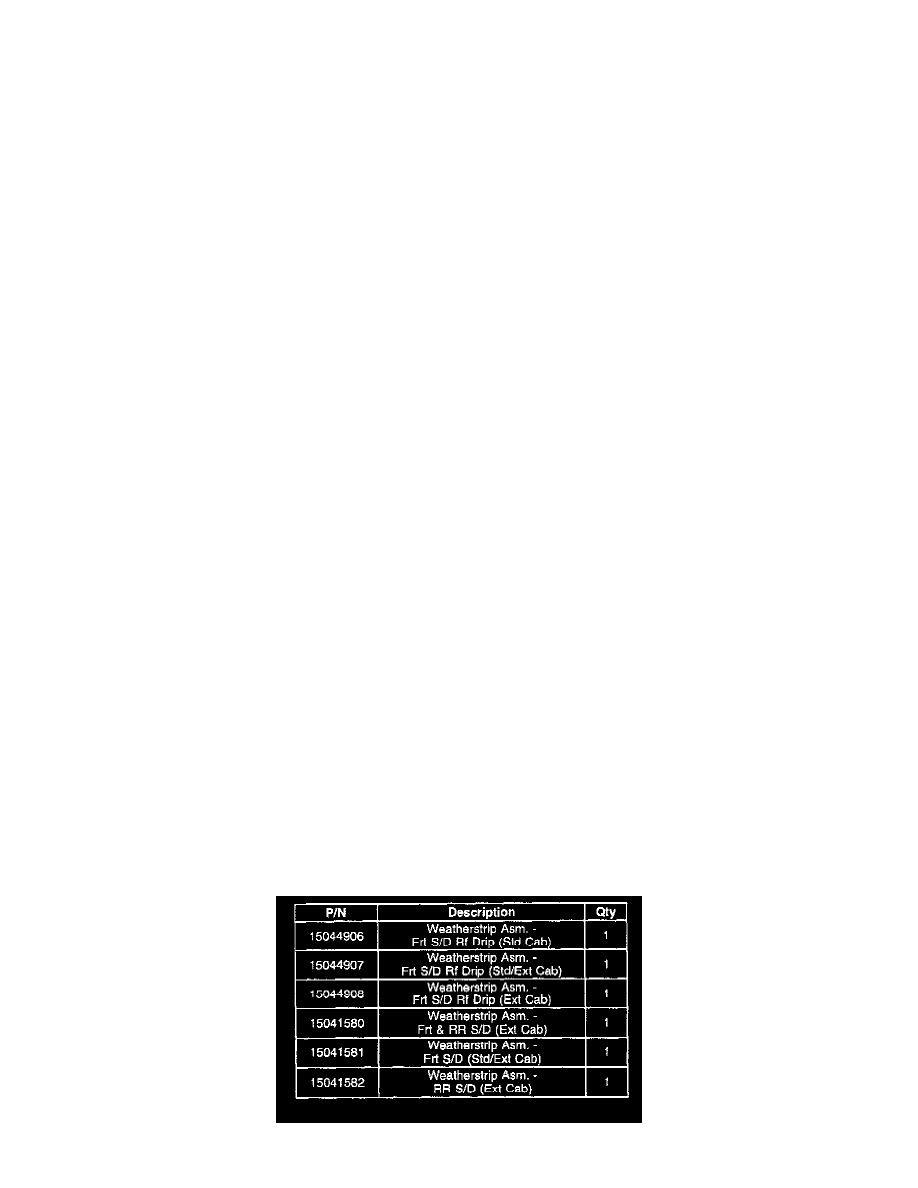
For vehicles built before August 15, 1998, replace all the weatherstrips. For vehicles built after August 15, 1998, replace only the front side door drip
weatherstrip.
Front Side Door Roof Drip Weatherstrip Replacement
1.
Remove the weatherstrip from the pinchweld flange.
2.
Install the weatherstrip onto the pinchweld flange. Completely seat the weatherstrip around the flange.
Front or Front and Rear Side Door Weatherstrip Replacement
1.
Remove the door sill plate.
2.
Remove the hinge pillar trim panel. Refer to the Interior Trim subsection of the Service Manual.
3.
Remove the rear seat assembly (extended cab vehicles only). Refer to the Seats subsection of the Service Manual.
4.
Remove the rear quarter trim panel. Refer to the Interior Trim subsection of the Service Manual.
5.
Remove the weatherstrip from the door opening.
6.
Install the weatherstrip to the door opening using the following procedure:
6.1.
Position the end of the new weatherstrip in the same location as the weatherstrip you are replacing.
6.2.
Push the weatherstrip onto the pinchweld flange. Start at the end and work around the entire edge of the door opening.
7.
Install the rear quarter trim panel. Refer to the Interior Trim subsection of the Service Manual.
8.
Install the rear seat assembly (extended cab vehicles only). Refer to the Seats subsection of the Service Manual.
9.
Install the hinge pillar trim panel. Refer to the Interior Trim subsection of the Service Manual.
10.
Install the door sill plate.
Rear Side Door Weatherstrip Replacement (Extended Cab Only)
1.
Remove the third door trim panel assembly. Refer to the Interior Trim subsection of the Service Manual.
2.
Remove the weatherstrip from the door edge.
3.
Install the weatherstrip to the door edge
4.
Install the third door trim panel assembly. Refer to the Interior Trim subsection of the Service Manual.