
C 1500 Truck 2WD V8-5.3L VIN T (1999)
Compressor Clutch Coil: Service and Repair
Compressor Clutch Coil Install
TOOLS REQUIRED
-
J 33024 Clutch Coil Installer Adapter
-
J 8433-1 Puller Bar J 34992 Holding Fixture
-
J 33017 Pulley and Bearing Assembly Installer
-
J 33023-A Puller Pilot
-
J 6083 Snap Ring Pliers
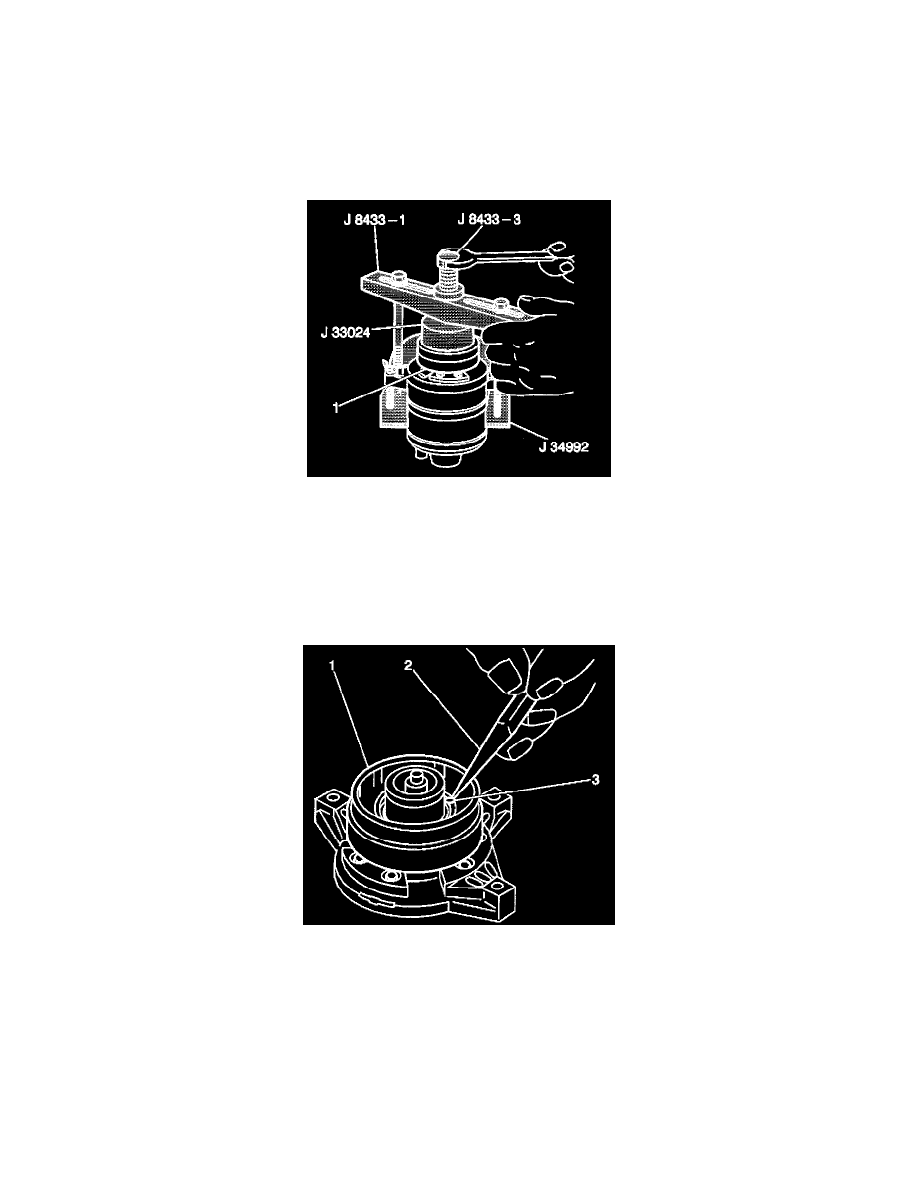
1. Place the clutch coil assembly (1) on the front head. Position the terminals at the previously marked location.
2. Place the J 33024 over the internal opening of the clutch coil housing.
3. Align the J 33024 with the compressor front head.
4. Center the J 8433-1 in the counter-sunk center hole of the J33024.
5. Install the 2 through bolts and the washers through the crossbar slots.
6. Thread the bolts into the J 34992 in order to achieve full fixture thickness.
7. Turn the center forcing screw of the J 8433-1 in order to force the clutch coil onto the front head.
Ensure that the clutch coil and the J 33024 remain aligned during installation.
8. When the coil is fully seated on the front head, use a 1/8-inch diameter drift punch (2) in order to stake the front head at 3 places, 120 degrees
apart (3), in order to ensure that the clutch coil (1) remains in position.