
C 1500 Truck 2WD V8-6.0L VIN U (2002)
Important: P/N 29533074 is printed on A trim solenoid (15).
14. Install solenoid O-ring (14) onto A trim solenoid (15).
15. Install spring (10), A trim valve (11), spring (12), if present, and trim gain valve (13).
16. Install A trim solenoid (15) so that the electrical connector faces up.
Important: P/N 29533075 is printed on B trim solenoid (9).
17. Install solenoid O-ring (8) onto B trim solenoid (9).
18. Install spring (5), B trim valve (6), and trim gain valve (7).
19. Install B trim solenoid (9) so that the electrical connector faces up.
20. Align two accumulator plugs (3) so that their spring bores face up.
21. Install two accumulator plugs (3) and two accumulator springs (2).
22. Push A and B trim solenoids (9,15) into their bores until they seat.
23. Align A/B solenoid bracket (1) with main valve body dowel pin (4).
24. Install A/B solenoid bracket (1) so that the A and B trim solenoids and the accumulator plugs and springs are retained against the valve body.
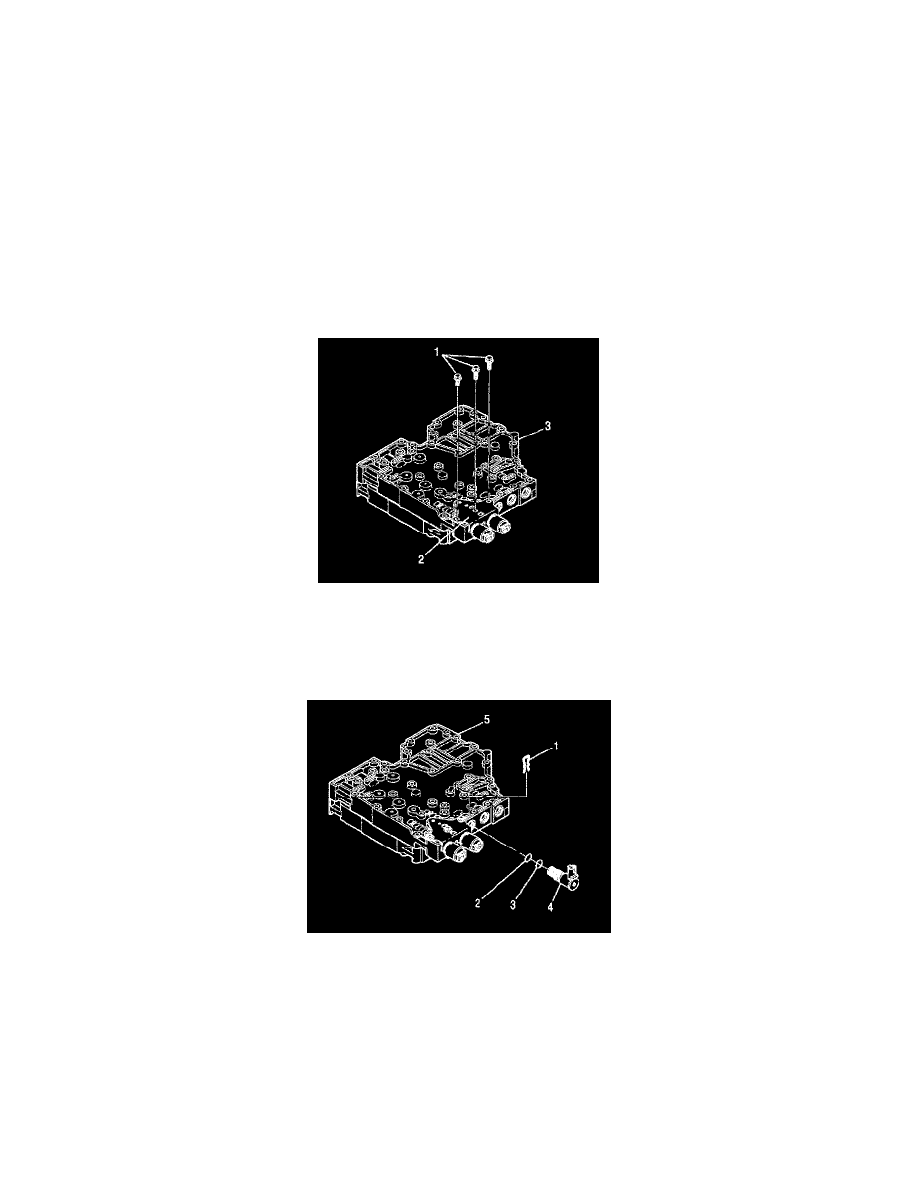
25. Install three bolts (1) through A/B solenoid bracket (2).
Notice: Refer to Fastener Notice in Service Precautions.
^
Tighten bolts to 12 Nm (106 inch lbs.).
26. Install solenoid O-ring (3) onto E ON/OFF shift solenoid (4).
Important: P/N 29536833 is printed on E ON/OFF shift solenoid (4). Solenoid O-rings are brown. O-ring (3) is slightly larger than O-ring (2).
27. Install solenoid O-ring (2) onto E ON/OFF shift solenoid (4).
28. Install E ON/OFF shift solenoid (4) so that the solenoid electrical connector faces up.
29. Install solenoid retainer (1).