
C 1500 Truck 2WD V8-6.5L DSL Turbo VIN F (1998)
18. Dry using compressed air.
INSPECTION PROCEDURE
1. Inspect all of the valves and bushings for the following conditions:
-
Porosity
-
Scoring
-
Nicks
-
Scratching
2. Inspect the springs for damaged or distorted coils
3. Inspect the valve body casting for the following conditions
-
Porosity
-
Cracks
-
Interconnected oil passages
-
Damaged machined surfaces
ASSEMBLY PROCEDURE
1. When assembling the control valve assembly, notice the position of the valve lands and bushing passages.
2. Position the pressure control solenoid so that the connectors face outward.
INSTALLATION PROCEDURE
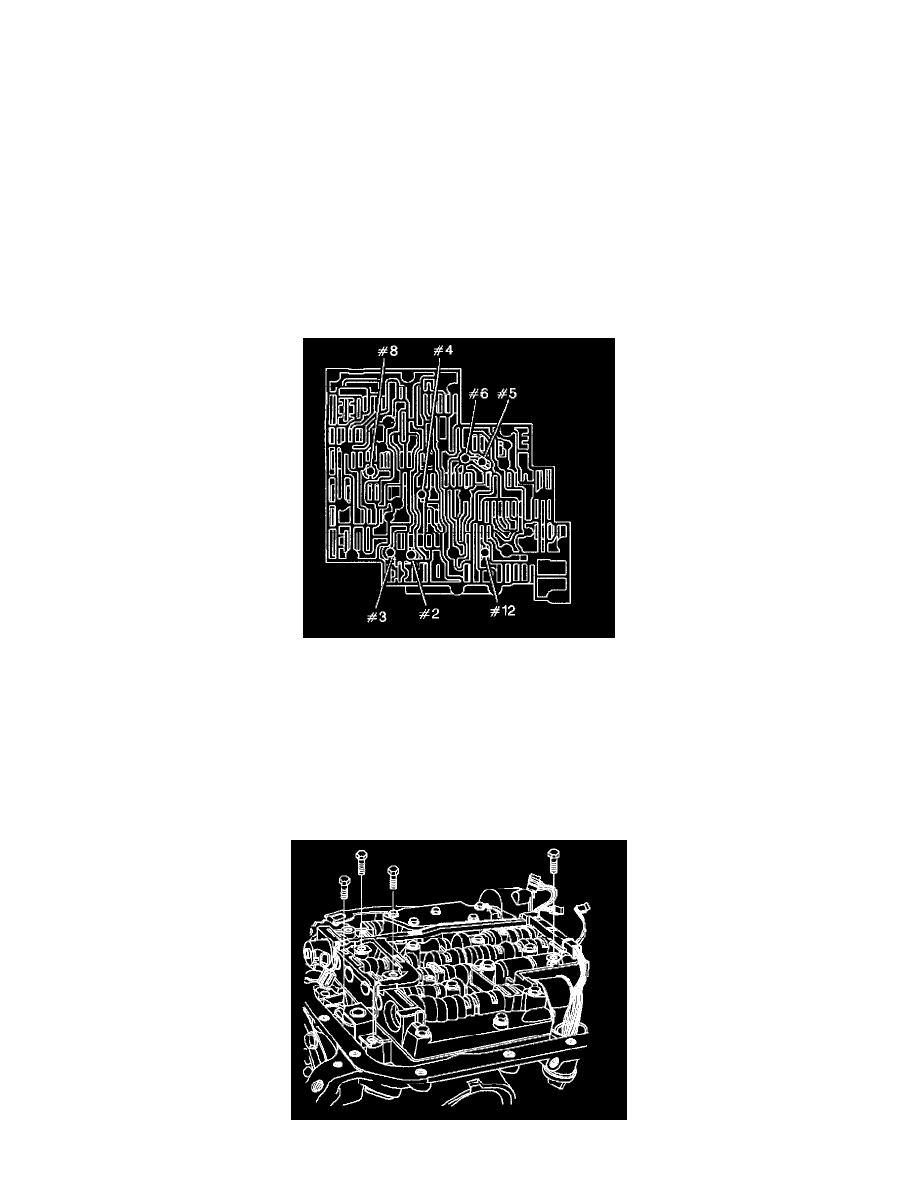
1. Install the checkballs into the valve body assembly. Retain with Transjel (R) or an equivalent.
2. Install the valve body assembly.
-
Connect the manual valve link to the inside detent lever.
-
Do not damage the screens when installing the valve body assembly.
NOTICE: Torque valve body bolts in a spiral pattern starting from the center. If the bolts are torqued at random, valve bores may be distorted
and inhibit valve operation.