
C 1500 Truck 2WD V8-6.5L DSL Turbo VIN S (1997)
4.
Install the crankshaft (See Figure 4).
5.
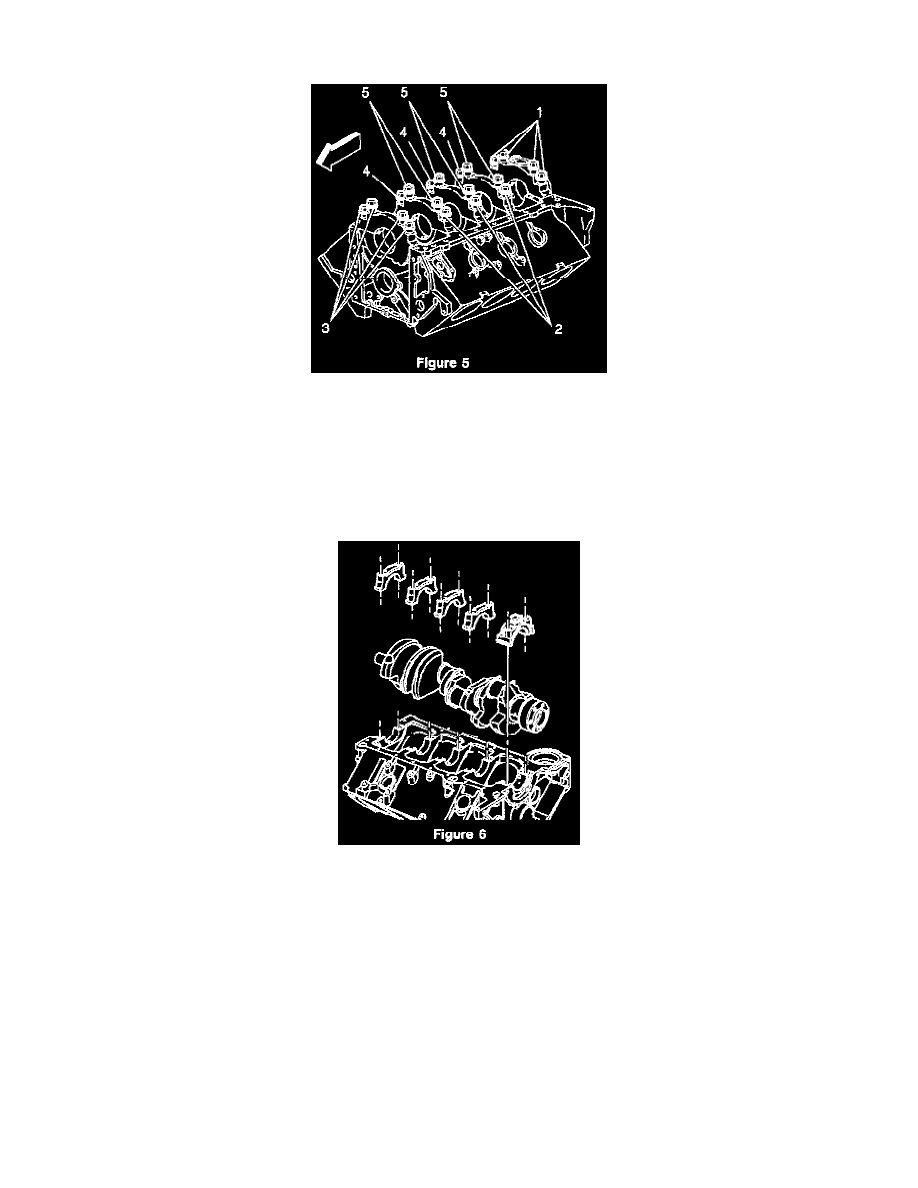
Apply a 1/8 inch bead of gasket maker, GM P/N 1052942, or equivalent, on each side of the rear crankshaft bearing cap area (See Figure 5).
Important:
Crankshaft bearing cap bolt sizes are as follows:
^
All inner crankshaft bearing cap bolts on crankshaft bearing 1, 2, 3, 4 and 5 are 12 mm (101 mm long) bolts.
^
All outer crankshaft bearing cap bolts on crankshaft bearing caps 1 and 5 are 12 mm (68 mm long) bolts.
^
All outer crankshaft bearing cap bolts on crankshaft bearing caps 2, 3 and 4 are 10 mm (68 mm long) bolts (See Figure 6).
Notice:
The crankshaft bearing caps are to be tapped into place with a brass or leather mallet before the attaching bolts are installed. Do not use the
attaching bolts to pull the crankshaft bearing caps into their seats, as this may damage the bearing cap and/or block.
6.
Install the number 1, 2, 4 and 5 crankshaft bearing caps and bearings by tapping into place with a brass or leather mallet.
7.
Apply engine oil to the crankshaft bearing cap bolt threads.
8.
Install the crankshaft bearing cap inner 12 mm bolts.
Tighten
Tighten the inner 12 mm bolts to 75 N.m (55 lb ft).
9.
Install the number 3 crankshaft bearing cap and bearing (thrust bearing) by tapping into place with a brass or leather mallet.