
C 1500 Yukon 2WD V8-4.8L VIN V (2000)
Pressure Plate: Service and Repair
^
Tools Required
-
J 5824-01 Clutch Alignment Tool
Removal Procedure
1. Remove the transmission. Refer to Transmission Replacement.
2. Remove the quick disconnect from the actuator cylinder. Refer to Master Cylinder Replacement.
3. Install J 5824-01 or use a clutch drive gear to support the clutch.
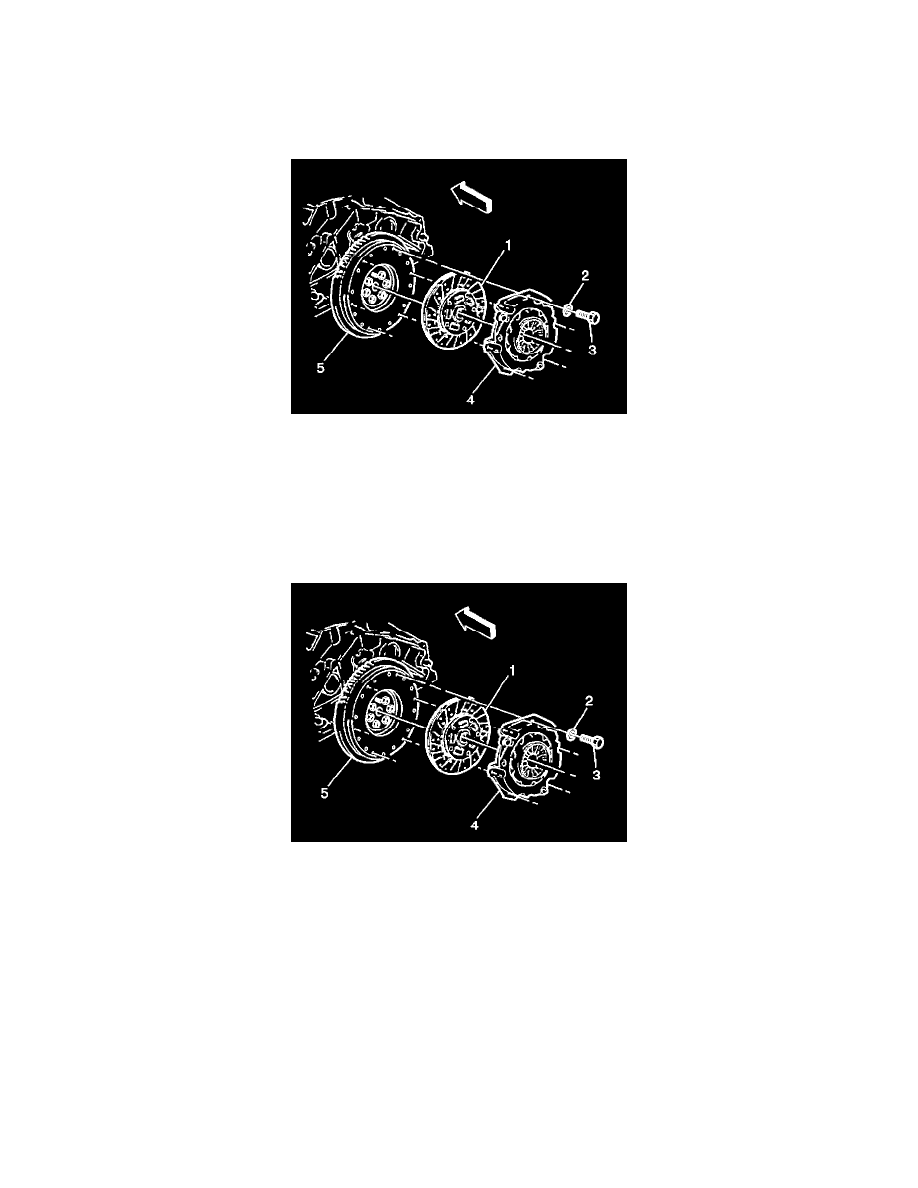
4. Mark the flywheel (5) and a clutch pressure plate lug for the installation alignment.
5. Remove the bolts (3) and the washers (2). Secure the clutch pressure plate (4) and the clutch driven plate (1) to the flywheel (5).
6. Remove the clutch alignment tool.
Installation Procedure
1. Install the bolts (3) and the washers (2) securing the clutch pressure plate (4) and the clutch driven plate (1) to the flywheel (5).
2. Install the J 5824-01 or used a clutch drive gear to support the clutch.
Notice: Refer to Fastener Notice in Service Precautions.
3. Align the marks made during removal or, if new align the lightest part of the clutch pressure plate identified by a yellow dot, to the heaviest part of
the flywheel, identified by an "X".
Tighten the clutch pressure plate to the flywheel bolts to 41 Nm (30 ft. lbs.).
4. Remove the clutch alignment tool.
5. Install the transmission. Refer to Transmission Replacement.
6. Install the quick disconnect to the concentric slave cylinder. Refer to Master Cylinder Replacement.