
C 1500 Yukon XL 2WD V8-5.3L VIN T (2001)
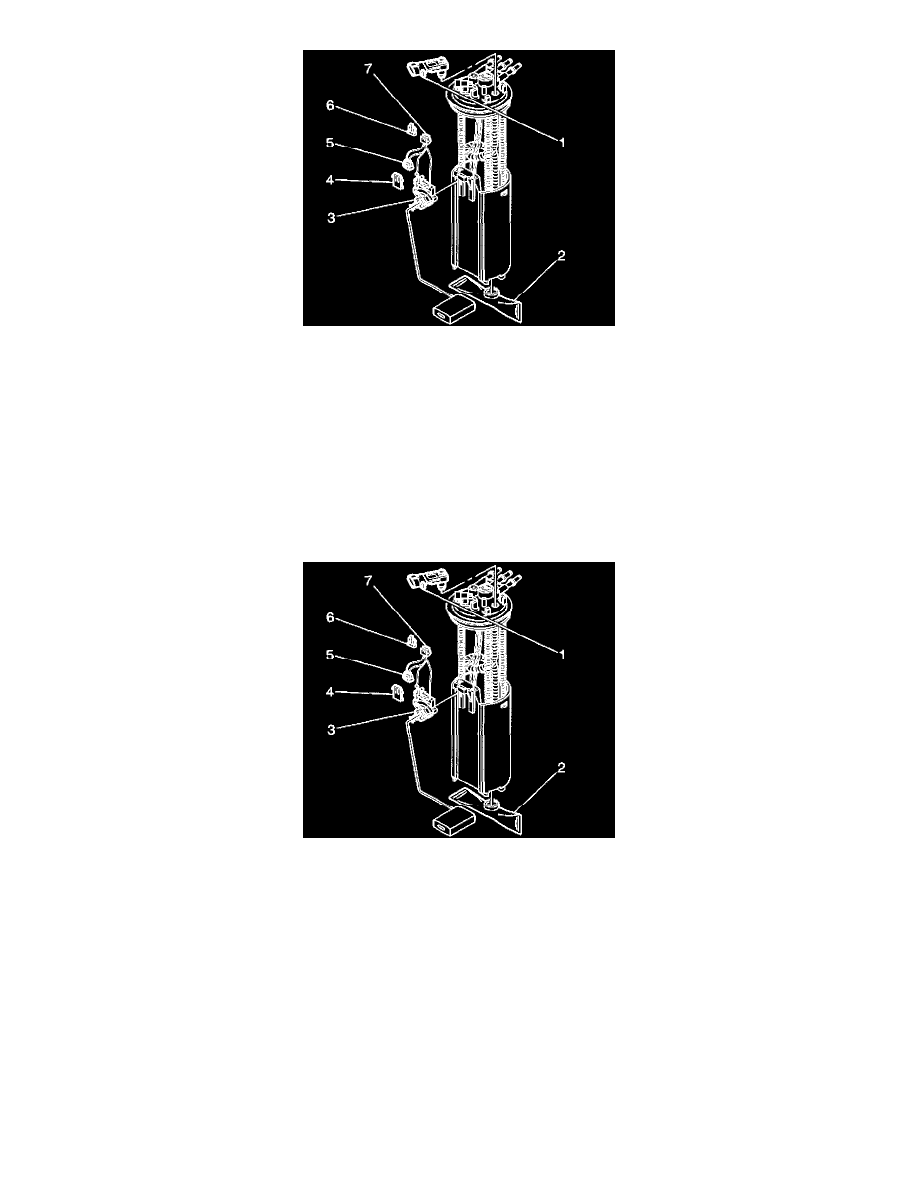
6. Note the position of the fuel strainer (2) on the fuel sender.
7. Support the fuel sender assembly with one hand and grasp the strainer (2) with the other hand.
8. Pull the strainer off the fuel sender. Discard the strainer after inspection.
9. Inspect the strainer. Replace a contaminated strainer and clean the fuel tank.
10. Disconnect the fuel pump electrical connector (5).
11. Remove the fuel level sensor electrical connector retaining clip (6).
12. Disconnect the fuel level sensor electrical connector (7) from under the fuel sender cover.
13. Remove the fuel level sensor retaining clip (4).
14. Squeeze the locking tangs and remove the fuel level sensor (3).
15. Remove the fuel pressure sensor (1).
INSTALLATION PROCEDURE
1. Install the fuel pressure sensor (1).
2. Install the fuel level sensor (3).
3. Install the fuel level sensor retaining clip (4).
4. Connect the fuel level sensor electrical connector (7).
5. Connect the fuel level sensor electrical connector retaining clip (6).
6. Connect the fuel pump electrical connector (5).
IMPORTANT: Always install a new fuel strainer when replacing the fuel tank fuel pump module.
7. Install a new fuel strainer (2) in the same position as noted during disassembly. Push the strainer on the bottom of the fuel sender until the strainer
is fully seated.