
C 2500 3/4 Ton Pickup 2WD L6-250 4.1L VIN D 2-bbl (1984)
Steering Column: Service and Repair
Steering Column - Removal and Installation
C & K MODELS
Removal
Front dash plates must be loosened whenever steering column is to be lowered from the instrument panel.
1.
Disconnect battery ground cable.
2.
Remove steering wheel.
3.
Remove nuts and washers securing flanged end of steering shaft to the flexible coupling.
4.
Disconnect transmission control linkage from column shift tube levers.
5.
Disconnect steering column harness from electrical connector.
6.
Disconnect neutral start switch or back-up light switch electrical connectors, if equipped.
7.
Remove floor pan trim cover attaching bolts, then the cover.
8.
Remove transmission indicator cable, if equipped.
9.
Remove screws securing the 2 floor pan cover halves, then the covers.
10.
Move front seats as far back as possible to provide maximum clearance.
11.
Remove 2 column bracket to instrument panel nuts, then the steering column from vehicle.
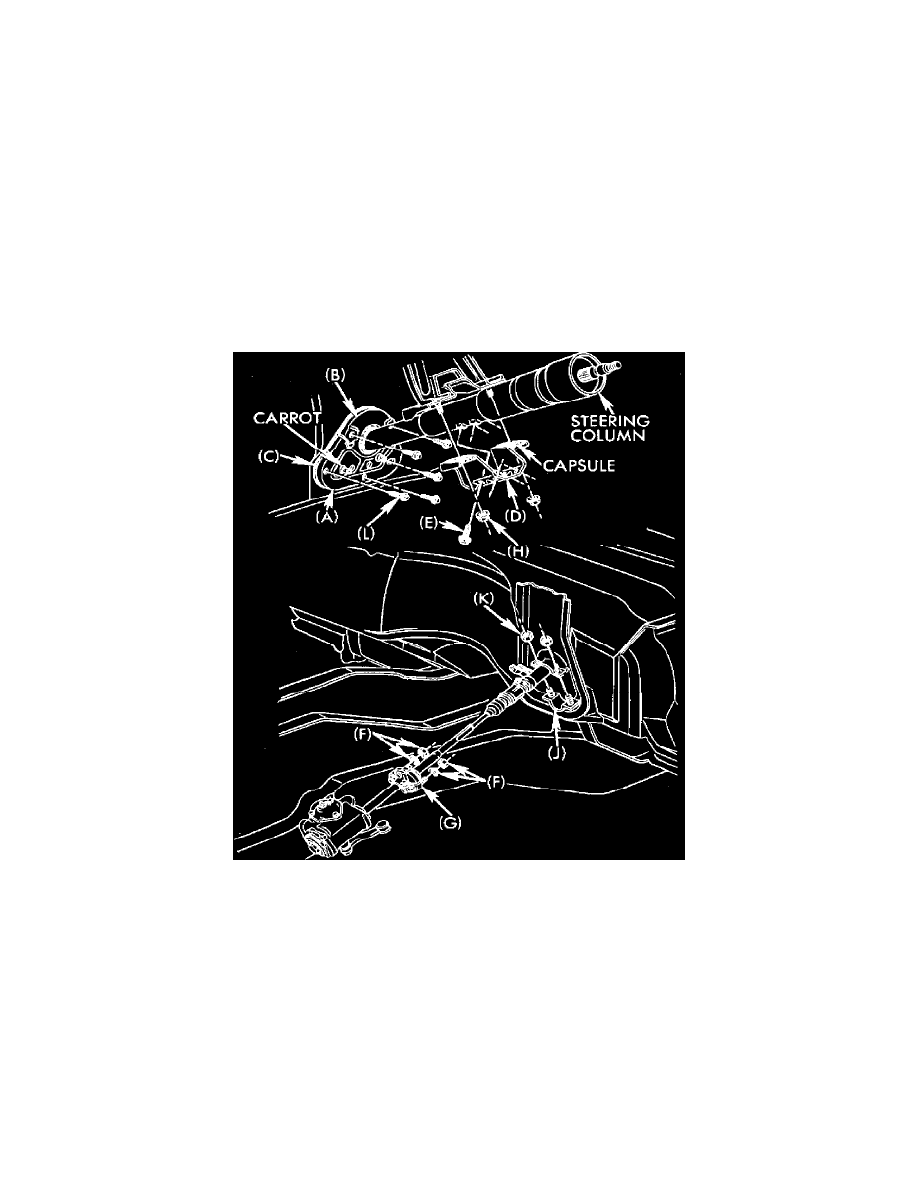
Fig. 4 Steering column installation. C & K models
Installation
1.
Assemble lower dash cover (A) and upper dash cover (B) onto seal (C) with ``carrots'' (part of seal), Fig. 4.
2.
Connect bracket (D) onto steering column jacket. Torque bolts (E) to 30 ft. lbs.
3.
Install lockwashers and nuts (F). Torque nuts (F) to 20 ft. lbs.
4.
Loosely assemble 2 capsule nuts (H) onto instrument panel bracket.
5.
Position lower clamp (J) and torque attaching nuts (K) to 55 ft. lbs.
6.
Torque the 2 (H) nuts at capsule to 25 ft. lbs.
7.
Install seal (C) and covers (A and B) onto dash. Torque bolts (L) to 45 inch lbs.