
C 2500 Suburban 2WD V8-350 5.7L (1994)
Intake Manifold (Right)
Intake Manifold (Left)
INSTALL OR CONNECT
1. Gaskets to the cylinder head. Make sure the tab and/or arrow faces the front of the engine. The side stamped "This Side Down" must face the
cylinder head.
2. RTV to the front and rear sealing surfaces on the block. Apply a 5mm (3/16-inch) bead of RTV (GM P/N 1052289 or equivalent) to the front and
rear of the block. Extend the bead 13 mm (1/2 inch) up each cylinder head to seal and retain the gaskets.
3. Intake manifold to the engine.
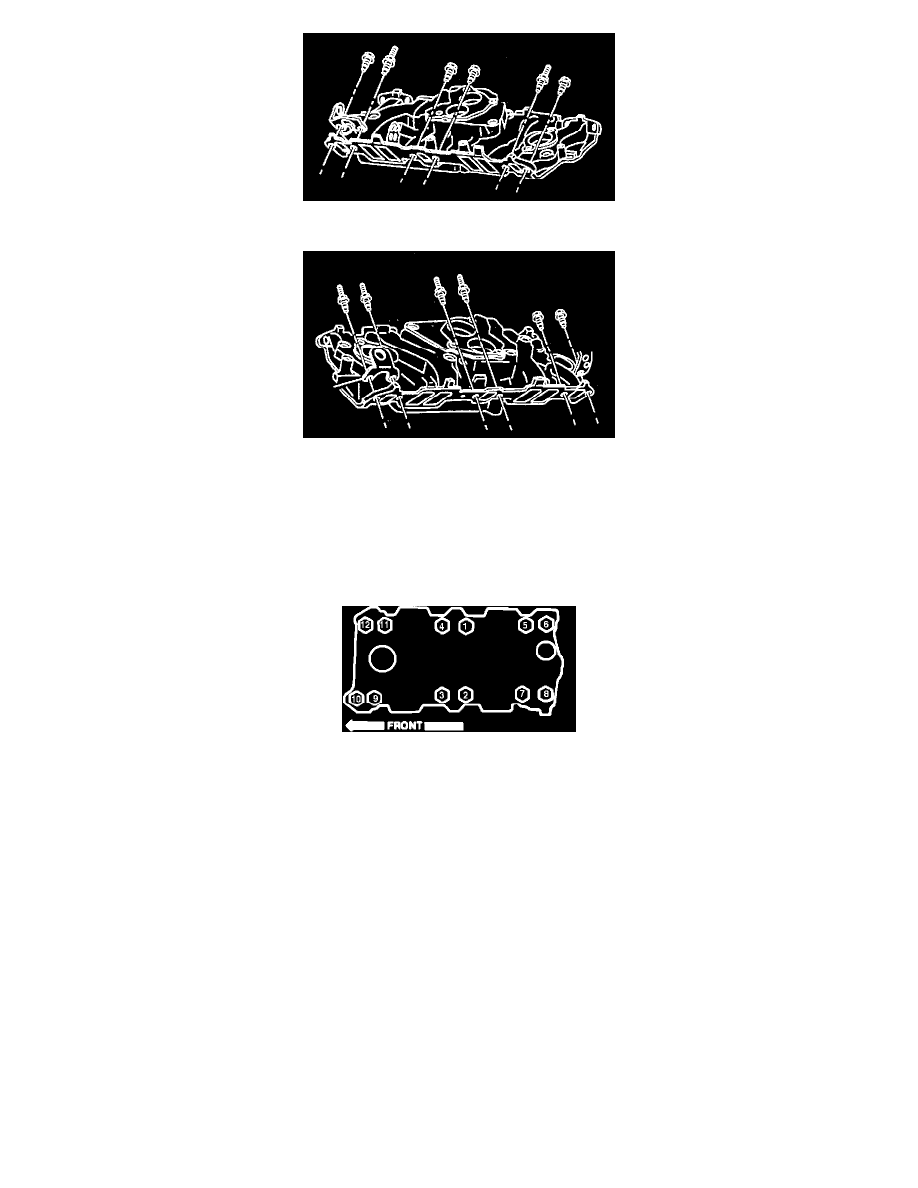
Intake Manifold Bolt Tightening Sequence
4. Intake manifold bolts. Tighten intake manifold bolts to 48 Nm (35 lbs. ft.) using the tightening sequence shown.
5. TBI. unit (if removed).
6. Bracket at rear of belt idler.
7. Fuel line bracket at rear of manifold.
8. Emission control sensors and bracket.
9. Coil wires.
10. Brake booster vacuum pipe.
11. Air conditioning compressor rear bracket.
12. Distributor.
13. Accelerator and cruise control cables (if equipped).
14. Fuel lines to the TBI unit.
15. Electrical connections.
16. Vacuum hoses.
17. Generator brace.
18. Heater pipe and upper radiator hose.
19. Air cleaner.
20. Negative battery cable.
-
Fill the cooling system with the proper quantity and grade of coolant.