
C 2500 Truck 2WD V8-393 6.5L DSL Turbo VIN S (1995)
Intake Manifold: Service and Repair
Intake Manifold Replace
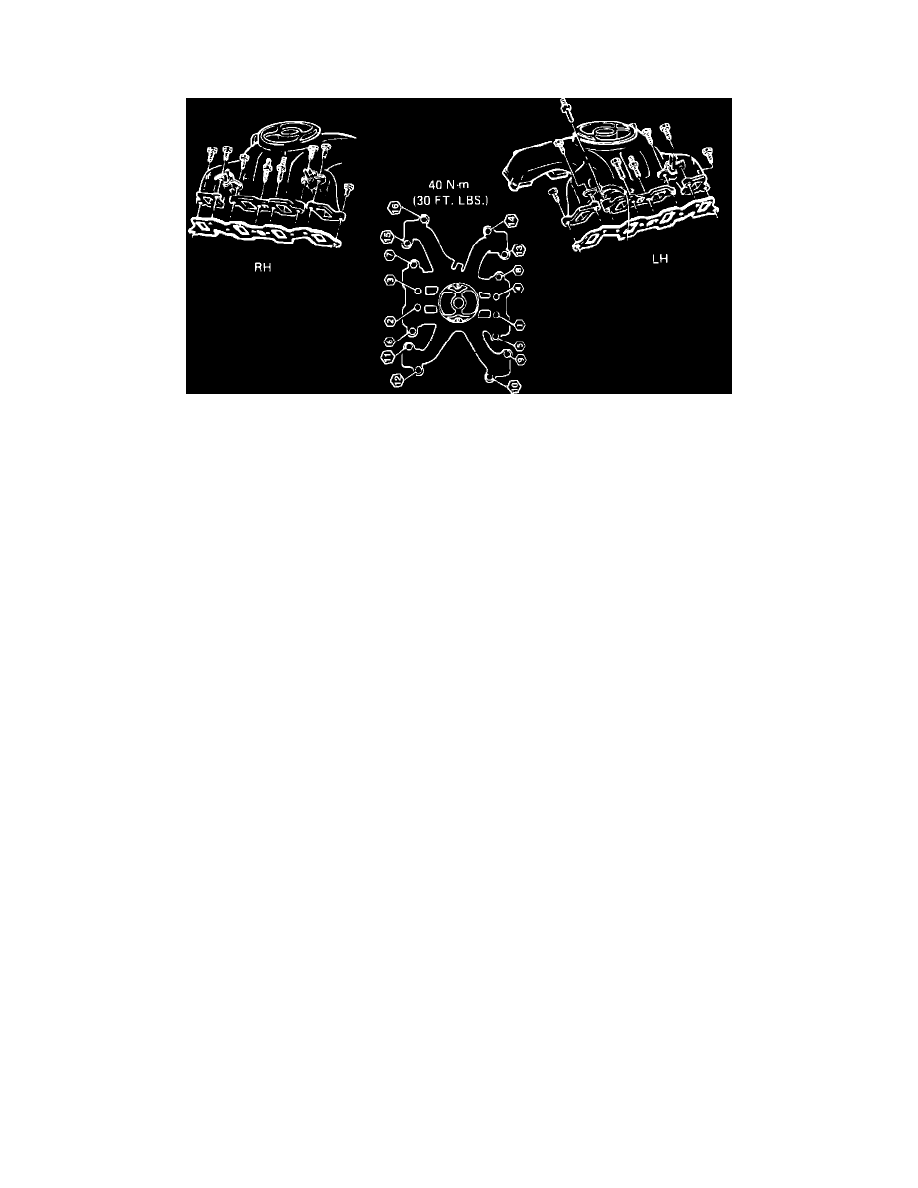
Intake manifold tightening sequence
1. Disconnect battery cables.
2. Remove air cleaner and fuel filter.
3. Remove alternator rear attaching bracket.
4. Disconnect CDR line from manifold.
5. Remove EGR and crankcase vent hoses.
6. Remove EGR/EPR solenoids and bracket from the intake manifold, if equipped.
7. Remove fuel line bracket and ground strap.
8. Remove upper radiator hose and long pencil brace to turbocharger.
9. Remove fuel line bracket from intake manifold.
10. Remove intake manifold bolts and fuel line clips.
11. Remove manifold and gasket.
12. Reverse procedure to install, noting the following:
a. Using sequence shown in Fig. 2, tighten intake manifold attaching bolts to specification.
b. Ensure correct gasket is used. L56 Models (VIN S) have an opening for the EGR valve.