
C 2500 Truck 2WD V8-8.1L VIN G (2002)
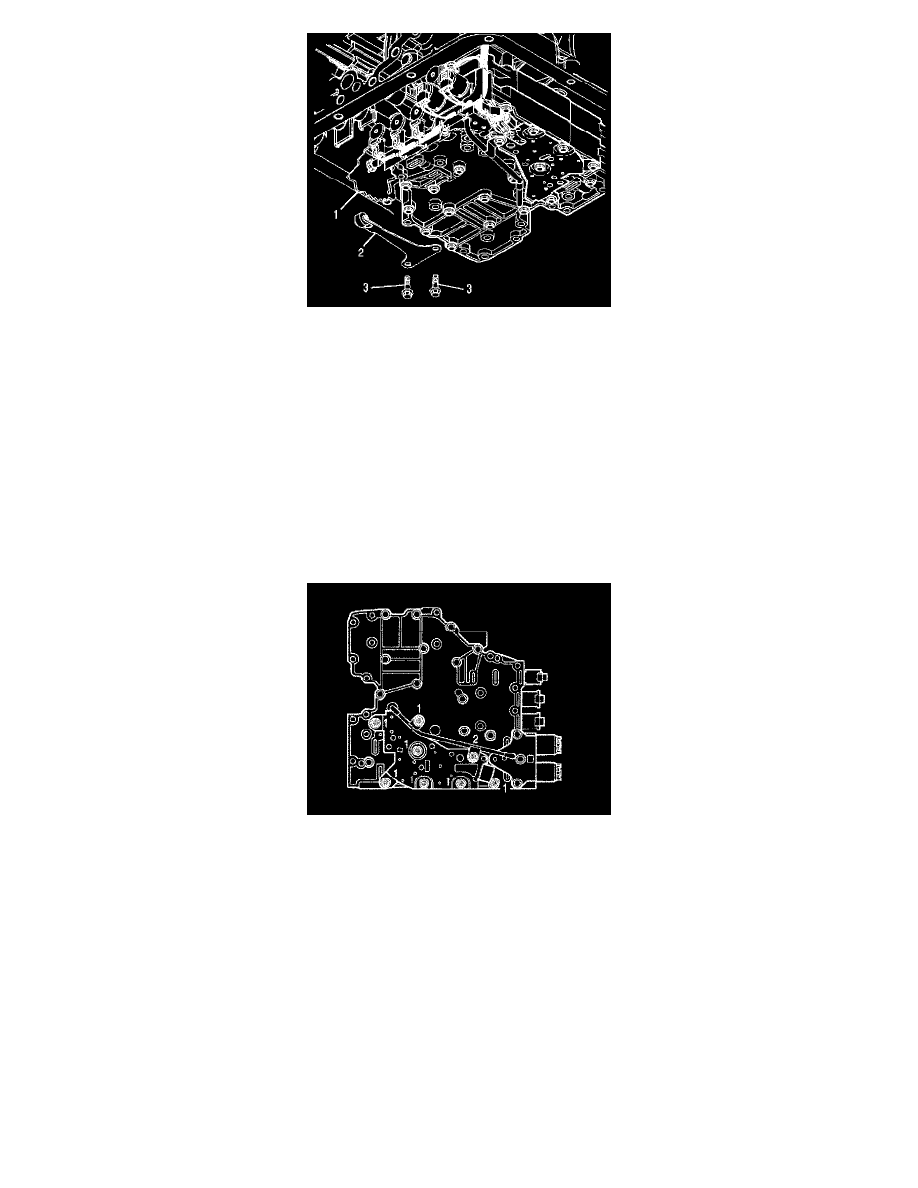
7. Install the detent spring assembly (2) onto the control valve assembly. Confirm that the roller of the detent spring assembly rests on the detent
lever (1).
8. Install two detent spring bolts (3).
^
Tighten the bolts to 12 Nm (108 inch lbs.).
9. Install the oil pan and suction filter.
10. Connect the external wiring harness to the main transmission connector.
Control Valve Body Disassemble
Control Valve Body Disassemble (Disassembly of Control Valve Assembly)
Disassembly of Control Valve Assembly
^
Tools Required
-
J 33163 Valve Tray Set
Important:
^
Transmission damage may occur when control valve assembly springs and other parts are mistakenly interchanged. Interchanging parts can be
avoided by observing the following precautions:
-
Tag each part as it is removed.
-
Use J33163 Valve Tray Set to organize parts and to simplify correct valve body reassembly.
^
Protect control valve assembly parts from damage by observing the following precautions:
-
Handle all valves carefully.
-
Protect control valve assembly parts during removal, cleaning, inspection, and reassembly.
-
Keep the parts in a clean container until the parts are installed.
^
When a valve is installed dry, the weight of the valve is sufficient to move the valve through the valve bore. If a valve does not move freely, the
transmission may be damaged.
1. Position the control valve body assembly on the work table so that the main valve body assembly is facing up.
2. Remove the six bolts (1) and one bolt (2), holding the reverse signal tube and pressure switch assembly to the main valve body.