
C 3500 HD Truck 2WD V8-6.5L DSL Turbo VIN F (2001)
Valve Body: Service and Repair
Control Valve Body Replacement
^
Tools Required
-
J25025 Alignment Pin
-
J36850 Transjel (R)
Removal Procedure
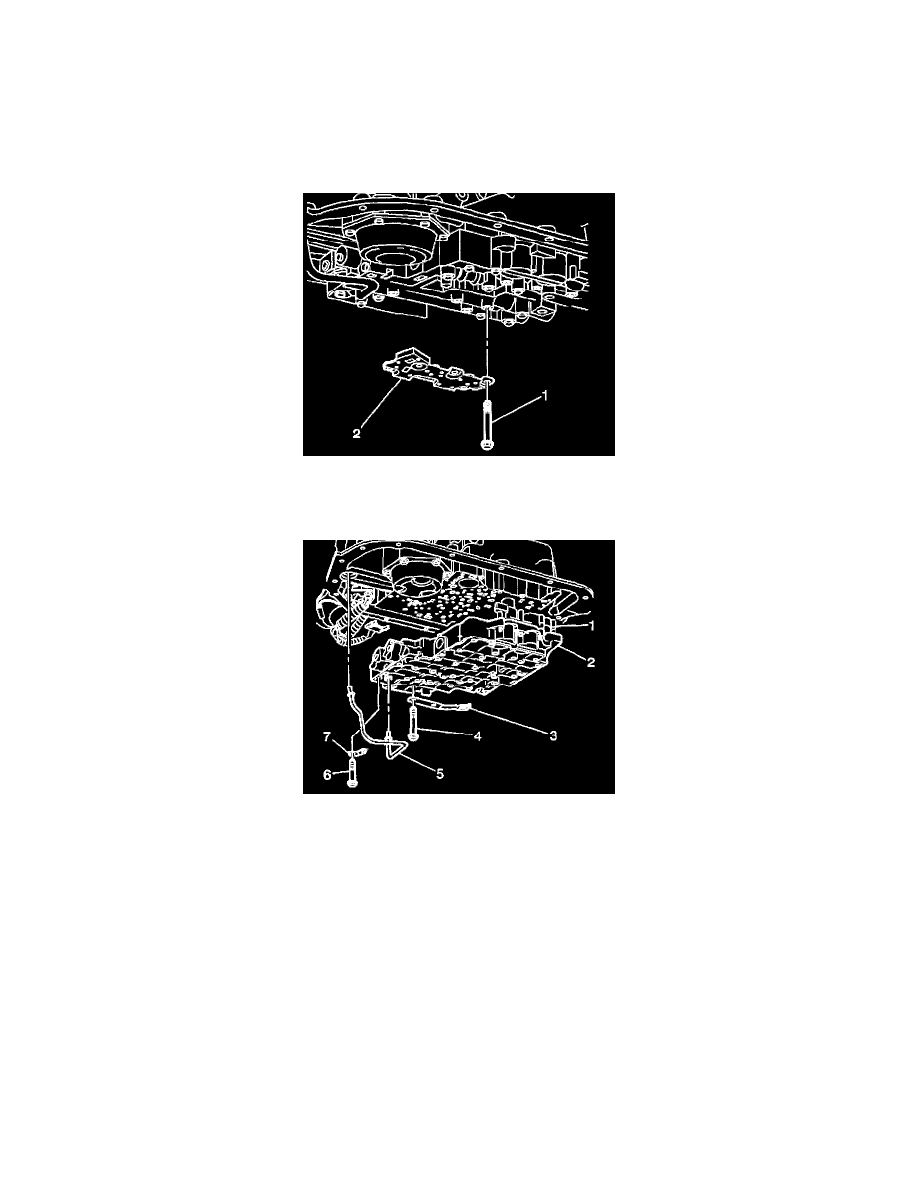
1. Remove the Transmission Fluid Pressure (TFP) manual valve position switch bolts and the TFP valve position switch.
Important: The five O-rings should remain attached to the TFP valve position switch (2).
2. Remove the control valve assembly bolts (4).
3. Remove the fluid level indicator stop bracket.
4. Remove the lube oil pipe retainer (7) and the clamp.
5. Remove the lube oil pipe (5).
6. Remove the manual shaft detent spring assembly (3).
7. Remove the control valve assembly (2) which includes the following:
^
The accumulator housing assembly (1)
^
The control valve assembly to the spacer plate gasket
^
The spacer plate
^
The accumulator gasket