
C 3500 Truck 2WD V8-454 7.4L VIN J SFI (1999)
Important: Failure to follow the procedure listed, could cause a driveability problem.
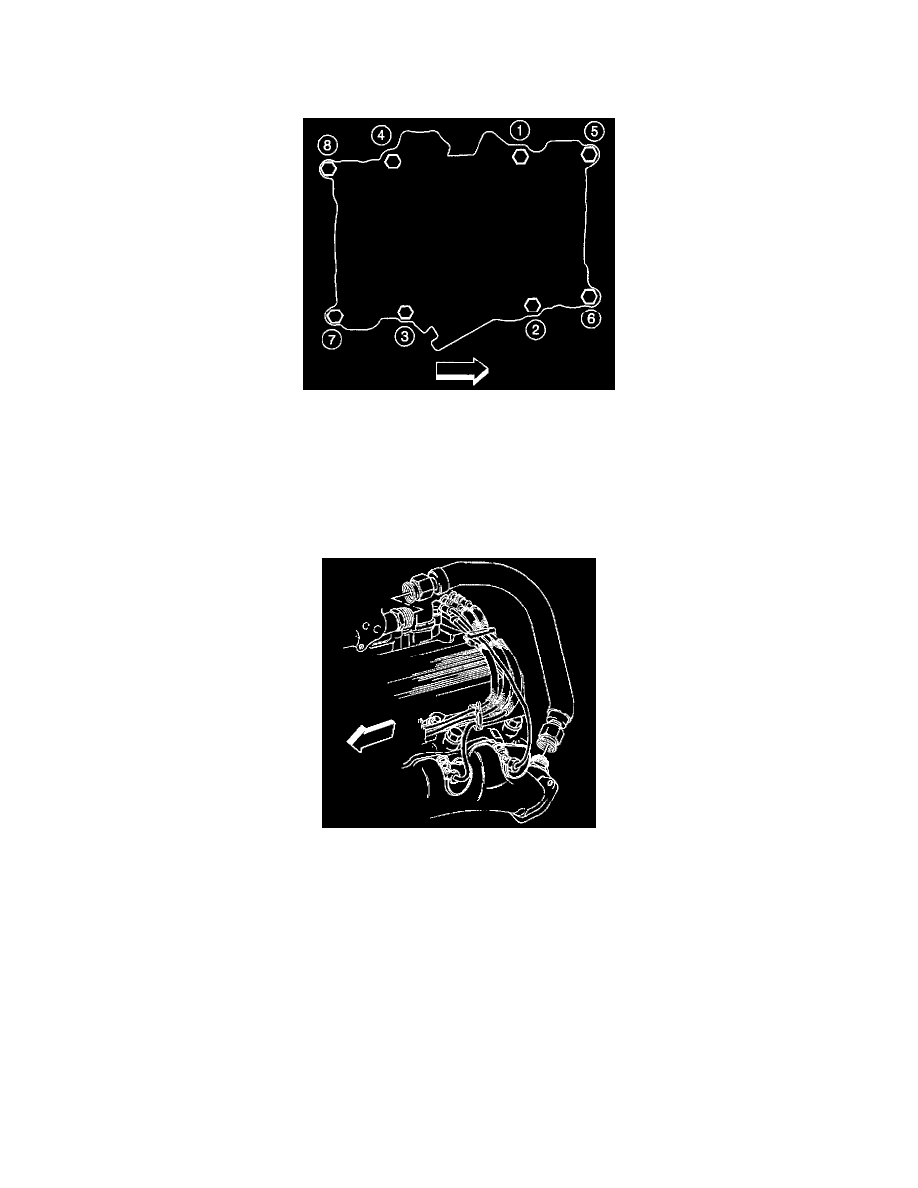
3. Coat a minimum of eight threads of the bolts with thread locking sealant.
Notice: Refer to Fastener Notice in Service Precautions.
4. Install the upper intake manifold bolts.
4.1.
Tighten the bolts in sequence to 8 Nm (71 in. lbs.).
4.2.
Re tighten the bolts in sequence to 18 Nm (13 ft. lbs.).
5. Install the number 8 spark plug wire. Refer to Spark Plug Wire Harness Replacement (7.4 L).
6. Install the ignition coil to the upper intake manifold. Refer to Ignition Coil and ICM Replacement.
7. Install the EGR valve if necessary. Refer to Secondary Air Injection Check Valve/Pipe Replacement.
8. Install the EGR pipe to the upper intake manifold.
^
Tighten EGR valve fittings to 60 Nm (46 ft. lbs.).
9. Install Left and Right Side Secondary AIR Injection Pipes. If so equipped. Refer to Secondary Air Injection Check Valve/Pipe Replacement.
10. Install the EVAP canister solenoid valve to the intake manifold. Refer to EVAP Canister Purge Solenoid Valve Replacement
11. Install the throttle body to the upper intake manifold. Refer to Throttle Body Assembly Replacement.