
C 3500 Truck 2WD V8-454 7.4L VIN J SFI (1999)
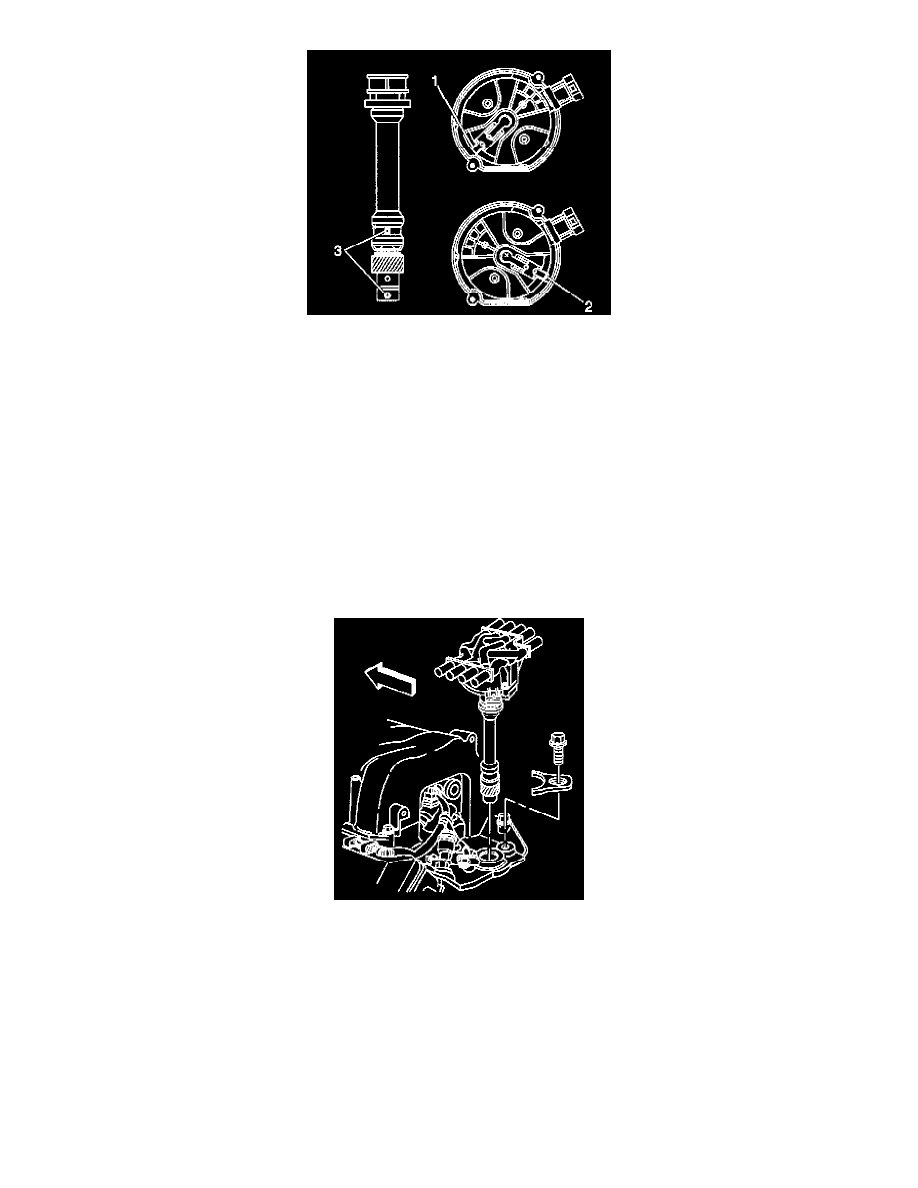
2. Align white paint mark on the bottom stem of the distributor, and the pre-drilled indent hole in the bottom of the gear (3).
NOTE: The OBD II ignition system distributor driven gear and rotor may be installed in multiple positions. In order to avoid mistakes, mark the
distributor on the following components in order to ensure the same mounting position upon reassembly:
^
The distributor driven gear
^
The distributor shaft
^
The rotor holes
Installing the driven gear 180 degrees out of alignment, or locating the rotor in the wrong holes, will cause a no-start condition. Premature engine
wear or damage may result.
3. With the gear in this position, the rotor segment should be positioned as shown for a V6 engine (1) or V8 engine (2).
^
The alignment will not be exact.
^
If the driven gear is installed incorrectly, the dimple will be approximately 180 degrees opposite of the rotor segment when it is installed in the
distributor.
4. Using a long screw driver, align the oil pump drive shaft to the drive tab of the distributor.
5. Guide the distributor into the engine.
Ensure that the spark plug towers are perpendicular to the centerline of the engine.