
C 3500 Truck 2WD V8-454 7.4L VIN J SFI (1999)
4. Place the front hub and rotor assembly on a flat surface with the tone wheel facing up. Take care not to damage the wheel studs.
5. Mark the position of the rotor relative to the hub so the rotor can be installed in the same position later.
6. Remove bolts (22) attaching the rotor (21) to the hub (14).
7. Remove the rotor from the hub.
8. Install the bearing seal (12) and inner bearing (20).
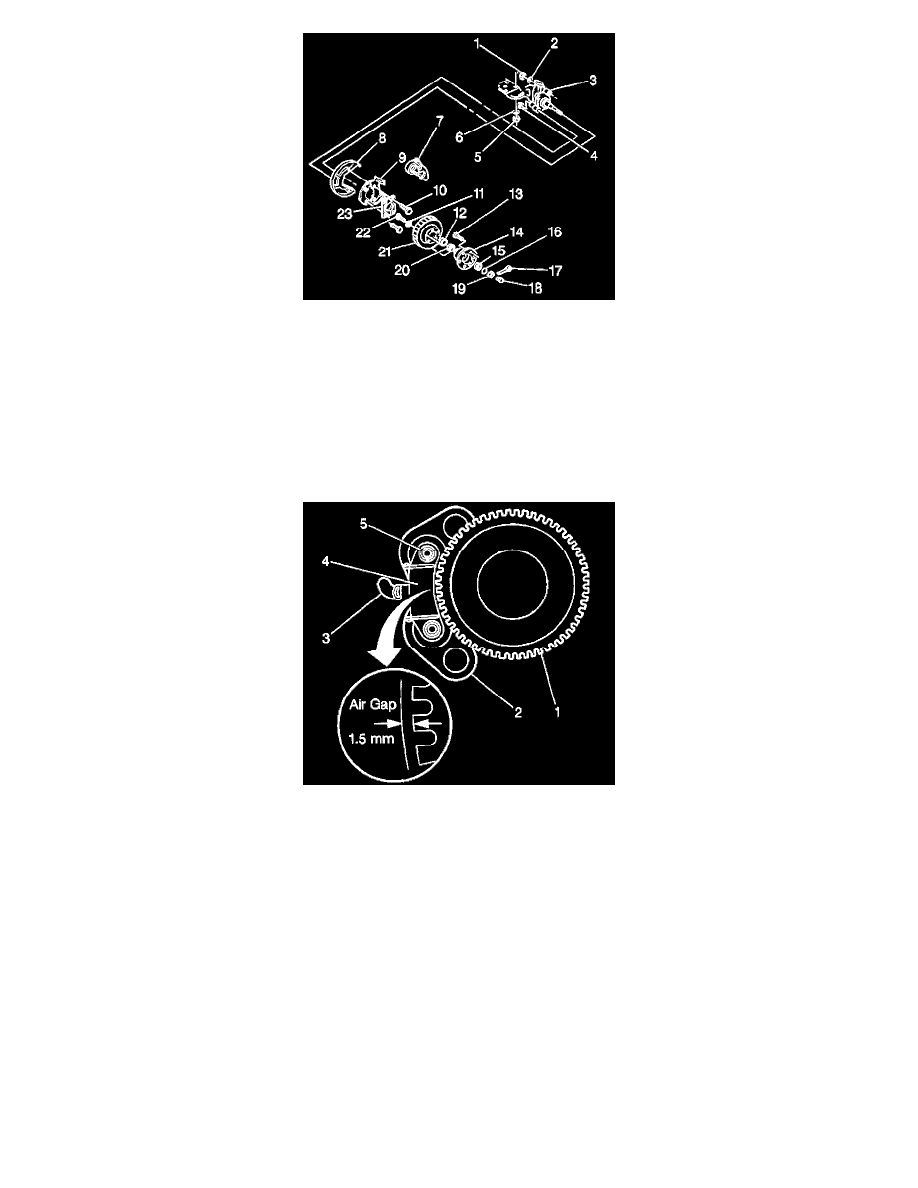
9. Install hub and tone wheel assembly (14) on the knuckle spindle (3), taking care not to damage the wheel speed sensor with the tone ring.
10. Install the hub outer bearing (15), washer (16) and wheel bearing nut (19).
^
Wheel bearing nut (19) to 16 Nm (12 ft. lbs.) while rotating the hub (14) in either direction to ensure proper centering.
11. Do not back off the wheel bearing nut.
NOTICE: DO NOT use a rigid feeler gauge or a wire spark plug gap gauge to set the wheel speed sensor to tone wheel air gap as these tools will
not result in the correct air gap.
12. Insert flexible shim stock or equivalent between the tone wheel (1) and the wheel speed sensor (4).
13. The thickness of the shim stock must be 1.5 mm (0.060 inch). The length and width of the shim stock must be sufficient enough to cover the face
of the wheel speed sensor. If shim stock is not available, regular notebook or writing paper can be used provided the specified thickness is inserted
between the tone wheel and the wheel speed sensor.
14. Press the wheel speed sensor firmly against the shim stock and tone wheel.