
C 3500 Truck 2WD V8-6.6L DSL Turbo VIN 1 (2002)
10. Clean the lower valve rocker arm cover. Remove any sludge or other deposits.
11. Clean the lower valve rocker arm cover sealing surfaces.
12. Inspect the lower valve rocker arm cover for cracks or any damage.
13. Inspect the lower valve rocker arm cover sealing surfaces for damage.
14. Replace the lower valve rocker arm cover if any damage is found.
Installation Procedure
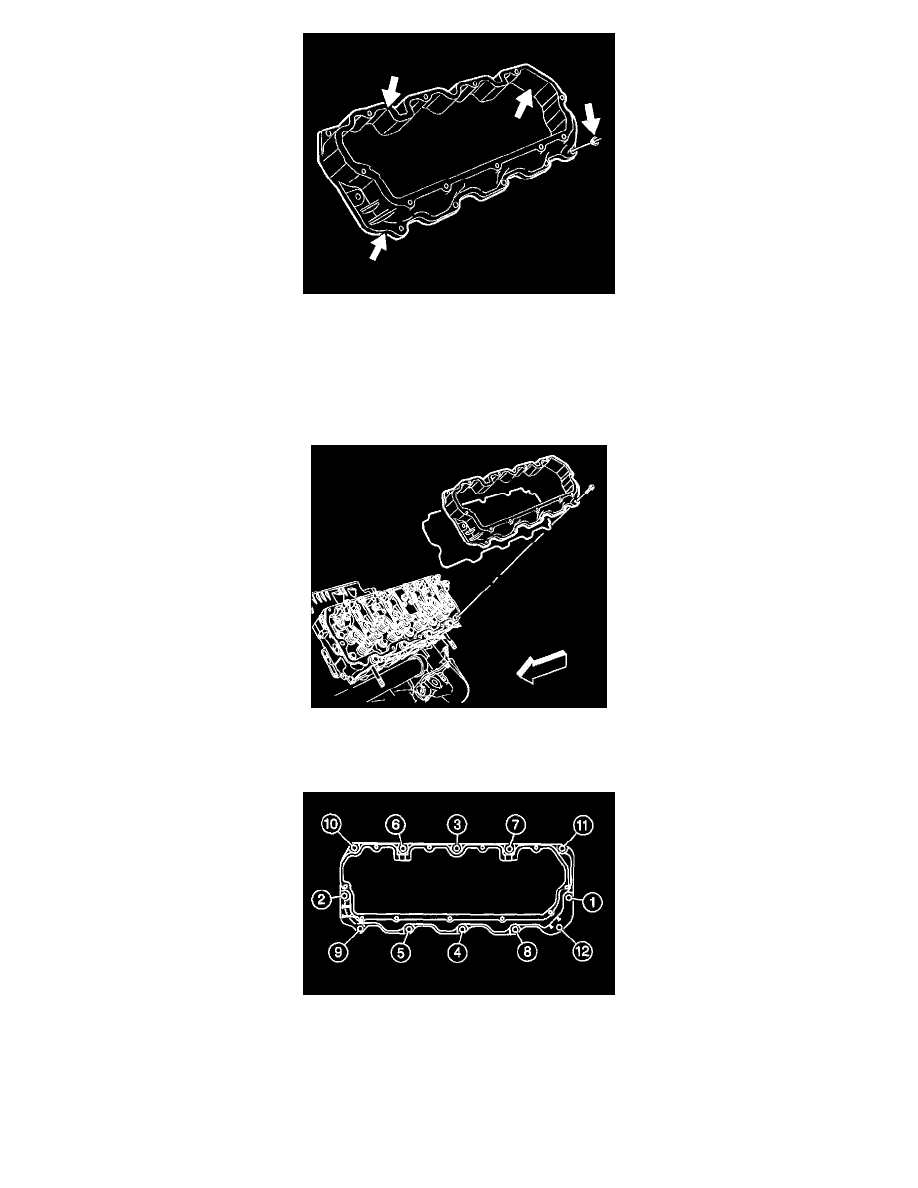
1. Install the lower valve rocker arm cover gasket in the lower valve rocker arm cover.
2. Install the bolt grommets in the lower valve rocker arm cover.
3. Install the lower valve rocker arm cover.
Notice: Refer to Fastener Notice in Service Precautions.
4. Install the 12 bolts for the lower valve rocker arm cover.
The lower valve rocker arm cover is tightened 2 times in the numerical order.
Bolts number 1 and 2 are used to position the cover.
4.1.
Tighten the lower valve rocker arm cover bolts to 10 Nm (89 inch lbs.) in the proper sequence.
4.2.
Retighten the lower valve rocker arm cover bolts to 10 Nm (89 inch lbs.) in the proper sequence.