
C 3500 Truck 2WD V8-6.6L DSL Turbo VIN 1 (2002)
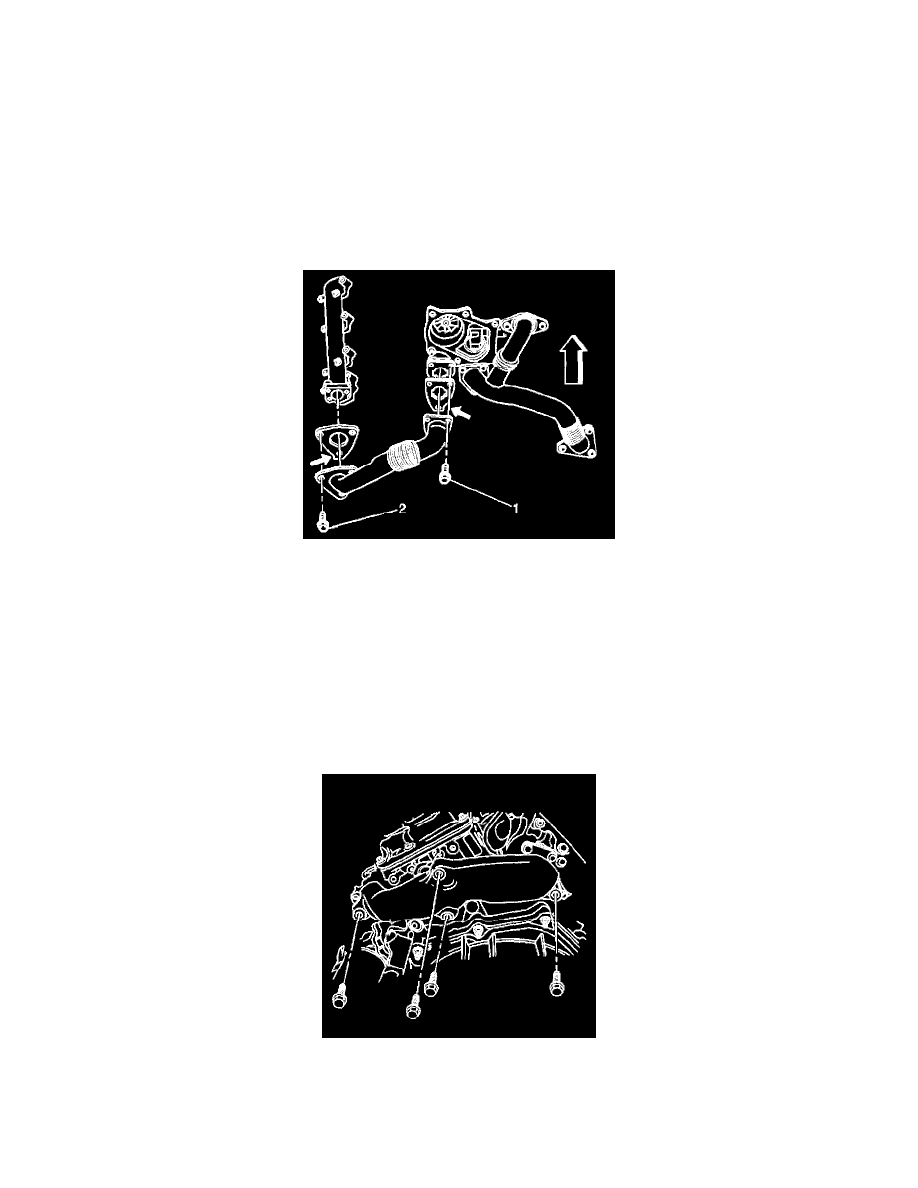
5. Remove the exhaust manifold to exhaust pipe bolts (2).
6. Remove and discard the gasket.
7. Lower the vehicle.
8. Remove the exhaust pipe heat shield. The shield will remove from the top of the engine.
9. Remove the exhaust pipe bolts (1) from the turbocharger.
10. Remove the exhaust pipe with the gasket.
11. Clean the exhaust pipe.
12. Clean the exhaust pipe mating surfaces.
13. Inspect the exhaust pipe for dents and cracks.
14. Replace the exhaust pipe if any damage is found.
Installation Procedure
1. Install the exhaust pipe with a NEW gasket to the turbocharger. Align the tab on the gasket at the turbocharger to face inward. To aid in
installation temporarily install an exhaust pipe to exhaust manifold bolt.
Notice: Refer to Fastener Notice in Service Precautions.
2. Install the exhaust pipe to turbocharger bolts (1).
-
Tighten the exhaust pipe to turbocharger bolts to 53 Nm (39 ft. lbs.).
3. Install the exhaust pipe heat shield but do not install the bolts.
4. Raise the vehicle.
5. Install the exhaust pipe with a NEW gasket to the exhaust manifold. Align the tabs on the gasket to face outward.
6. Install the exhaust pipe to exhaust manifold bolts (2).
-
Tighten the exhaust pipe to exhaust manifold bolts to 53 Nm (39 ft. lbs.).
7. Install the exhaust pipe heat shield bolts.
-
Tighten the exhaust pipe heat shield bolts to 8 Nm (71 inch lbs.).