
C 3500 Truck 2WD V8-6.6L DSL Turbo VIN 1 (2002)
3. Reinstall the solenoid-retaining bracket (5). Install three bolts (4).
^
Tighten the bolts to 12 Nm (108 inch lbs.).
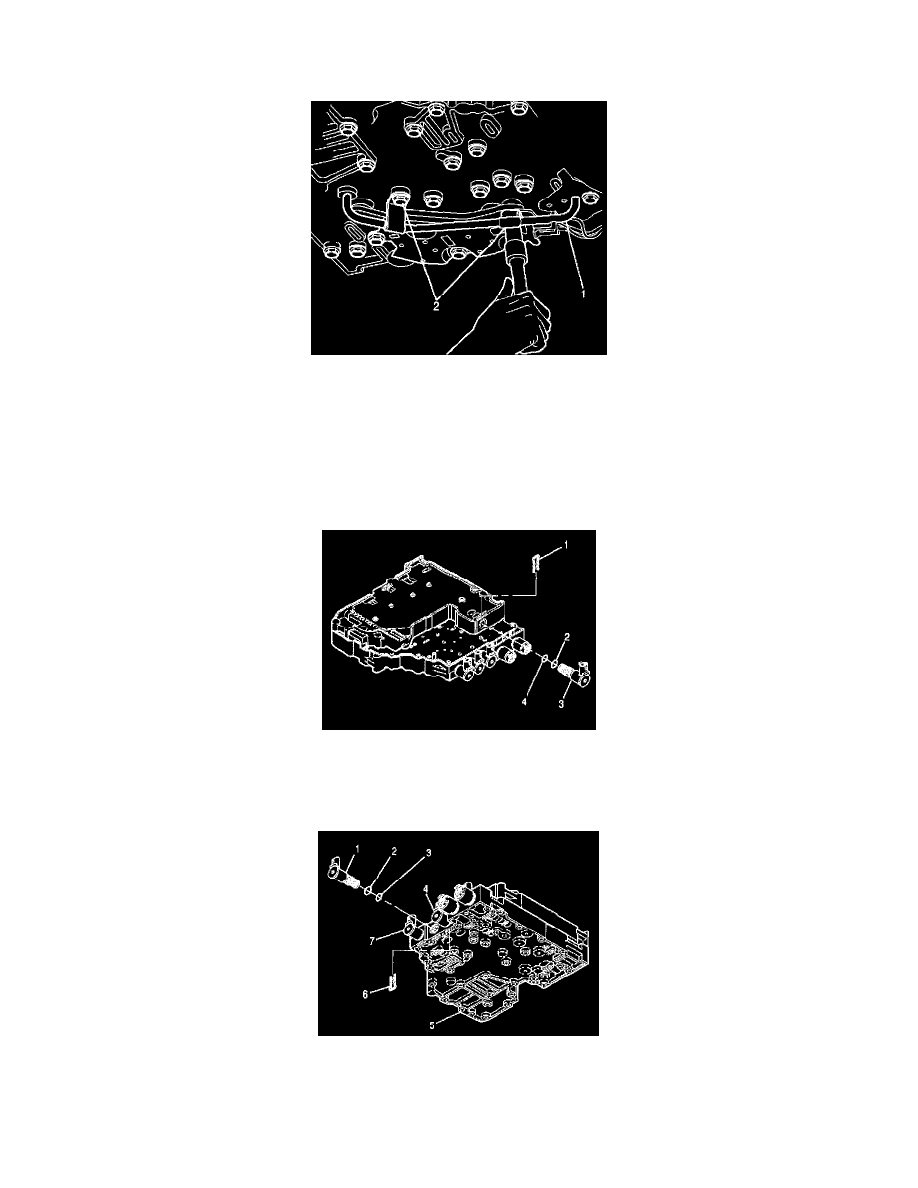
4. Install the reverse signal tube. Install the two bolts (2) that fasten reverse signal tube (1) to the control valve assembly.
^
Tighten the bolts to 12 Nm (108 inch lbs.).
5. Reconnect the internal wiring harness to the solenoid.
6. Install the oil pan and suction filter.
Control Valve Solenoid Replacement (Solenoid C, D, E, F)
Control Valve Solenoid Replacement (Solenoid C, D, E, F)
Removal Procedure
1. Remove the oil pan and suction filter.
2. Disconnect the internal wiring harness from the solenoid being changed.
3. Remove the solenoid retainer (1) for the C solenoid (3). Note the position of the solenoid connector and pull the solenoid (3) out of the bore in the
control valve assembly. The wrings (2) and (4) provide the resistance felt during removal.
4. Remove the solenoid retainers (6) for the D solenoid (1), E solenoid (4), or F solenoid (7), whichever is being replaced.
5. Note the position of the solenoid connector and pull the solenoid out of the bore in the control valve assembly. The O-rings (2) and (3) provide the
resistance felt during removal.
Installation Procedure