
C 3500 Truck 2WD V8-6.6L DSL Turbo VIN 1 (2002)
Important: Do not damage the solenoid(s) when turning over the control valve assembly.
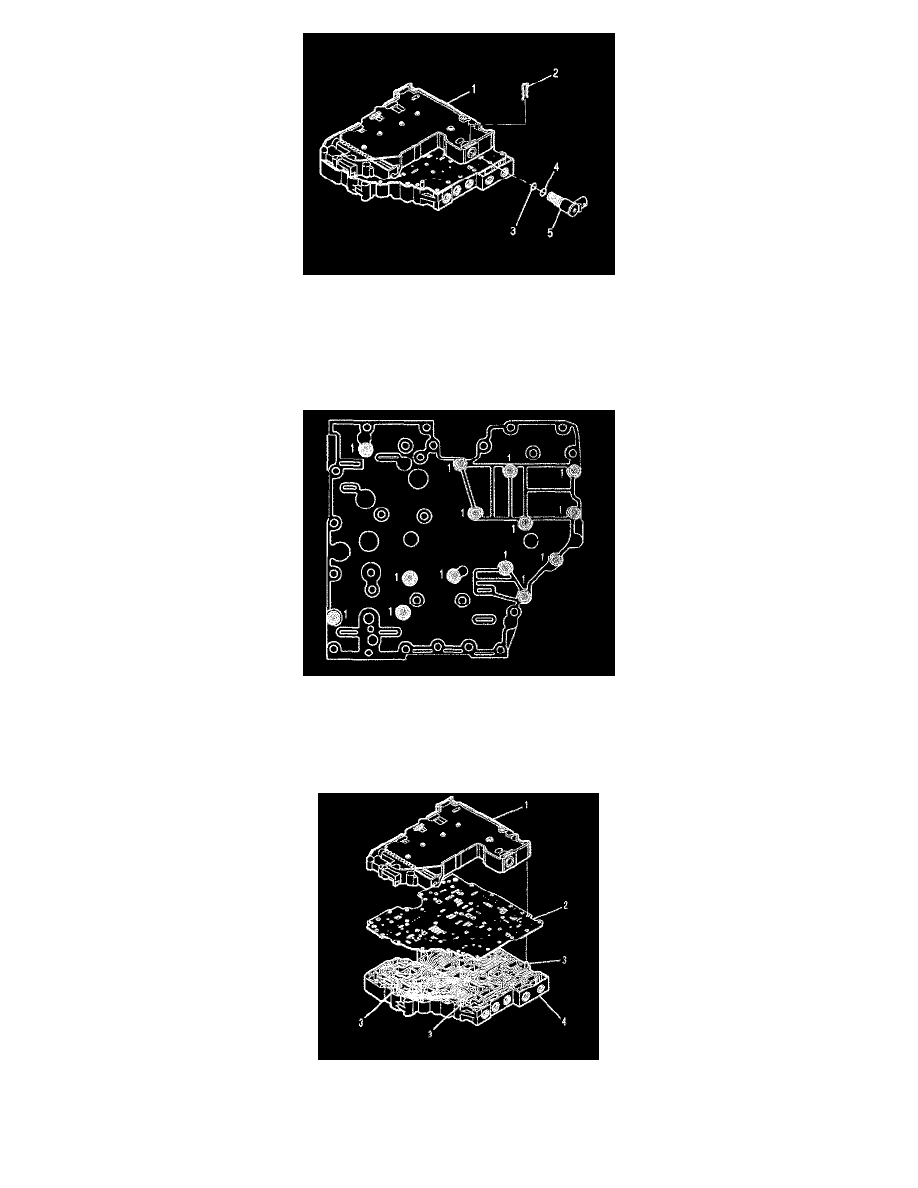
19. Position the control valve assembly on the work table so that shift valve body (1) is facing up.
20. Remove C ON/OFF shift solenoid retainer (2).
21. Remove C ON/OFF shift solenoid (5).
22. Remove O-rings (3,4) from C ON/OFF shift solenoid (5).
23. Position the control valve assembly on the work table so that the main valve body is facing up.
24. Remove fourteen bolts (1) holding the shift valve body to the main valve body.
25. Position the control valve assembly on the work table so that the assembly is on edge (sideways).
26. Reinstall four bolts (1) so that the bolts are partially threaded into the shift valve body and protrude from the main valve body.
27. Gently tap on the bolts until the assembly separates.
28. Position the control valve assembly on the work table so that shift valve body (1) is facing up.
29. Remove shift valve body assembly (1) and separator plate (2).
Disassembly of Shift Valve Body