
C 3500 Truck 2WD V8-8.1L VIN G (2001)
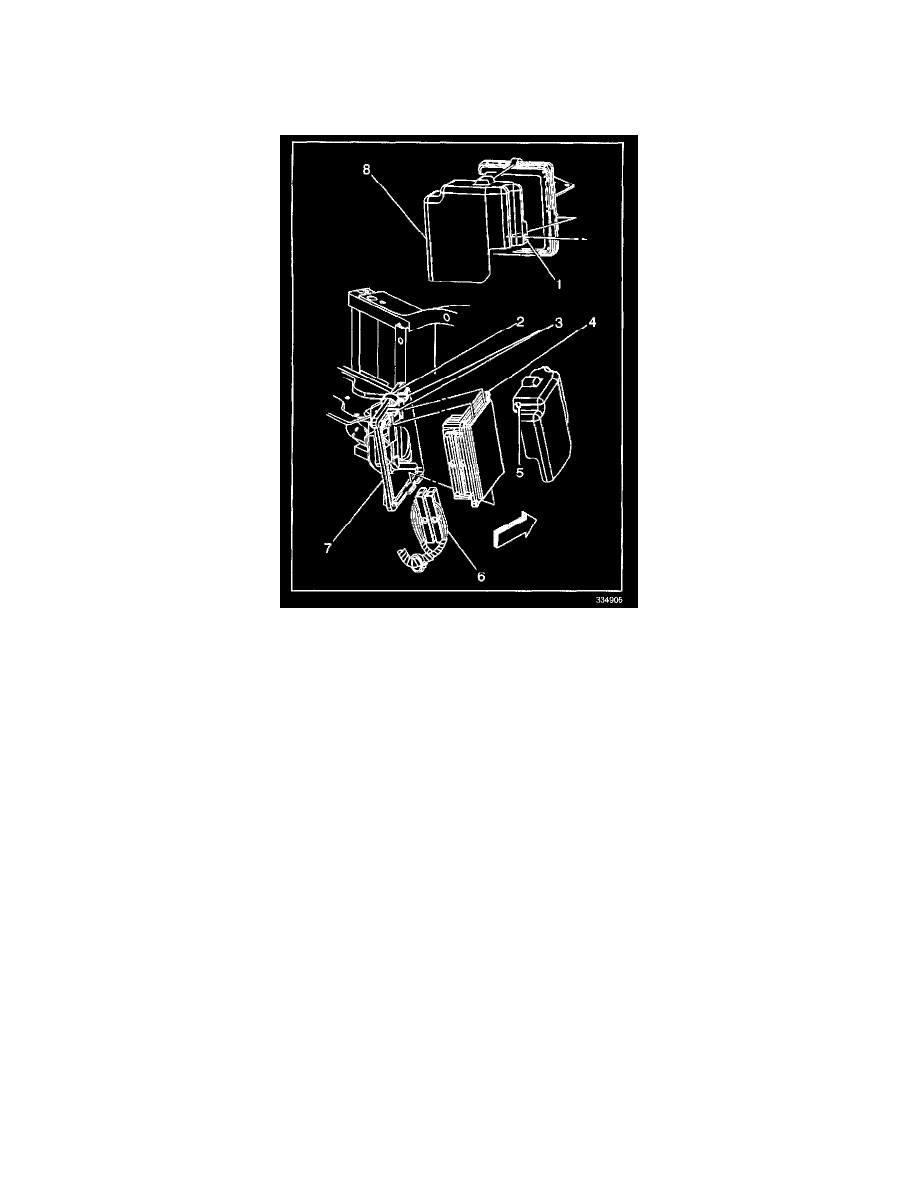
5. Release the spring latch (2) from the PCM.
6. Release the PCM mounting tabs (3) from the PCM.
7. Remove the PCM (4) from the engine compartment.
Installation Procedure
1. Install the PCM (4) to the PCM mounting bracket (7) ensuring that the mounting tabs (3) are engaged.
2. Secure the spring latch (2) to the PCM.
NOTE: Refer to Fastener Notice in Service Precautions.
3. Connect the PCM connectors (6) to the PCM (4).
Tighten
Tighten the PCM connector end bolts to 8 N.m (70 lb in).
4. Install the PCM cover (8) to the PCM mounting bracket (7), ensuring the mounting tabs on the PCM mounting bracket are engaged into the
mounting holes in the PCM cover.
5. If a new PCM is being installed, program the EEPROM. See: Testing and Inspection/Programming and Relearning