
Canyon 2WD L4-2.9L (2008)
Shift Boot: Service and Repair
Control Lever and/or Boot Replacement
Removal Procedure
1. Remove the shift lever assembly. Refer to Shift Lever Assembly Replacement (D06) (See: Shifter M/T/Service and Repair/Shift Lever Assembly
Replacement (D06))Shift Lever Assembly Replacement (W/O D06) (See: Shifter M/T/Service and Repair/Shift Lever Assembly Replacement
(W/O D06)) .
2. Remove the console (w/o D06 only). Refer to Console Replacement (Small W/ Manual Transmission) (See: Body and Frame/Interior Moulding /
Trim/Console/Service and Repair/Removal and Replacement)Console Replacement (Large w/Manual or Auto Transmission) (See: Body and
Frame/Interior Moulding / Trim/Console/Service and Repair/Removal and Replacement) .
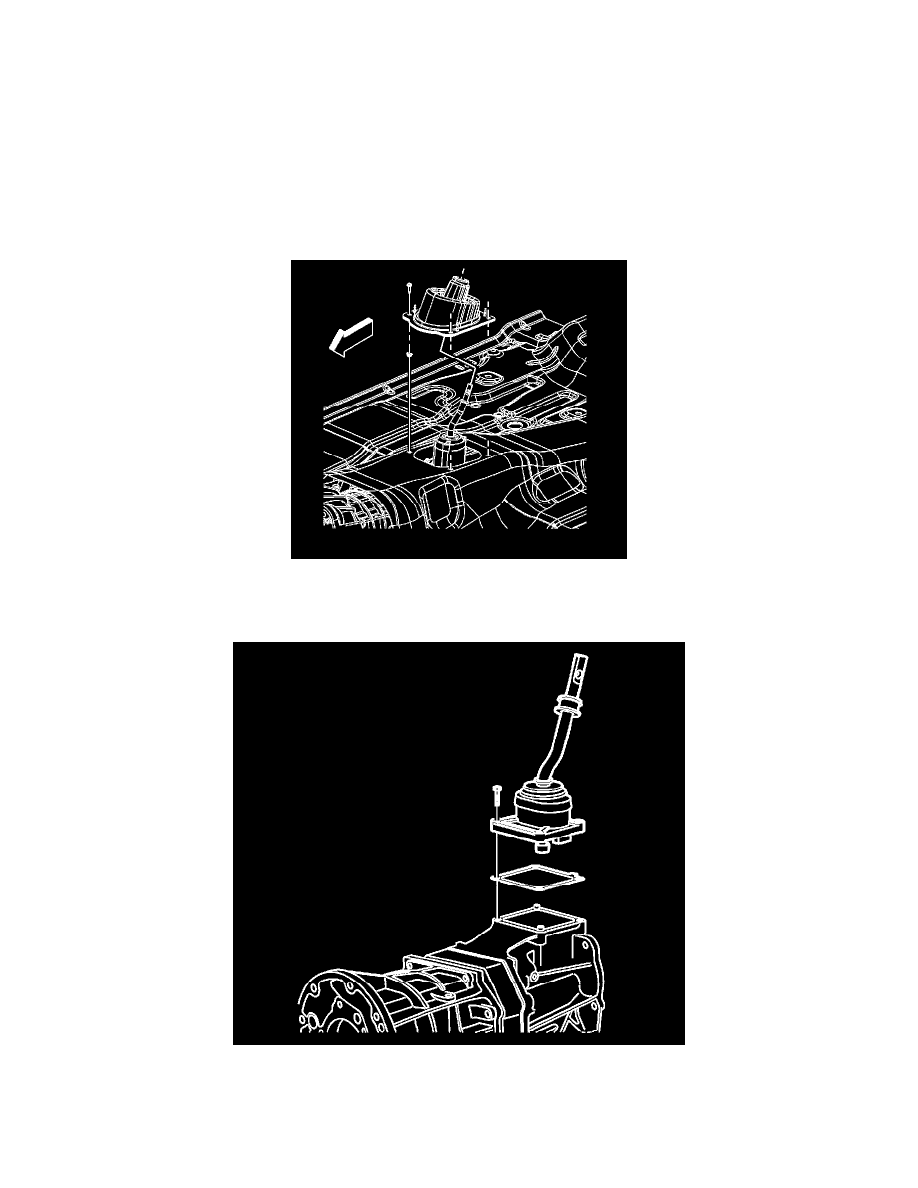
3. Remove the control lever boot screws.
4. Tilt and remove the control lever boot from the control lever.
5. Shift the transmission into NEUTRAL.
6. Remove the control lever housing assembly bolts.
7. Remove the control lever housing assembly and gasket.
8. Mask off the control lever housing opening, in order to prevent foreign objects from entering the transmission.
9. Disassemble the control lever housing if necessary. Refer to Shift Control Housing Disassemble (See: Service and
Repair/Overhaul/Disassembly/Shift Control Housing Disassemble) .