
Canyon 2WD L5-3.5L VIN 6 (2004)
12. Remove the intake camshaft sprocket bolt. Discard the bolt.
13. Remove the intake camshaft sprocket.
14. Remove the timing chain.
15. Remove the crankshaft sprocket.
16. Clean and inspect the timing chain and sprockets. Refer to Timing Chain and Sprockets Cleaning and Inspection.
Installation Procedure
1. Important: Ensure the # 1 piston is at TDC. The pin on the crankshaft for the timing chain sprocket should be straight up.
Install the crankshaft sprocket to the crankshaft snout.
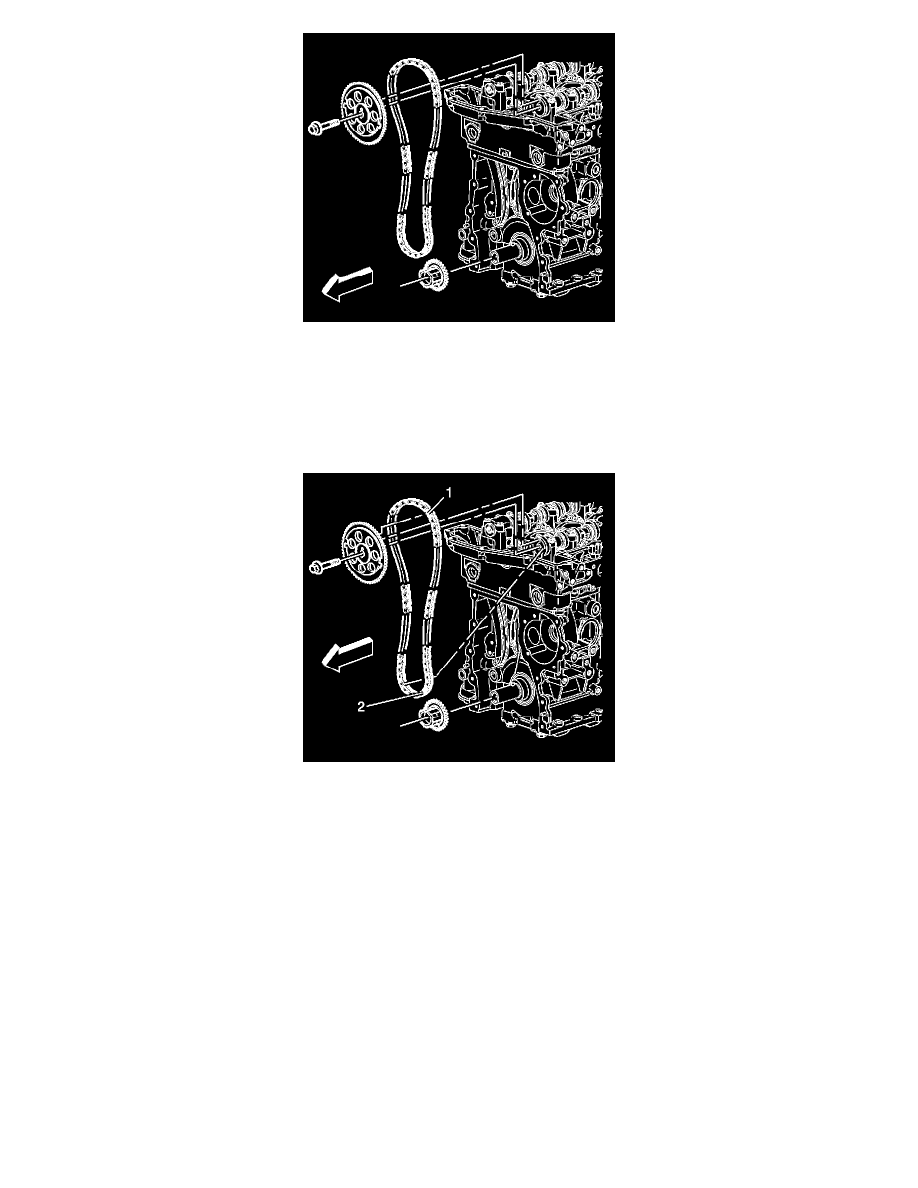
2. Important: Every 7th link of the timing chain is darkened to aid in aligning the timing marks.
Install the intake camshaft sprocket into the timing chain. Aligning the dark link (1) of the timing chain with the timing mark on the intake
camshaft sprocket.
3. Feed the timing chain down through the opening in the cylinder head.
4. Install the timing chain on the crankshaft sprocket. Aligning the dark link (2) of the timing chain with the timing mark on to the crankshaft
sprocket.
5. Important: Ensure the alignment pin is properly engaged with the camshaft
Install the intake camshaft sprocket onto the intake camshaft.