
Canyon 4WD L5-3.7L (2007)
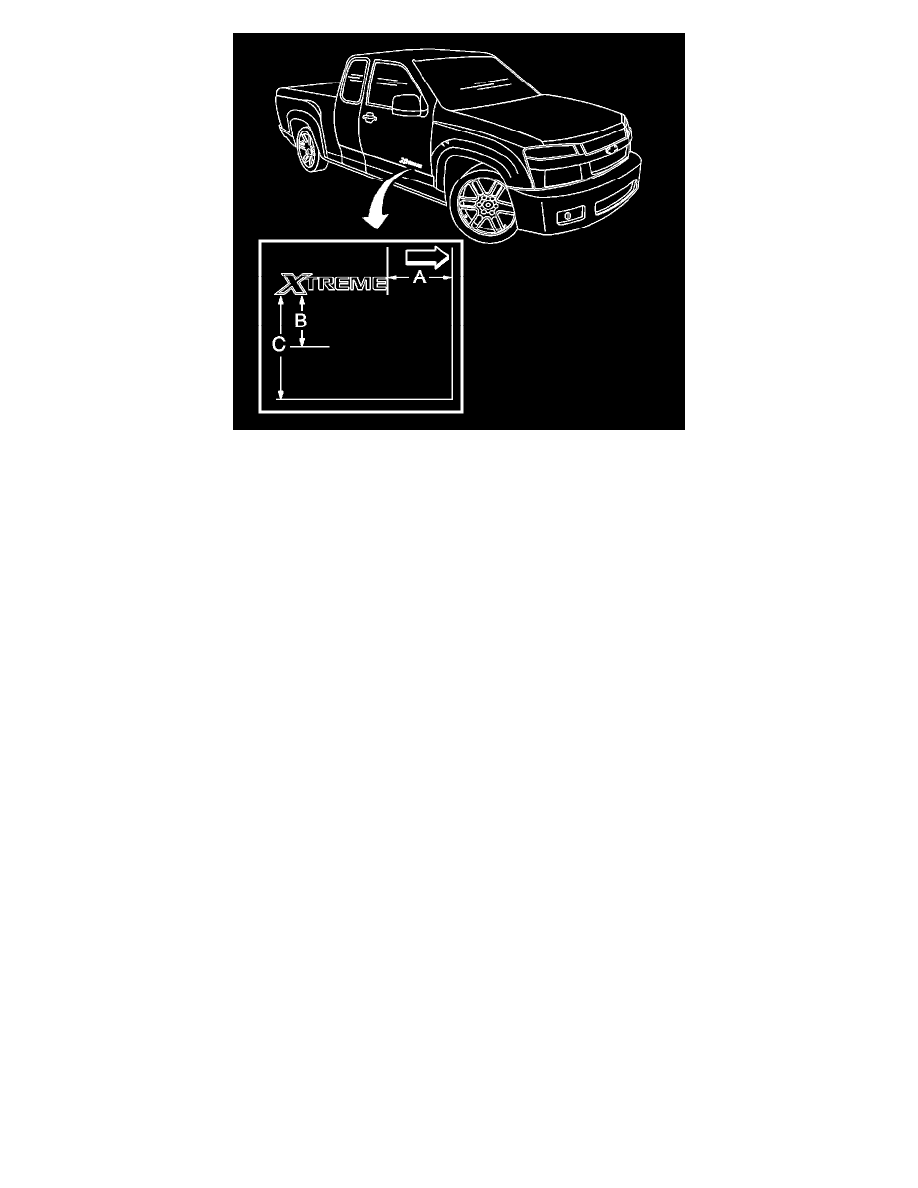
1. If the location of the emblem/nameplate has not been marked, apply tape and use the following dimensions:
*
Dimension (a) is 145.0 mm (5.70 in) from the front of the door to the emblem/nameplate.
*
Dimension (b) is 165.0 mm (6.50 in) from the bottom of the door to the front of the emblem/nameplate.
*
Dimension (c) is 28.0 mm (1.11 in) from the feature line of the door to the front of the emblem/nameplate.
2. Warm the door surface with a J 25070, 152 mm (6 in) from the surface to a minimum of 21°C (70°F).
Important: Do not touch the adhesive backing of the emblem/nameplate.
3. Remove the backing from the front end of the emblem/nameplate.
4. Press the emblem/nameplate to the door panel surface while continuing to remove the backing.
5. Hand roll the emblem/nameplate to the door panel to ensure proper adhesion.
6. Inspect the emblem/nameplate for bonding.
7. Remove the tape from the area around the door emblem.
Endgate Emblem/Nameplate Replacement (Canyon)
Endgate Emblem/Nameplate Replacement (Canyon)
Tools Required
J 25070 Heat Gun
Removal Procedure
Important: Use the tape for protection and alignment marks for alignment of the new emblem.
1. Apply tape to the area around the tailgate emblem.
2. Heat the emblem/nameplate, using a J 25070, 152 mm (6 in) from the surface.
3. Apply the heat using a circular motion for about 30 seconds.
Notice: Refer to Exterior Trim Emblem Removal Notice.
4. Remove the emblem/nameplate from the tailgate surface using a plastic, flat-bladed tool.