
Envoy 2WD V6-4.3L VIN W (1998)
REMOVAL PROCEDURE
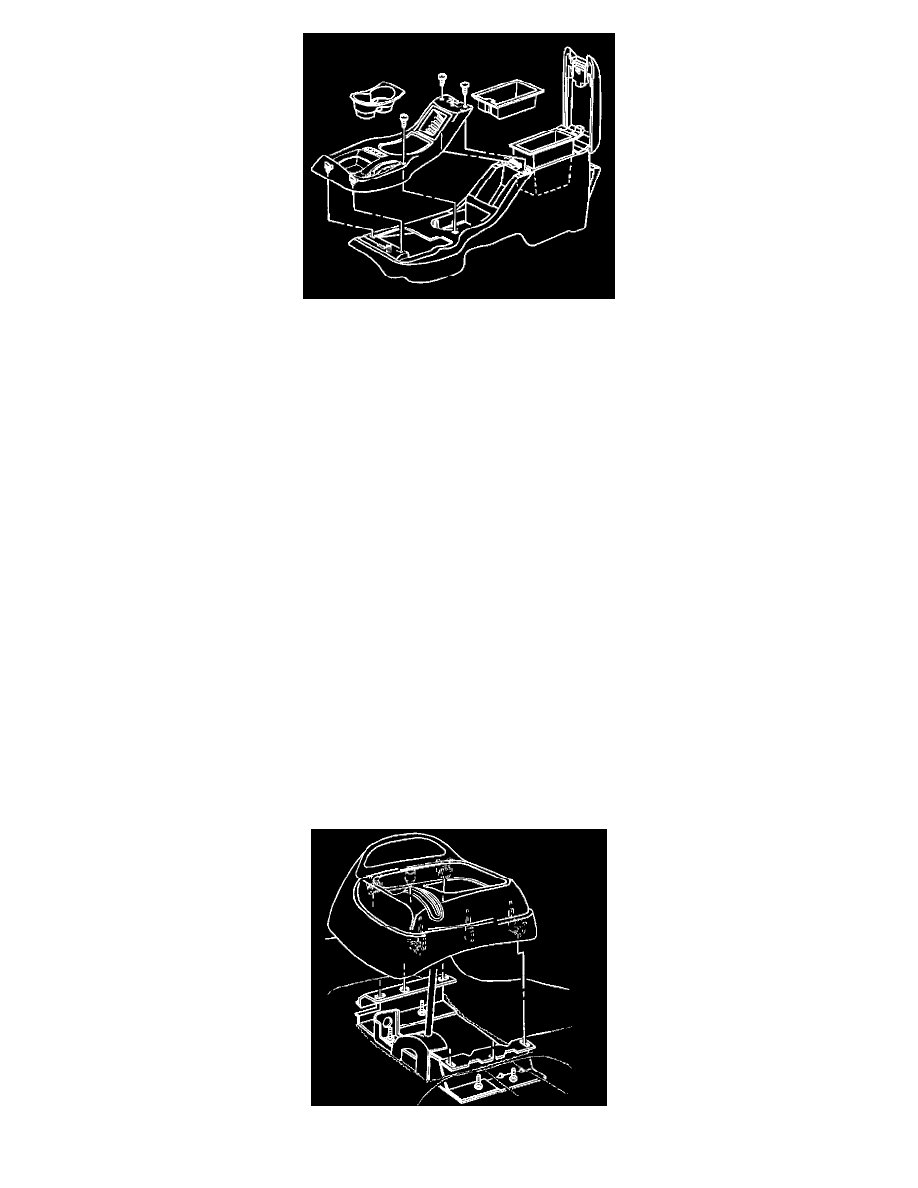
1. Remove the shift control lever.
2. Remove the cup holder insert.
3. Remove the screws that retain the trim plate to the console.
4. Remove the trim plate from the console.
5. Open the storage compartment cover.
6. Remove the storage compartment.
7. Remove the nuts that retain the console to the vehicle.
8. Remove the electrical connector, if equipped.
9. Remove the console from the vehicle.
INSTALLATION PROCEDURE
1. Install the console to the vehicle.
2. Install the electrical connector, if equipped.
3. Install the nuts that retain the console to the vehicle.
Tighten
Tighten the nuts to 10 N.m (88 lb in).
4. Install the storage compartment to the vehicle.
5. Install the trim plate to the console.
6. Install the screws that retain the trim plate to the console.
Tighten
Tighten the ruts to 1.9 N.m (17 lb in).
7. Install the cup holder insert.
8. Install the shift control lever.
Non-Full Length
REMOVAL PROCEDURE