
Envoy 2WD V8-5.3L VIN M (2005)
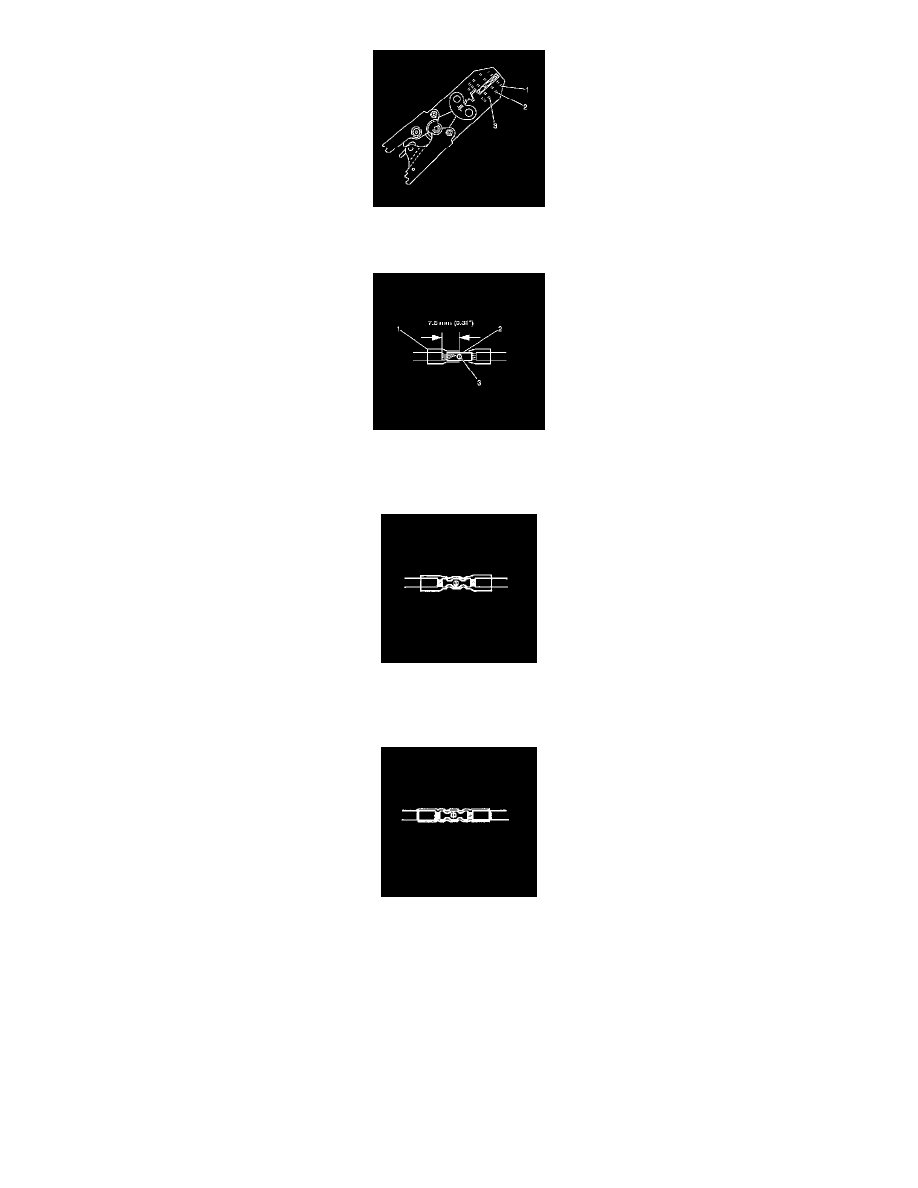
5. Use the Splice Crimp Tool from the J-38125 to crimp duraseal splice sleeve. In order to position the duraseal splice sleeve in the proper color nest
of the Splice Crimp Tool, refer to the table at the beginning of this repair procedure.
6. Place the duraseal splice sleeve in the nest. Ensure that the crimp falls midway between the end of the barrel and the stop. The sleeve has a stop (3)
in the middle of the barrel (2) in order to prevent the wire (1) from going further. Close the hand crimper handles slightly in order to firmly hold
the duraseal splice sleeve in the proper nest.
7. Insert the wire into the splice sleeve barrel until the wire hits the barrel stop.
8. Tightly close the handles of the crimp tool until the crimper handles open when released.The crimper handles will not open until you apply the
proper amount of pressure to the duraseal splice sleeve. Repeat steps 4 and 5 for the opposite end of the splice.
9. Using the heat torch, apply heat to the crimped area of the barrel.
10. Gradually move the heat barrel to the open end of the tubing:
-
The tubing will shrink completely as the heat is moved along the insulation.
-
A small amount of sealant will come out of the end of the tubing when sufficient shrinkage is achieved.
SIR/SRS SYSTEM WIRE SPLICE REPAIR
Apply a new splice (not sealed) from the J-38125 if damage occurs to any of the original equipment splices (3 wires or more) in the SIR/SRS wiring
harness. Carefully follow the instructions included in the kit for proper splice clip application.
CONNECTOR POSITION ASSURANCE (CPA)
The connector position assurance (CPA) is a small plastic insert that fits through the locking tabs of all the SIR/SRS system electrical connectors. The
CPA ensures that the connector halves cannot vibrate apart. You must have the CPA in place in order to ensure good contact between the SIR/SRS
mating terminals.