
Envoy 4WD V8-5.3L (2007)
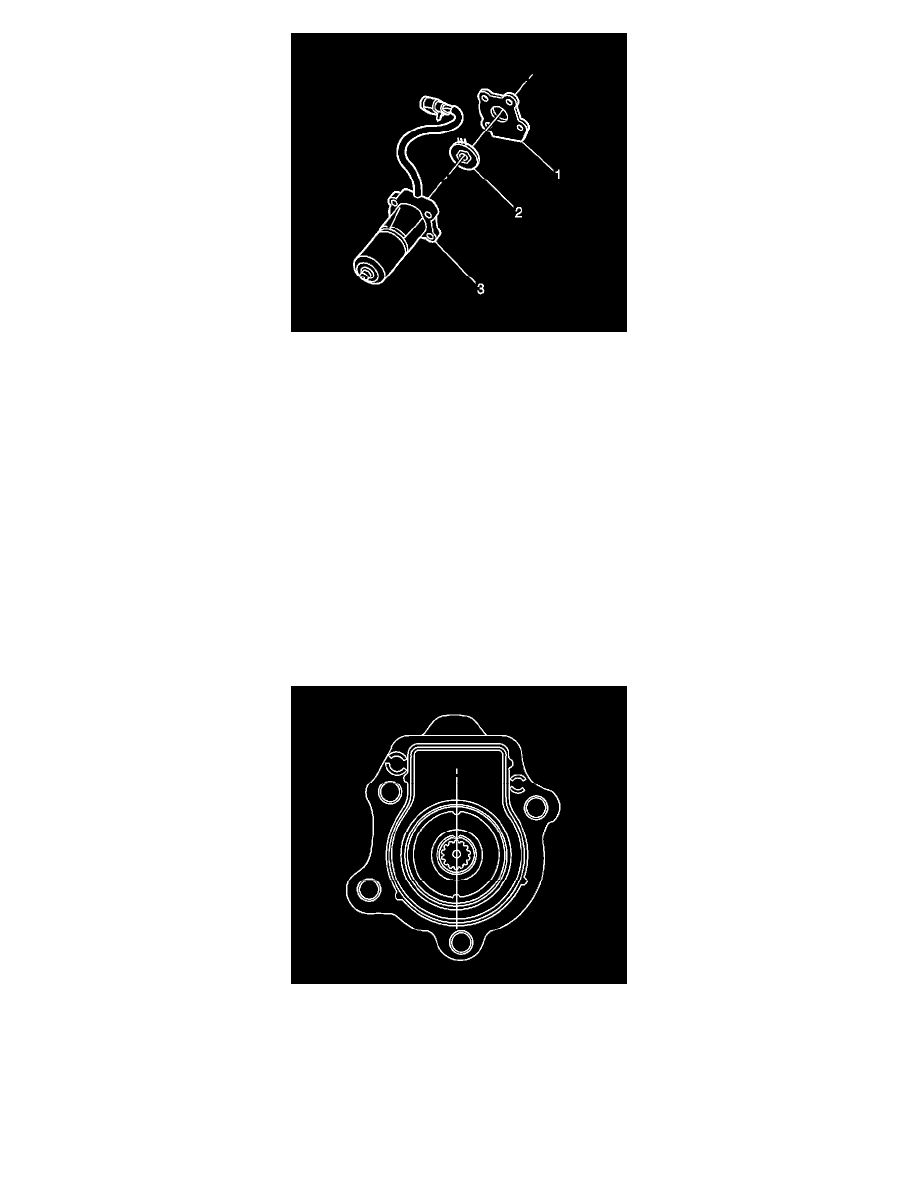
7. Release the 4 tabs that retain the motor/encoder plastic baseplate and remove the baseplate/gasket (1).
8. Discard the old baseplate/gasket, replacement baseplate/gasket provided in rotary position sensor kit.
Important: The motor/encoder rotary position sensor internal wires go to a connector within the motor housing. This internal wire
connector does not have a locking tab and is easily disturbed.
9. Gently lift the motor/encoder rotary position sensor (2) from the motor shaft.
10. Disconnect the rotary position sensor (2) from the wiring harness.
Important: Look at the motor/encoder housing (1) where the rotary position sensor was removed from. Take note of the "Hex"; in the
housing where the new sensor will seat when properly installed.
Installation Procedure
Important: Provided the rotary position sensor was removed, follow steps (1-5) to install the sensor, otherwise proceed to step 6 installing
the motor/encoder to the transfer case.
1. Connect the wiring harness to the rotary position sensor.
2. Gently insert a suitable tool along side the internal wires and press down on the internal wire connector to insure the connector is fully installed.
3. Properly align the keyway of the rotary position sensor with the motor/encoder shaft as indicated by the center reference line shown in the graphic.