
Envoy 4WD V8-5.3L VIN M (2005)
Seat Latch: Service and Repair
Seat Latch Rod Replacement - Rear No. 2
SEAT LATCH ROD REPLACEMENT - REAR NO. 2
REMOVAL PROCEDURE
1. Remove the seat from the vehicle.
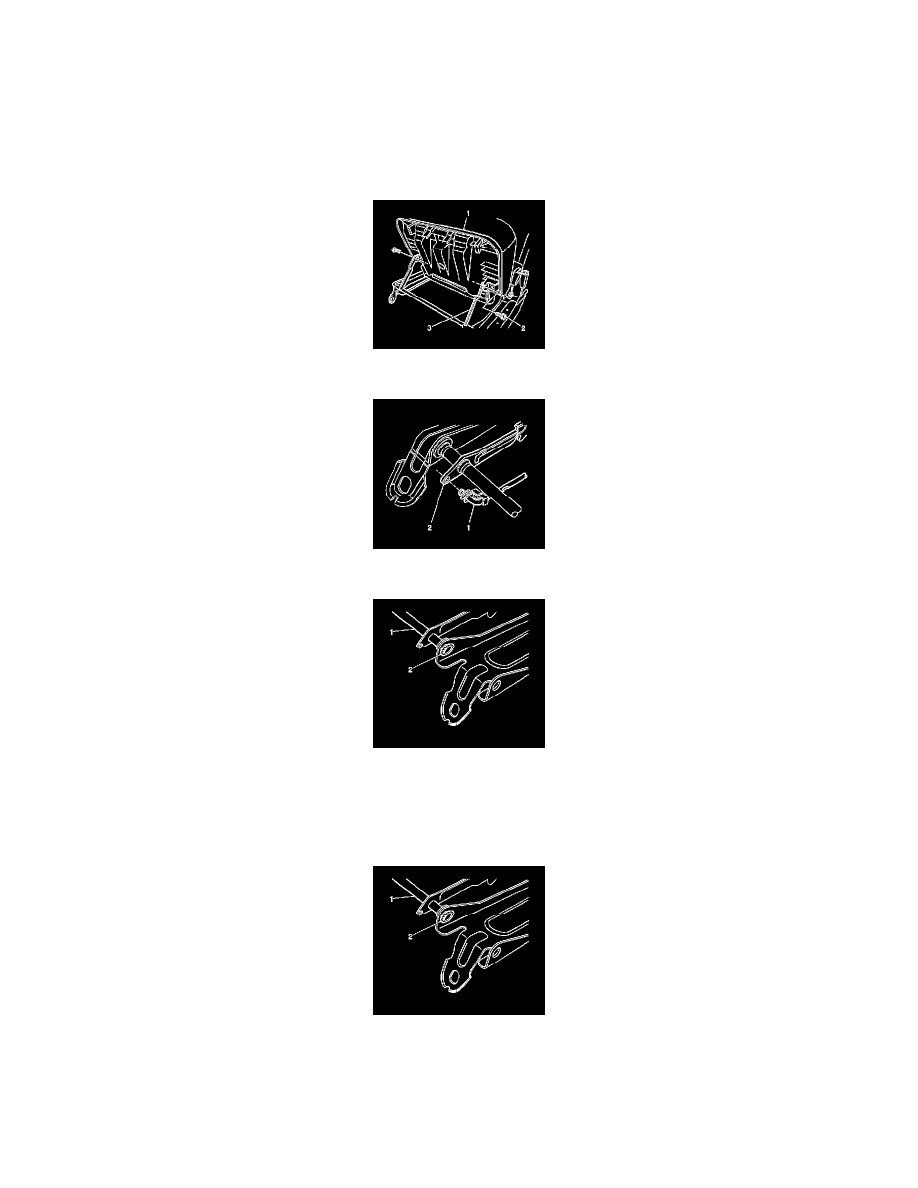
2. Remove the two bolts (2) securing the rear seat cushion assembly (1) to the seat latch rod (3).
3. Remove the seat riser latch assembly (1) from the seat latch rod (2).
4. Remove the retainer nut (2) from each end of the seat latch rod (1).
5. Remove the seat latch rod.
INSTALLATION PROCEDURE
1. Install the seat latch rod (1) to the inner and outer riser assemblies.
2. Install a retainer nut (2) on each end of the seat latch rod (1).