
Envoy 4WD V8-5.3L VIN M (2005)
Housing Assembly HVAC: Service and Repair
HVAC Module Assembly Replacement
HVAC MODULE ASSEMBLY REPLACEMENT
TOOLS REQUIRED
-
J 43181 Heater Line Quick Connect Release Tool
-
J 39400-A Halogen Leak Detector
REMOVAL PROCEDURE
1. Drain the engine coolant. Refer to Draining and Filling Cooling System (LL8) Draining and Filling Cooling System (LM4) in Cooling System.
2. Recover the refrigerant. Refer to Refrigerant Recovery and Recharging.
3. Remove the instrument panel (I/P) carrier.
4. Reposition the heater hose clamps using J 43181.
5. Disconnect the heater hoses from the heater core.
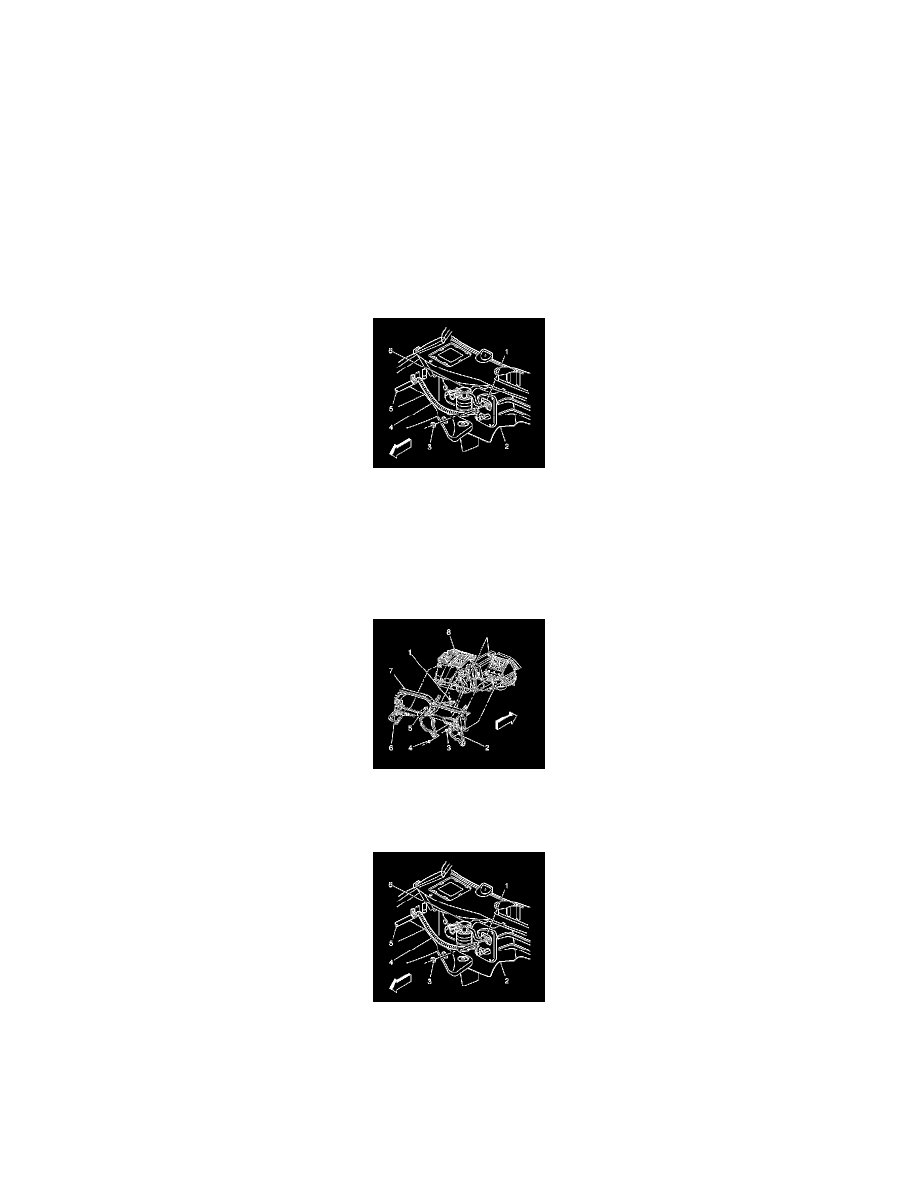
6. Remove the retaining nut (3) from the accumulator (6) at the evaporator (1).
7. Disconnect the accumulator (6) from the evaporator (1).
8. Disconnect the evaporator tube (4) from the evaporator (1).
9. Disconnect all of the electrical connectors to the HVAC module assembly.
10. Remove the HVAC module assembly.
INSTALLATION PROCEDURE
1. If replacing the HVAC module assembly (8), transfer the components from the old HVAC module assembly as necessary.
2. Install the HVAC module assembly (8).
3. Connect all of the electrical connectors to the HVAC module assembly.
4. Connect the heater hoses to the heater core.
5. Connect the evaporator tube (4) to the evaporator (1).
6. Install the accumulator (6) to the evaporator (1).
7. Tighten the accumulator retaining nut.
Tighten the nut to 4.5 N.m (40 lb in).