
G 2500 3/4 Ton Van V6-262 4.3L VIN Z (1992)
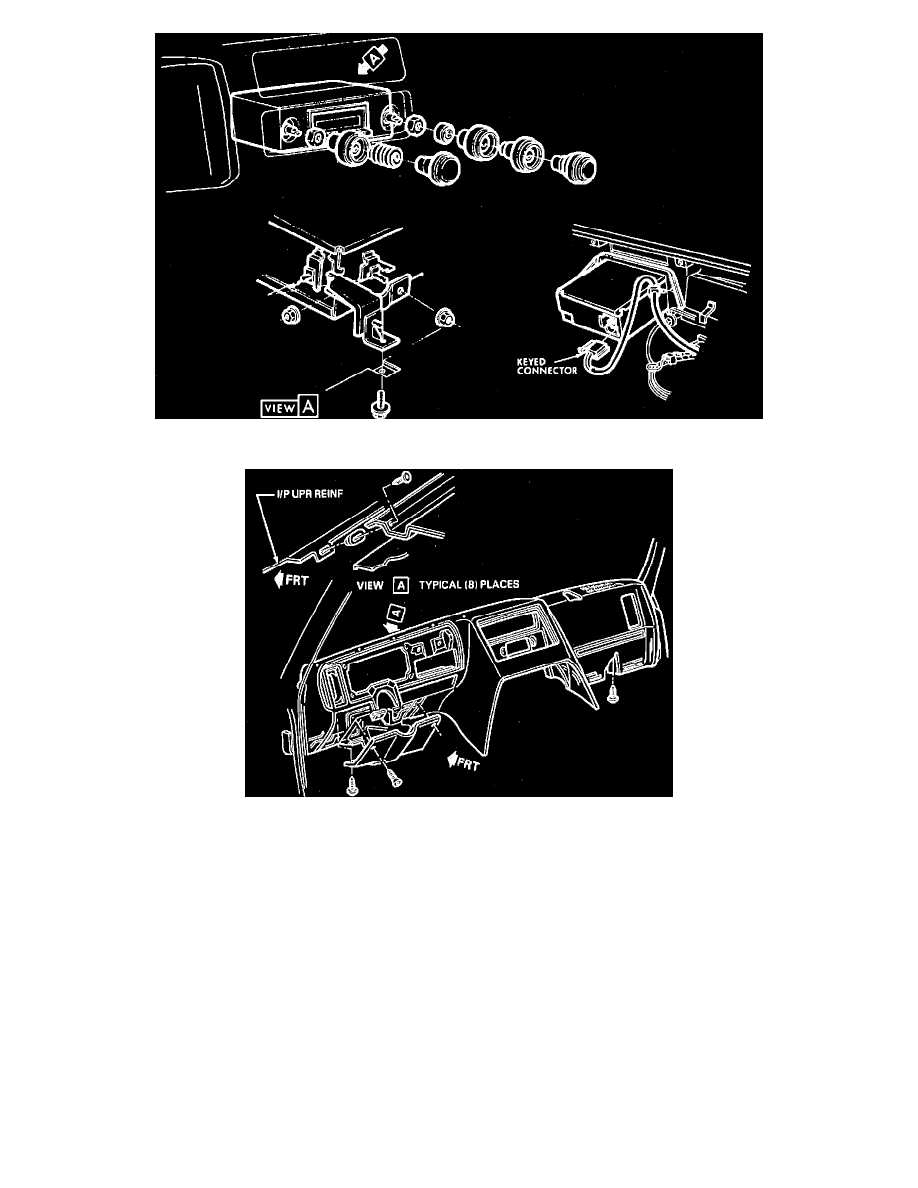
Fig. 17 Radio Removal & Installation
Fig. 18 Instrument Panel Removal & Installation
1.
Disconnect battery ground cable.
2.
On models with mechanical speedometers, reach up under instrument panel and disconnect speedometer cable by pulling cable while pressing
tang on rear of speedometer head.
3.
On models with mechanical clocks, remove clock set stem and knob.
4.
On all models, remove screws attaching instrument cluster bezel to instrument panel, then the bezel.
5.
Remove two lower cluster attaching screws, Fig. 15.
6.
Pulling top of cluster away from instrument panel, lift out bottom of cluster.
7.
Disconnect instrument panel harness connector from printed circuit and remove cluster.
8.
Disconnect headlamp and wiper/washer switches.
9.
Remove lower extension assembly, engine cover, air cleaner cover and element, Fig. 16.
10.
Remove radio control knobs and retaining nuts, Fig. 17.
11.
Remove radio rear mounting bracket, then push radio forward in vehicle and lower assembly.
12.
Disconnect antenna and electrical connectors, then remove radio.
13.
Remove steering column brace bolts and lower column.
14.
Remove heater and A/C control attaching screws, then disconnect A/C, temperature and defroster cables. Mark cables for assembly reference.
15.
Remove instrument panel attaching bolts and nuts, then disconnect any remaining electrical connectors and remove panel, Fig. 18.
16.
Reverse procedure to install.