
G 2500 3/4 Ton Van V6-262 4.3L VIN Z (1992)
Expansion Block/Orifice Tube: Service and Repair
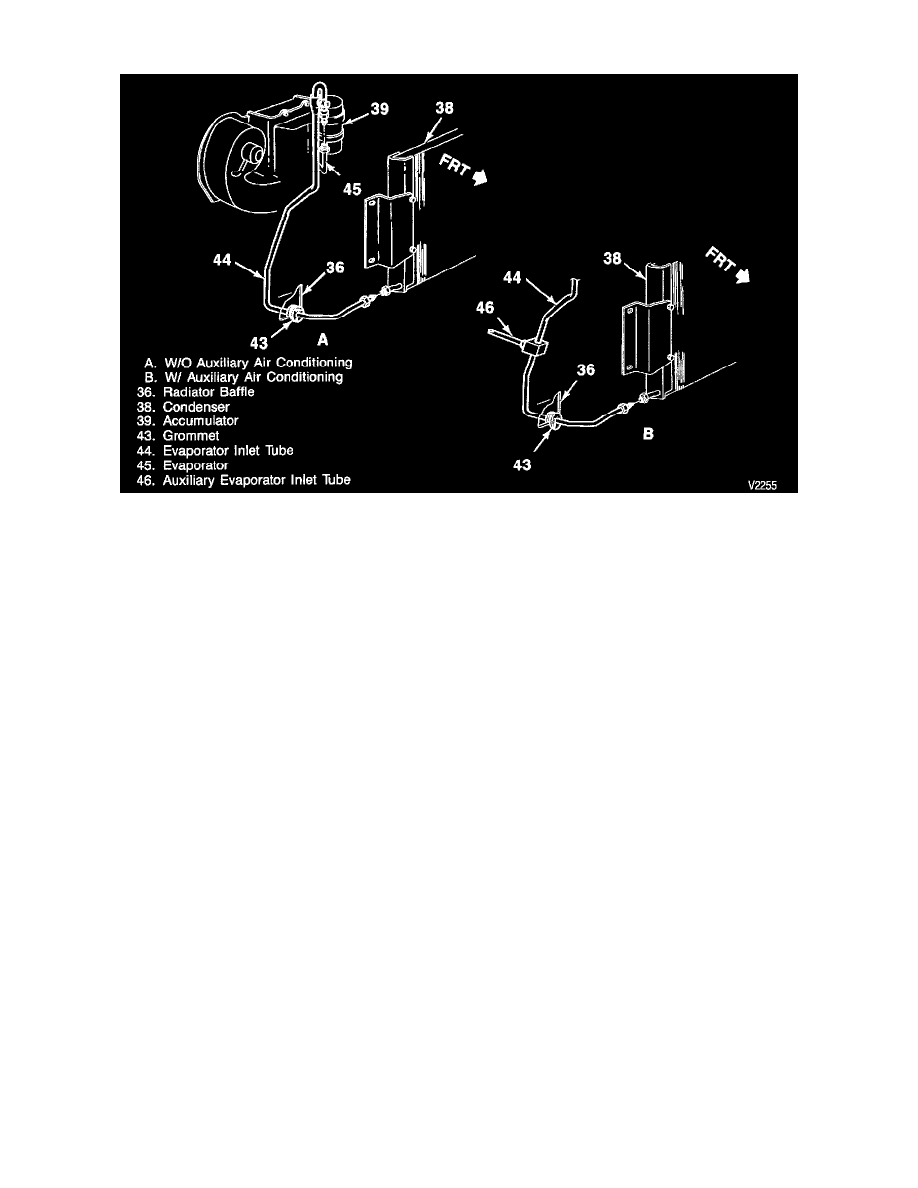
Evaporator Tube
Remove or Disconnect
Tool Required: J 26549-D Orifice Tube Remover and Installer or Equivalent
1. Discharge and recover refrigerant from the system.
2. Evaporator tube (44) from the evaporator (45).
3. 0-ring seal.
^
Cap or plug the open line.
4. Expansion (orifice) tube using J 26549-D or equivalent.
Note: In the event that difficulty is encountered during the removal of a restricted or plugged expansion (orifice) tube, the following procedure is
recommended:
A. Remove as much of any impacted residue as possible.
B. Carefully apply heat with a heat gun (hair drier, epoxy drier, or equivalent) approximately 7 mm (0.25 inch) from the dimples on the inlet pipe.
Do not overheat the pipe.
Caution: It the system has a pressure switch near the expansion tube location, it should be removed prior to heating the pipe to avoid damage
to the switch.
C. While applying heat, use the expansion tube removal tools J 26549-D or equivalent to grip the expansion (orifice) tube. Use a turning motion along
with a push-pull motion to loosen the impacted expansion (orifice) tube and remove it.
Install or Connect
1. Expansion tube using J 26549-D or equivalent.
2. New 0-ring seal.
A. Coat 0-ring seal with 525 viscosity refrigerant oil.
B. Insert the short screen end of the new orifice into the evaporator inlet tube.
3. Evaporator tube (44) to the evaporator (45).
4. Refrigerant to the system.
^
Check the system for leaks.