
G 2500 3/4 Ton Van V8-350 5.7L VIN K TBI (1995)
REMOVAL PROCEDURE
NOTICE:
On certain passenger vans a trim panel may have been installed. If a trim panel is present, remove the panel prior to repairs.
1.
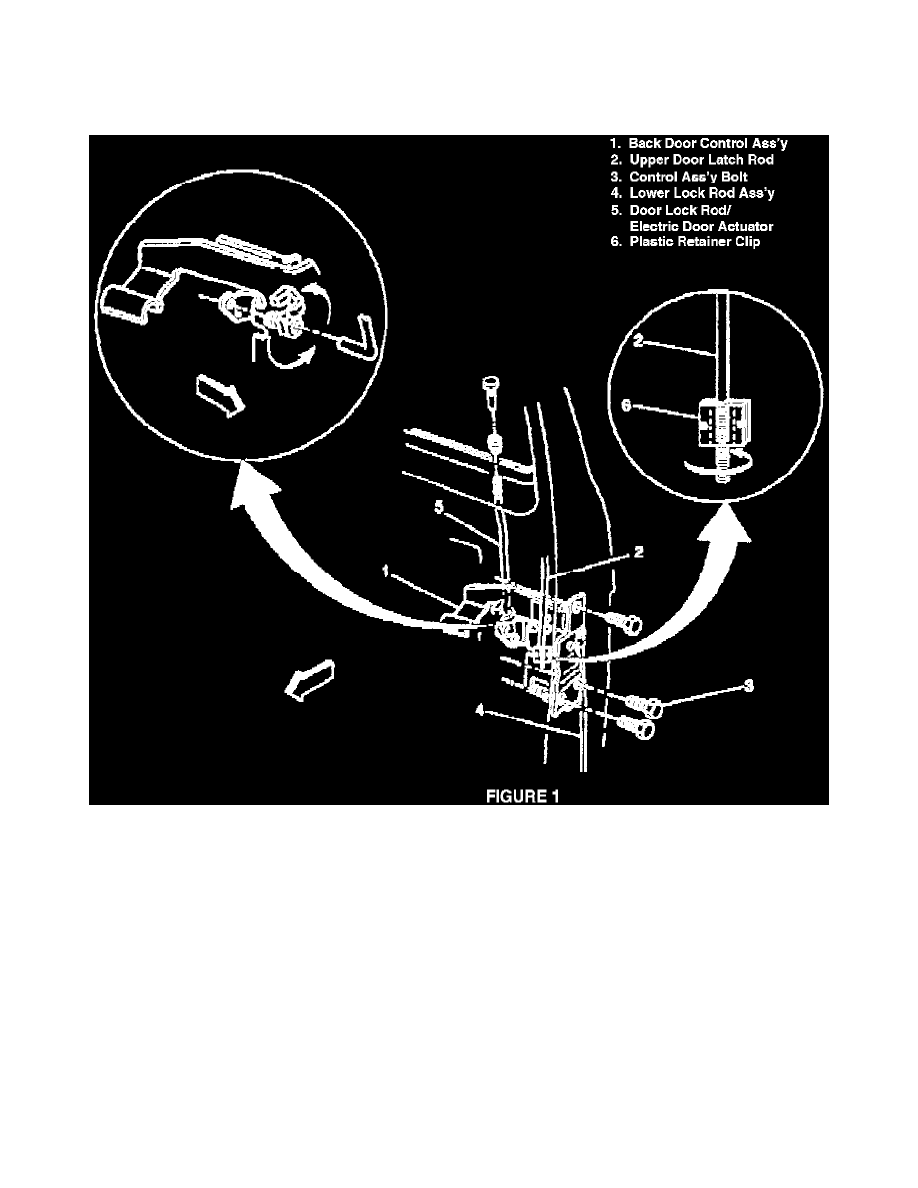
Remove upper door latch rod (Figure 1, Item 2) from control assembly (Figure 1, Item 1). Upper door latch rod is secured by a plastic retainer
clip (Figure 1, Item 6) which closes on the lock rod thread area. To open retainer, us a flat blade screwdriver (prefer an angled blade). The clip
locking mechanism will be on the LH side of the rod opening to the RH side of the rod.
2.
Remove door lock rod or electric door actuator rod (Figure 1, Item 5), if applicable. Remove actuator from lock rod by sliding rubber mount at top
of actuator off the door lock rod (refer to Service Manual, Section 10A1).
3.
Remove 3 control assembly bolts (Figure 1, Item 3).
4.
Remove lower lock rod assembly (Figure 1, Item 4) by removing plastic retainer clip (Figure 1, Item 6), if applicable. Pull lower lock rod forward
and detach from control assembly.
5.
Remove back door control assembly (Figure 1, Item 1) through the access hole.
INSTALLATION PROCEDURE
1.
Install new back door control assembly (Figure 1, Item 1) into access hole.
2.
Install lower lock rod assembly (Figure 1, Item 4) to back door control assembly (Figure 1, Item 1).