
G 2500 3/4 Ton Van V8-350 5.7L VIN K TBI (1995)
When replacing wire, use wire of equal or greater size than the original. The wire's insulation must have the same or higher temperature rating.
To find the correct wire size, either find the wire on the schematic page and convert or use an AWG gage.
The type of wire insulation must also be carefully selected. For areas not subject to HI temperatures, such as the passenger compartment,
instrument panel or cargo compartment, a general purpose insulation may be used. The most common general purpose insulation is Polyvinyl
Chloride (PVC). PVC may be used where temperatures do not exceed 80°C (l76°F).
For applications where higher temperatures are expected, such as the engine compartment, a cross-linked polyethylene insulated wire should be
used. Insulex (TM) is one such type; it can withstand temperatures up to 148°C (300°F). Cross-linked polyethylene wire may be used to replace
PVC, but not the other way around. Cross-linked polyethylene wire is not resistant to fuel or fuel vapors and should not be used to replace wire on
the fuel tank unit or throttle body injector connector, for example. Oxygen sensor leads should not be replaced with cross-linked polyethylene.
Select the correct size opening in the wire stripper or work down from the largest size if you're not sure of wire size. Strip an equal amount of
insulation on both pieces of wire. Inspect both pieces for nicks or cut strands; repeat the strip if needed.
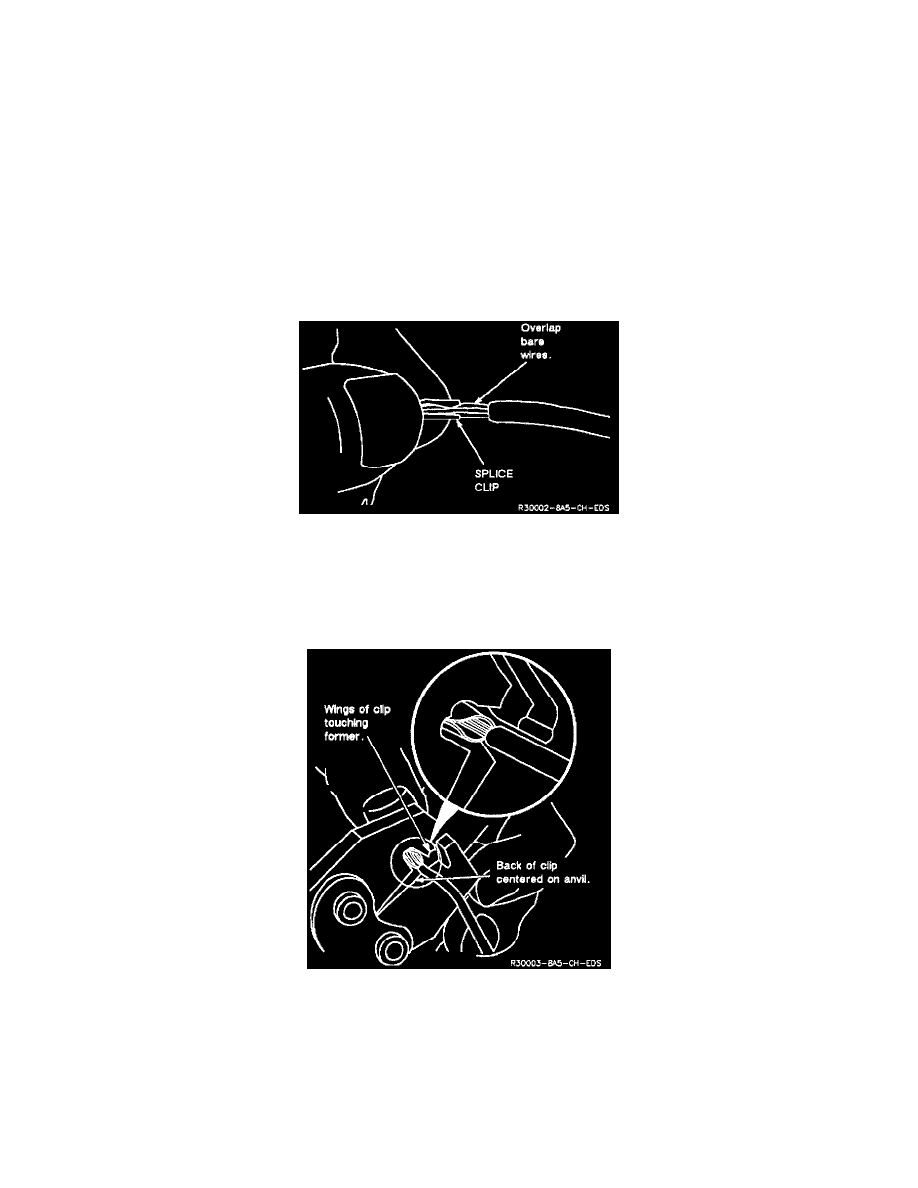
Centering The Splice Clip
Step Four: Crimp the Wires
Select the proper clip to secure the splice. To determine, the proper clip size crimp tool and anvil for the wire being spliced, follow the directions
included in the J 38125 Terminal Repair Kit. (On most crimpers, your choice is limited to either a small or large anvil.) Overlap the two stripped
wire ends and hold them between your thumb and forefinger as shown in. Then, center the splice clip under the stripped wires and hold it in place.
Crimping The Splice Clip
^
Open the crimping tool to its full width and rest one handle on a firm flat surface.
^
Center the back of the splice clip on the proper anvil and close the crimping tool to the point where the former touches the wings of the clip.
^
Make sure that the clip and wires are still in the correct position. Then, apply steady pressure until the crimping tool closes.
^
Before crimping the ends of the clip, be sure that:
-
The wires extend beyond the clip in each direction.
-
No, strands of wire are cut loose.
-
No insulation is caught under the clip.