
G 2500 3/4 Ton Van V8-379 6.2L DSL (1986)
Intake Manifold: Service and Repair
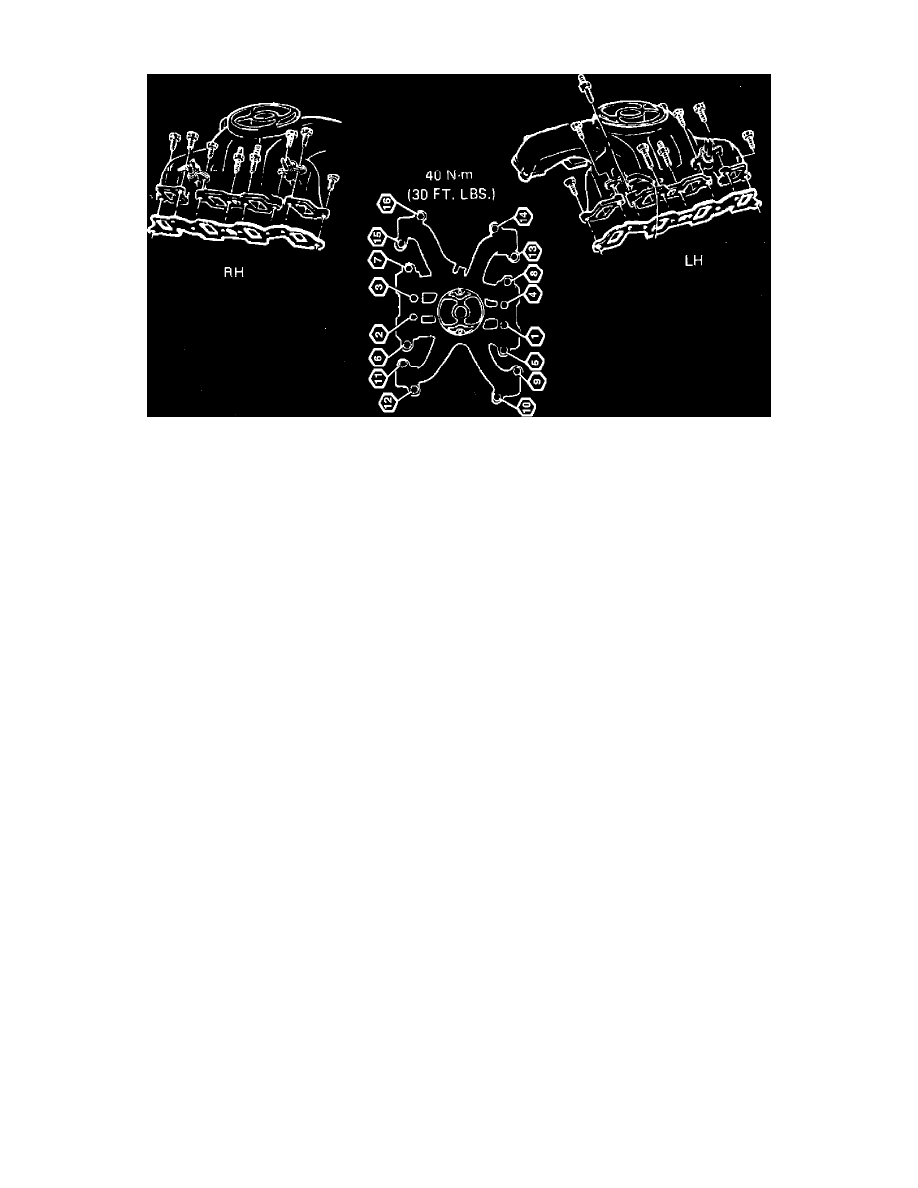
Fig. 9 Intake Manifold Tightening Sequence
1986---87
1.
Disconnect cables from both batteries.
2.
On Van models, remove engine cover.
3.
On all models, remove air cleaner.
4.
Remove EGR/EPR solenoids with bracket from intake manifold studs.
5.
On Van models, remove CDR valve.
6.
On all models, disconnect crankcase ventilation and EGR hoses from manifold.
7.
On models equipped with A/C, remove rear A/C compressor bracket.
8.
On all models, remove fuel line bracket and disconnect ground strap from manifold.
9.
On Van models, remove fuel filter bracket from manifold.
10.
On all models, remove intake manifold attaching bolts and fuel line clips. On models equipped with gear-driven vacuum pump, loosen pump
clamp bolt and pivot pump aside to gain access to all manifold bolts.
11.
Remove intake manifold and gasket.
12.
Reverse procedure to install. Refer to Fig. 9 for bolt torque and tightening sequence.