
K 1500 1/2 Ton Pickup 4WD V8-350 5.7L VIN L 4-bbl (1982)
Blower Motor: Service and Repair
Front Unit
1.
Disconnect battery ground cable. On some G model vehicles, it may be necessary to remove the battery, coolant recovery tank and power antenna,
if equipped, to gain access to the blower motor.
2.
On G models equipped with A/C and diesel engine, proceed as follows:
a. Remove parking lamp assembly, then the coolant recovery tank.
b. Remove retaining screws, then the blower insulation through the hood opening.
3.
On all models, disconnect blower motor electrical connections.
4.
If equipped with A/C, remove blower motor cooling tube.
5.
Remove blower motor attaching screws, then pry blower motor from case.
6.
Reverse procedure to install.
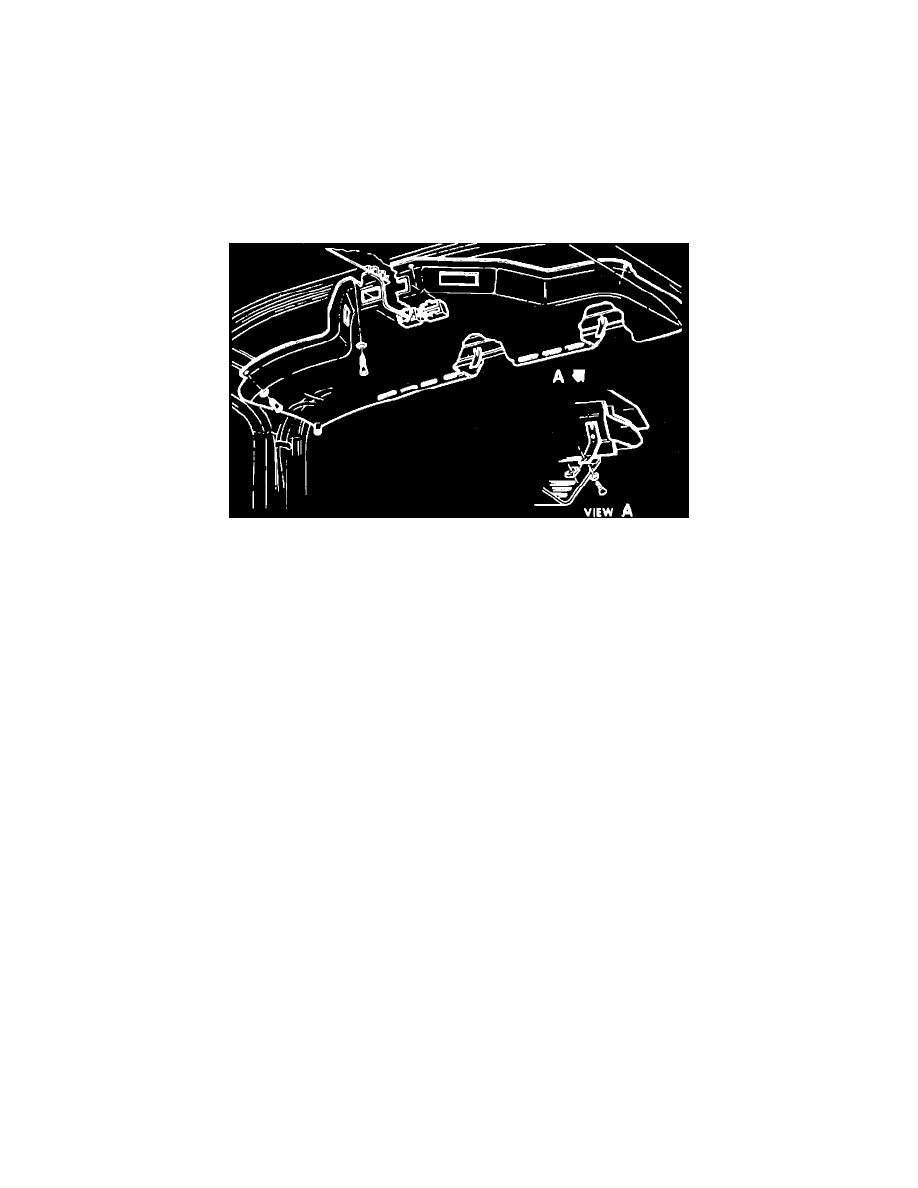
Fig. 22 Rear duct assembly. C, G, K, R & V models w/overhead system
Overhead Unit
1.
Disconnect battery ground cable.
2.
Remove rear duct drain tube, duct to header bracket and roof panel screws, then rear duct assembly, Fig. 22.
3.
Disconnect blower motor harness lead and ground wire.
4.
While supporting lower case to prevent damage to motor or case assemblies, remove case mounting screws, then lower case from vehicle roof.
5.
Remove motor retaining strap, then lift motor and cage assembly from case. Remove cages by removing shaft retaining nuts.
6.
Reverse procedure to install. When installing cages on motor shaft, tension springs must be installed on motor shafts. Cages should be mounted so
leading edges of blades face lower evaporator case (thin edge first). After installing blower assembly in case, check to ensure there is no
interference with rotating cages.