
K 1500 Suburban 4WD V8-393 6.5L DSL Turbo (1994)
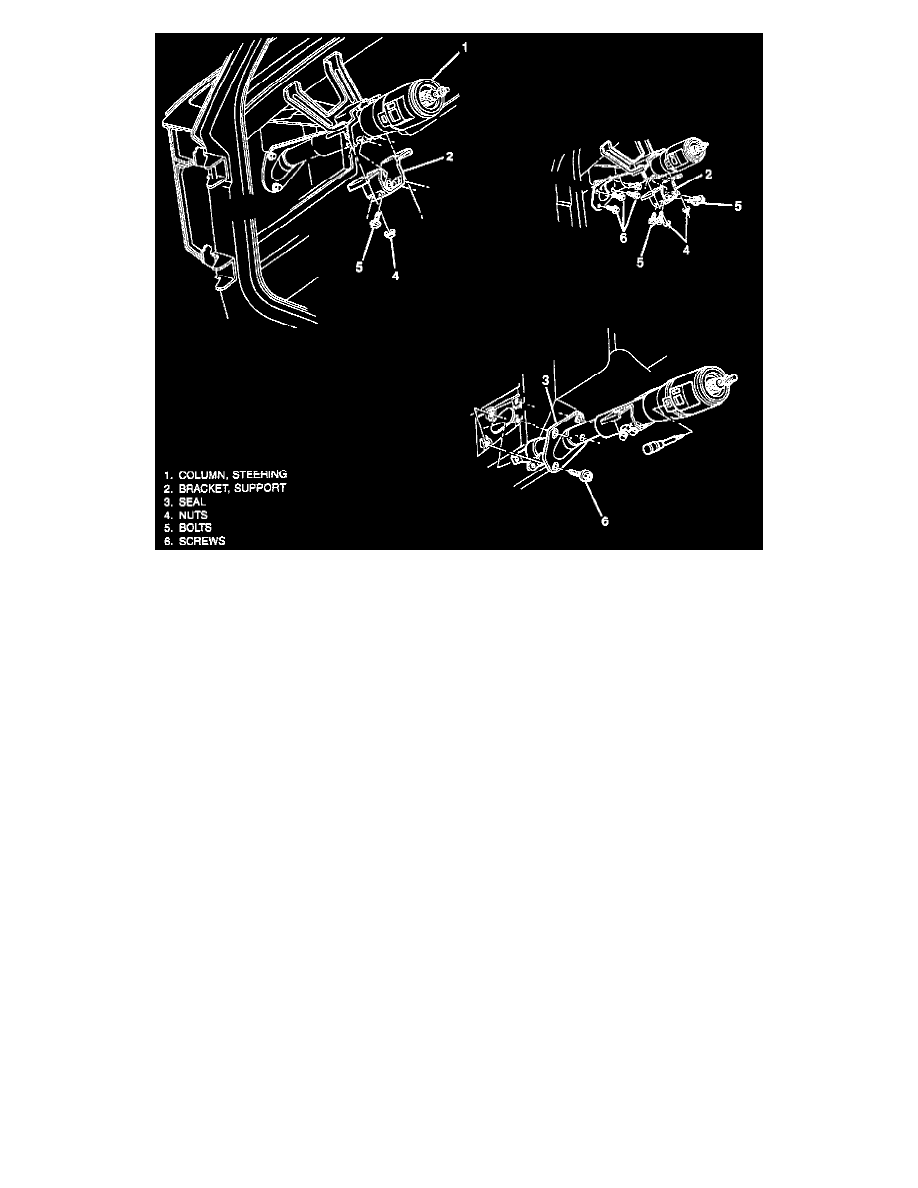
Steering Column Installation
REMOVE OR DISCONNECT
1. Negative battery cable
2. Steering wheel.
3. Transmission control linkage from the column shift tube levers.
4. Pot joint nut (17) and bolt (16) from the steering shaft. Mark the relationship of the pot joint to the steering shaft.
5. Steering column filler panel.
6. Bolts (5), nuts (4), and brackets (2).
7. Screws (6) and seal (3).
8. Steering column harness at the connectors.
^
Disconnect the neutral-start switch and backup lamp switch connectors (some models).
9. Steering column assembly. Rotate the column so the shift lever clears the dash opening.
INSTALL OR CONNECT
1. Lower the end of the steering column through the dash opening.
2. Connectors to the steering column harness.
3. Bracket (2), bolts (5), and nuts (4) loosely. Tighten bolts and nuts finger tight.
4. Screws (6) through the cover and seal to the dash panel.
TIGHTEN
^
Screws (6) to 12 Nm (105 lbs. in.).
^
Bolts (5) to 30 Nm (22 lbs. ft.).
^
Nut (4) to 27 Nm (20 lbs. ft.).
5. Steering column filler panel.
6. Intermediate shaft pot joint to steering column lower shaft end.
7. Transmission control linkage.
8. Steering wheel.
9. Negative battery cable.
Steering Wheel
STEERING WHEEL REPLACEMENT