K 1500 Truck 4WD V8-393 6.5L DSL Turbo VIN S (1996)

REMOVE OR DISCONNECT
NOTICE: If the timing chain, timing gears, front cover, crankshaft position sensor, crankshaft or other components affecting timing are replaced, it will
be necessary to reprogram TDC Offset Into the PCM.
1. Drain the cooling system.
2. Water pump.
-
Rotate the engine until the timing marks on the pump gear and camshaft gear are aligned.
3. Crankshaft balancer.
4. Crankshaft position sensor.
5. Front cover to oil pan bolts.
8. Fuel return line clips.
7. Fuel injection pump gear.
8. Fuel injection pump retaining nuts at the front cover.
9. Front cover bolts.
10. Front cover from the fuel injection pump and engine.
11. Front cover oil seal. Pry the oil seal out with a screwdriver.
CLEAN
-
RTV from the oil pan sealing surface.
-
Sealing surfaces on the front cover.
INSPECT
-
Front cover for cracks or damage to the sealing surfaces.
INSTALL OR CONNECT
1. New front cover oil seal to the front cover. Use tool J 22102.
-
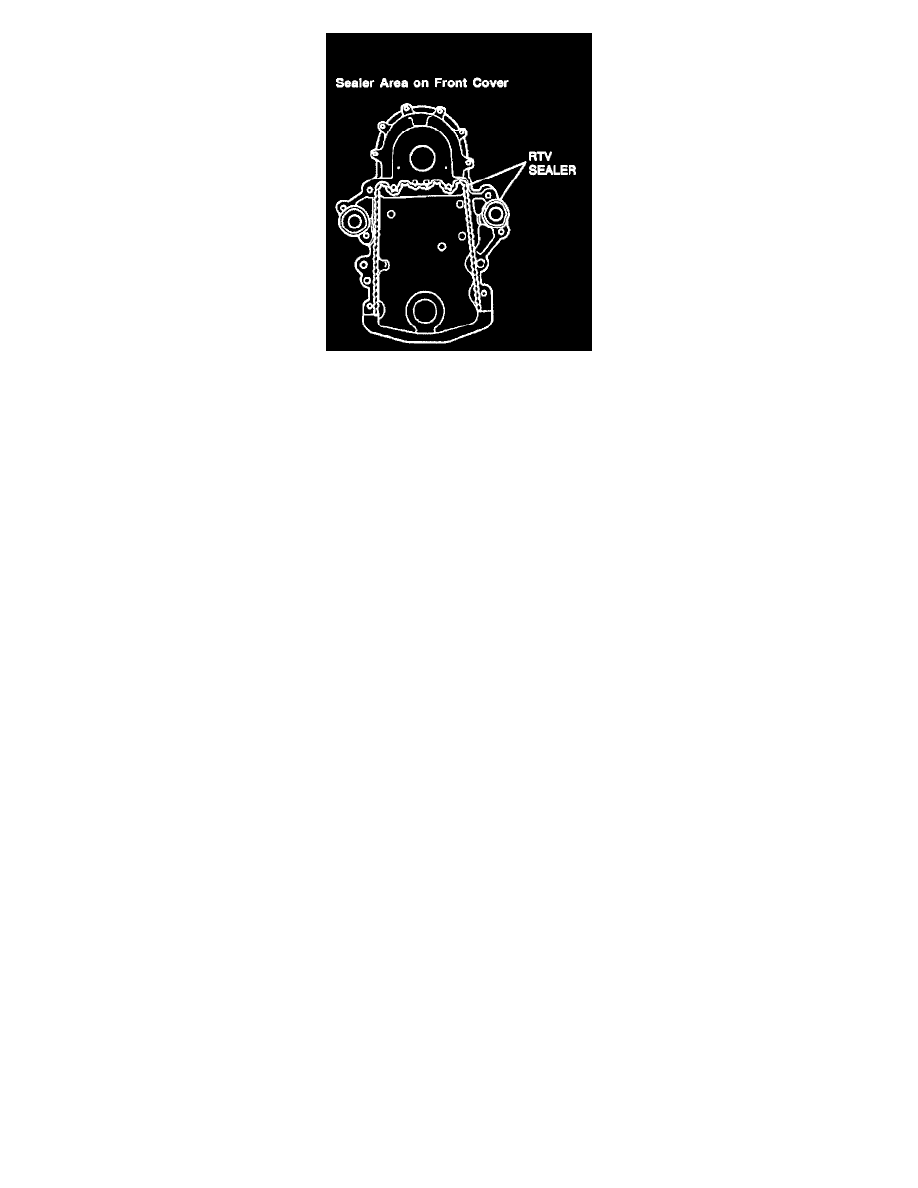
Apply a 2 mm (3/32 inch) bead of anaerobic sealant GM P/N 1052357 or equivalent to the front cover sealing area shown.
-
Apply a 5 mm (3/16 inch) bead of RTV sealant to the front cover sealing surface that mates against the oil pan.
2. Front cover to the engine. Install the attaching bolts and the fuel injection pump studs.
TIGHTEN
-
Front cover to block bolts to 45 Nm (33 lb. ft.).
-
Oil pan to front cover bolts to 10 Nm (89 lb. in.).
3. Fuel injection pump nuts.
TIGHTEN
-
Nuts to 42 Nm (31 lb. ft.).
4. Fuel injection pump gear and bolts. Align the timing marks.
TIGHTEN
-
Fuel injection pump gear bolts to 23 Nm (17 lb. ft.).
5. Fuel return line clip screws.
