
K 1500 Truck 4WD V8-393 6.5L DSL Turbo VIN S (1996)
1.
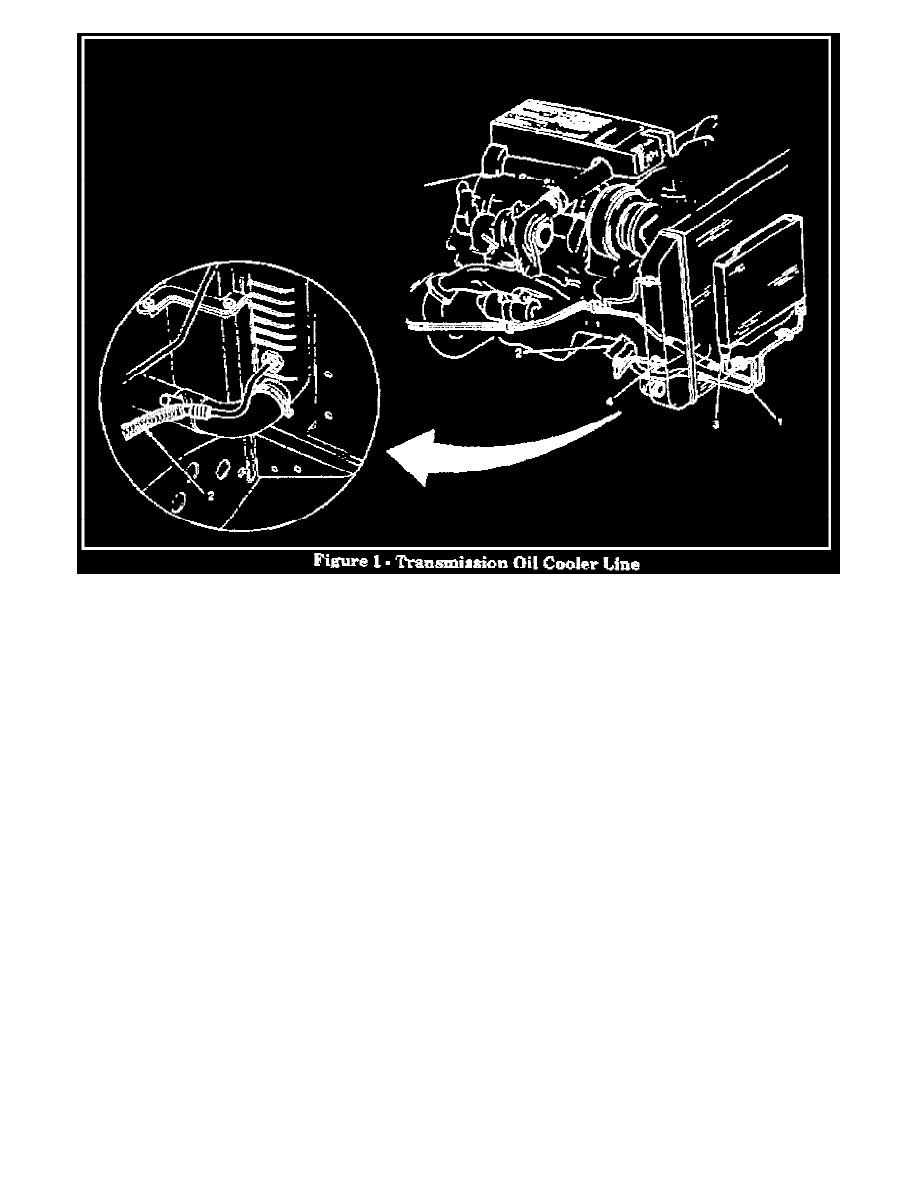
Locate inlet hose to auxiliary transmission oil cooler (Figure 1, Item 1)
2.
Inspect hose for any sign of a kink in the area of concern shown in Figure 1, Item 2.
3.
If hose is not kinked, proceed to step # 29. If the hose is kinked in the area of concern shown in Figure 1, Item 2, proceed to the next steps.
4.
Remove left and right turn signal lenses.
5.
Remove grille fasteners (6 screws).
6.
Remove grille (includes unplugging marker lamps)
7.
Remove deflector panel.
8.
Disconnect hose at cooler (Figure 1, Item 3 quick connect, discard "E" clip).
9.
Disconnect hose at radiator (Figure 1, Item 4).
10.
Remove hose (Figure 1, Item 1).
11.
Position new hose in the proper orientation to avoid kinking or interference with the inner fender in the area of concern shown in Figure 1, Item 2.
12.
Connect hose at radiator (Figure 1, Item 4) using caution to not cross thread fitting and to prevent tube from rotating. Torque nut to 45Nm (33 lb.
ft.). Install a new "E" clip on the cooler connector.
13.
Connect hose at the cooler making sure that the pipe clicks into the connector. Pull back on pipe to make sure that the pipe is fully fastened to the
connector. Snap plastic cap onto quick connector assembly. Do not depress the retainer clip during this operation. Plastic cap has to be fully seated
against the connector hex. Make sure that the pipe is not bent during this process.
14.
Install deflector panel.
15.
Install grille (includes plugging in marker lamps).