
K 1500 Truck 4WD V8-5.3L VIN T (2000)
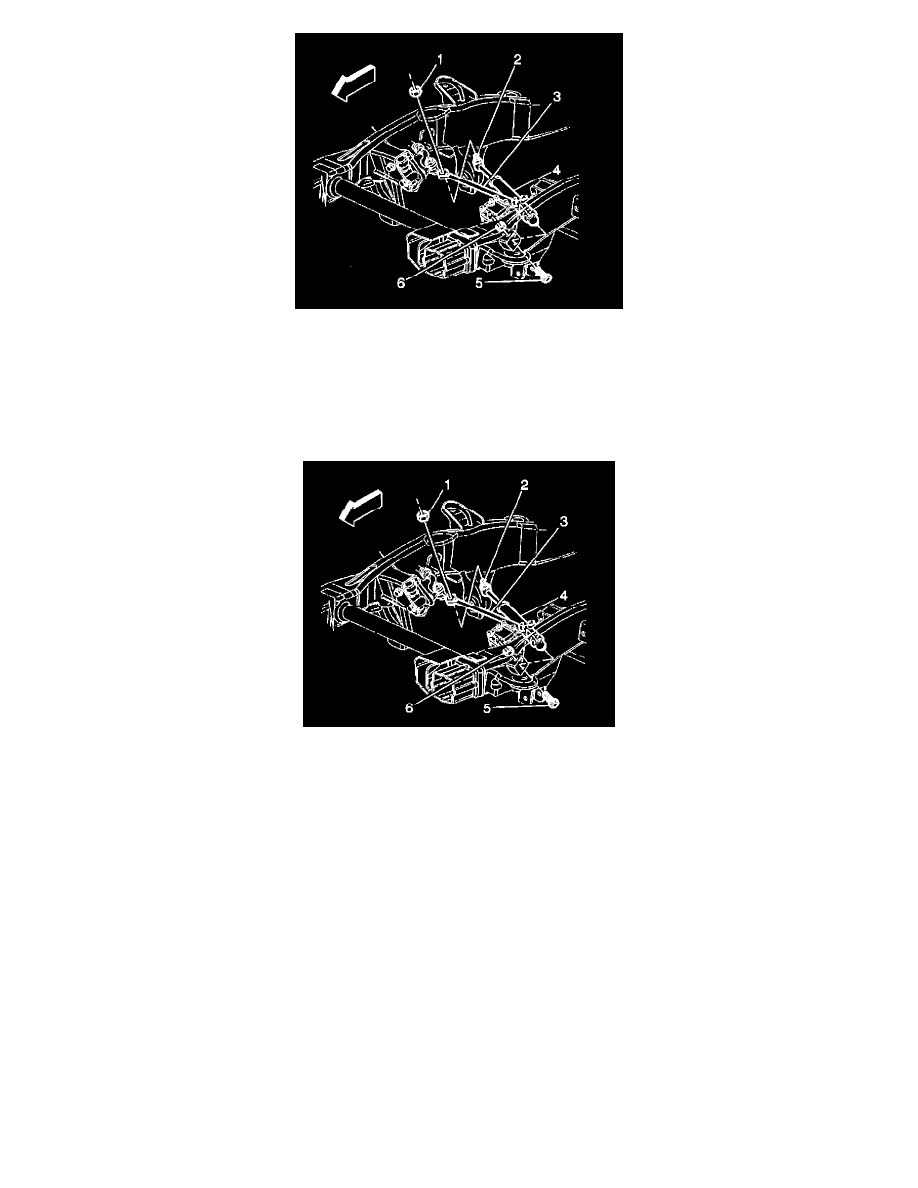
5. Remove the steering damper mounting bolt (5) and the nut (6). Do not reuse the nut.
6. Remove the steering damper (4) from the vehicle.
7. Inspect the following parts:
-
The steering damper for leaks and damage
-
The mounting bolts and the nuts for damage or corrosion
Installation Procedure
1. Install the steering damper (4).
2. Install the mounting bolt (5) and a new prevailing torque nut (6).
3. Install the steering damper ball stud (2) to the relay rod (3).
Notice: Refer to Fastener Notice in Service Precautions.
4. Install the J29193.
-
Tighten the steering linkage installer in order to seat the ball stud in the relay rod.
-
Tighten the steering linkage installer to 62 Nm (46 ft. lbs.).
5. Remove the J29193.
6. Lower the vehicle.
7. Install the prevailing ball stud nut (1).
-
Tighten the mounting nut (6) to 40 Nm (30 ft. lbs.).
-
Tighten the ball stud nut (1) to 62 Nm (46 ft. lbs.).
8. Install the differential carrier shield. Refer to Shield Replacement.