
K 1500 Truck 4WD V8-5.7L VIN R (1997)
REMOVE OR DISCONNECT
1. Raise and support the vehicle.
2. Remove the oil pan and filter.
Important: Cover the case connection electrical pins with a cover.
3. Twenty-one bolts from the valve body assembly and the manual detent spring.
4. Six bolts using an 8 mm socket, from the pressure manifold.
-
Ensure the five O-rings are attached to the pressure manifold assembly.
5. Three wiring clips, fluid level indicator stop, bolt, lube pipe, lube pipe retainer, and the clamp.
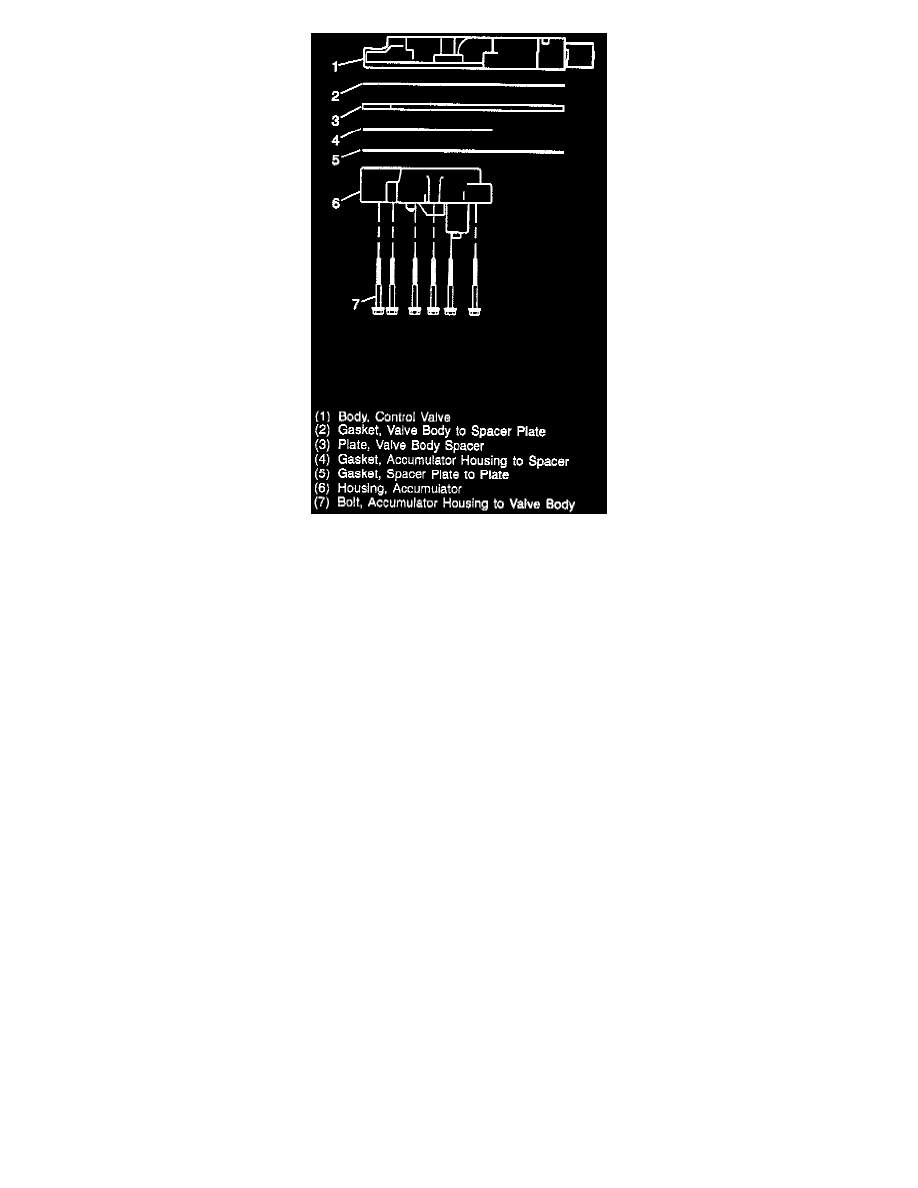
6. Control valve with the accumulator housing, valve body gaskets, spacer plate, and the accumulator gasket.
-
Remove all gasket material remaining on the case surface.
7. Eight check balls from the case passages.
8. PWM (Pulse Width Modulation) solenoid screen.
The use of a honing stone, fine sandpaper, or crocus cloth is not recommended for servicing stuck valves. All valve lands have sharply machined
corners that are necessary to cleaning the bore. If these corners are rounded, foreign material could wedge between the valve and the bore causing
the valve to stick. If it is found necessary to clean a valve, use micro fine lapping compound (900 grit or finer).
Too much lapping of the valve will cause excessive clearances and increase the chance of a valve not operating.
Clean
-
Control valve assembly and the accumulator housing thoroughly in clean solvent.
-
Dry using compressed air.
DISASSEMBLE
-
Control valve assembly and the accumulator housing.
-
Position as shown on a clean surface.
-
Remove the valve trains and the accumulator pistons.
CAUTION: Some valves are under pressure and will spring out when the roll pine are removed. Cover the valve bores while removing
the roll pins to prevent personal injury.
-
Remove the blind hole roll pins with a modified drill bit.
-
Valves, springs, bushings, and pistons must be laid out on a clean surface in the exact sequence that they are removed.