
K 1500 Truck 4WD V8-6.0L VIN U (2001)
1. Remove the oil pan and suction filter.
2. Disconnect the internal wiring harness from the solenoid being changed.
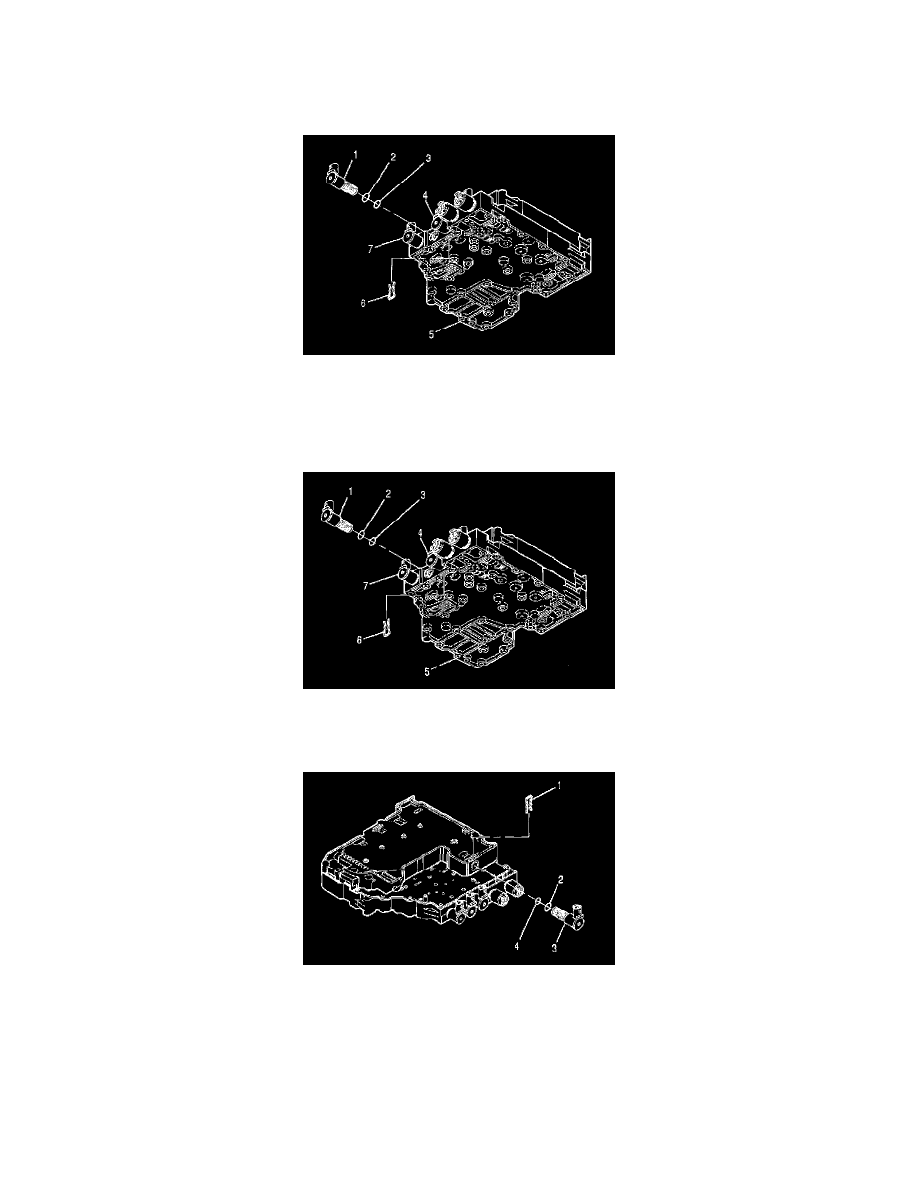
3. Remove the solenoid retainer (1) for the C solenoid (3). Note the position of the solenoid connector and pull the solenoid (3) out of the bore in the
control valve assembly. The O-rings; (2) and (4) provide the resistance felt during removal.
4. Remove the solenoid retainers (6) for the D solenoid (1), E solenoid (4), or F solenoid (7), whichever is being replaced.
5. Note the position of the solenoid connector and pull the solenoid out of the bore in the control valve assembly. The O-rings (2) and (3) provide the
resistance felt during removal.
Installation Procedure
1. Obtain the new D solenoid (1), E solenoid (4), or F solenoid (1). Install O-rings (2) and (3) and lubricate with clean transmission fluid. Push the
new solenoid into the control valve assembly (5) with the wiring harness connector in the correct position.
2. Reinstall the solenoid retainer (6). Reconnect the internal wiring harness to the solenoid(s) replaced.
3. For new C solenoid (3), install O-rings(2) and (4) and lubricate with clean transmission fluid. Push the new C solenoid (3) into the control valve
assembly with the wiring harness connector in the correct position. Reinstall the solenoid retainer (1).
4. Install the oil pan and suction filter.
Control Valve Body Replacement
Control Valve Body Replacement
^
Tools Required
-
J 44257 Wiring Harness Connector Remover