
K 1500 Yukon Denali AWD V8-6.0L VIN U (2002)
Rear Door Exterior Handle: Service and Repair
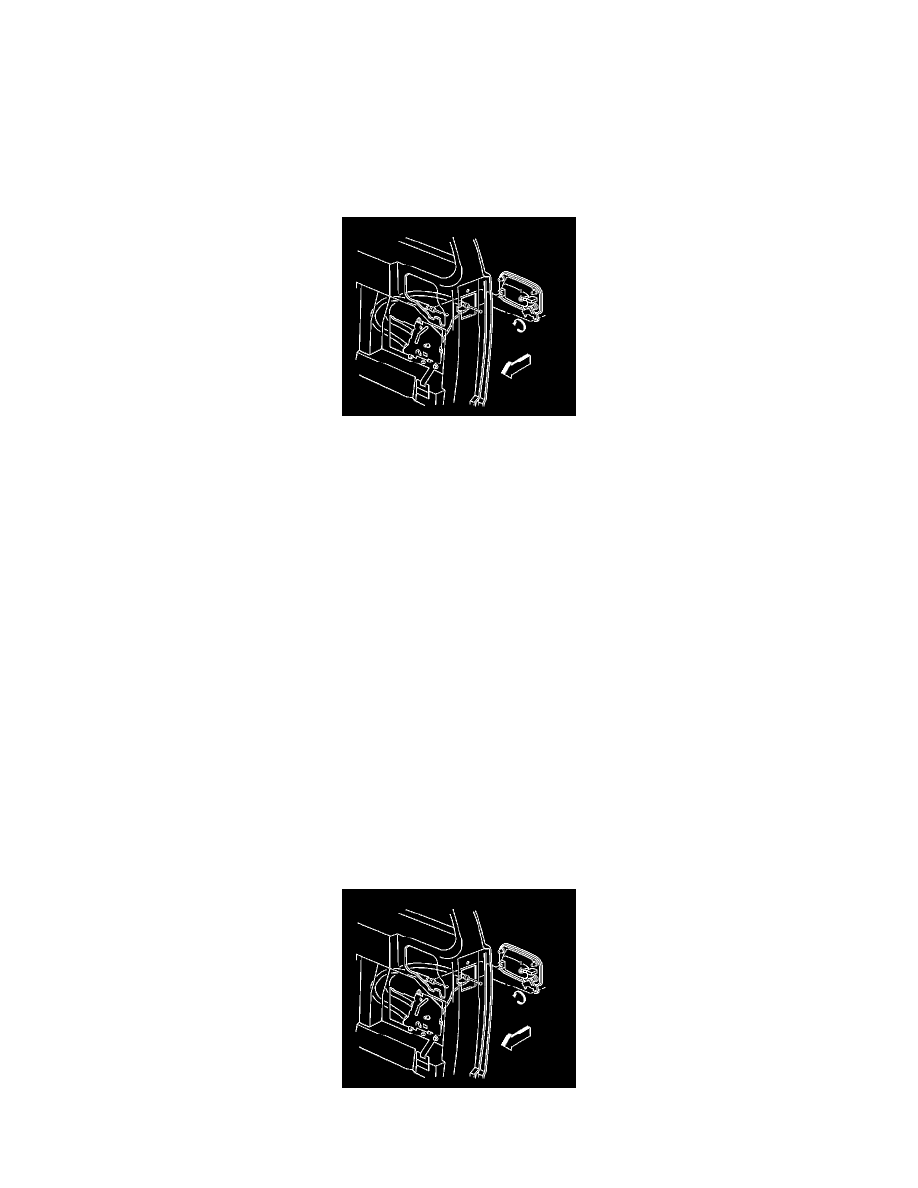
Door Handle Replacement
Lock Rod and Outside Handle Replace - Rear Door
Removal Procedure
1. Remove the trim panel, as necessary.
2. Pull back the water deflector, as necessary. Refer to Water Deflector Replacement.
3. Disconnect the lock cylinder rod from the rod clip.
4. Remove the outside handle nuts.
5. Remove the outside handle.
6. Disconnect electrical connector if required.
7. Remove actuator cable.
8. Remove the door lock cylinder.
9. Complete the necessary procedures:
*
For repair of a binding lock cylinder, refer to Binding Lock Cylinders.
*
For coding a new lock cylinder, refer to Key and Lock Cylinder Coding.
Installation Procedure
Important: When installing a new lock cylinder, apply GM P/N 12345120, or Canadian P/N 726548, lubricant or a similar lubricant to the
inside of the lock case and the cylinder keyway.
1. Install the door lock cylinder.
2. Install the actuator cable.
3. Connect the electrical connector if required.
4. Install the handle assembly.
Notice: Refer to Fastener Notice in Service Precautions.
5. Install the outside handle mounting nuts.
Tighten the nuts to 9 N.m (80 lb in).
6. Connect the lock cylinder rod to the rod clip.
7. Install the water deflector, as necessary.