
K 1500 Yukon Denali AWD V8-6.0L VIN U (2002)
Refrigerant Filter: Service and Repair
A/C Refrigerant Filter Installation (C69)
TOOLS REQUIRED
J 39400-A Halogen Leak Detector
IMPORTANT: The A/C refrigerant filter, AC P/N 15-1696 must be installed to the A/C evaporator tube (liquid line) between the condenser and
evaporator. The installation of this A/C refrigerant filter eliminates the need for flushing.
1. Remove the air cleaner. Refer to Air Cleaner Assembly Replacement in Computers and Controls Systems.
2. Remove the evaporator tube (2) from the vehicle.
3. Measure 45 mm (1.75 in) from the bend on the condenser end of the evaporator tube (2) and mark the location.
4. Measure 50.8 mm (2 in) from the mark on the evaporator tube (2) towards the evaporator from the previous step.
IMPORTANT: Do not allow metal burrs to enter the evaporator tube (2) during cutting or when removing the burrs.
5. Using a tubing cutter, cut the marked section of the evaporator tube (2).
6. Remove the burrs from the evaporator tube (2).
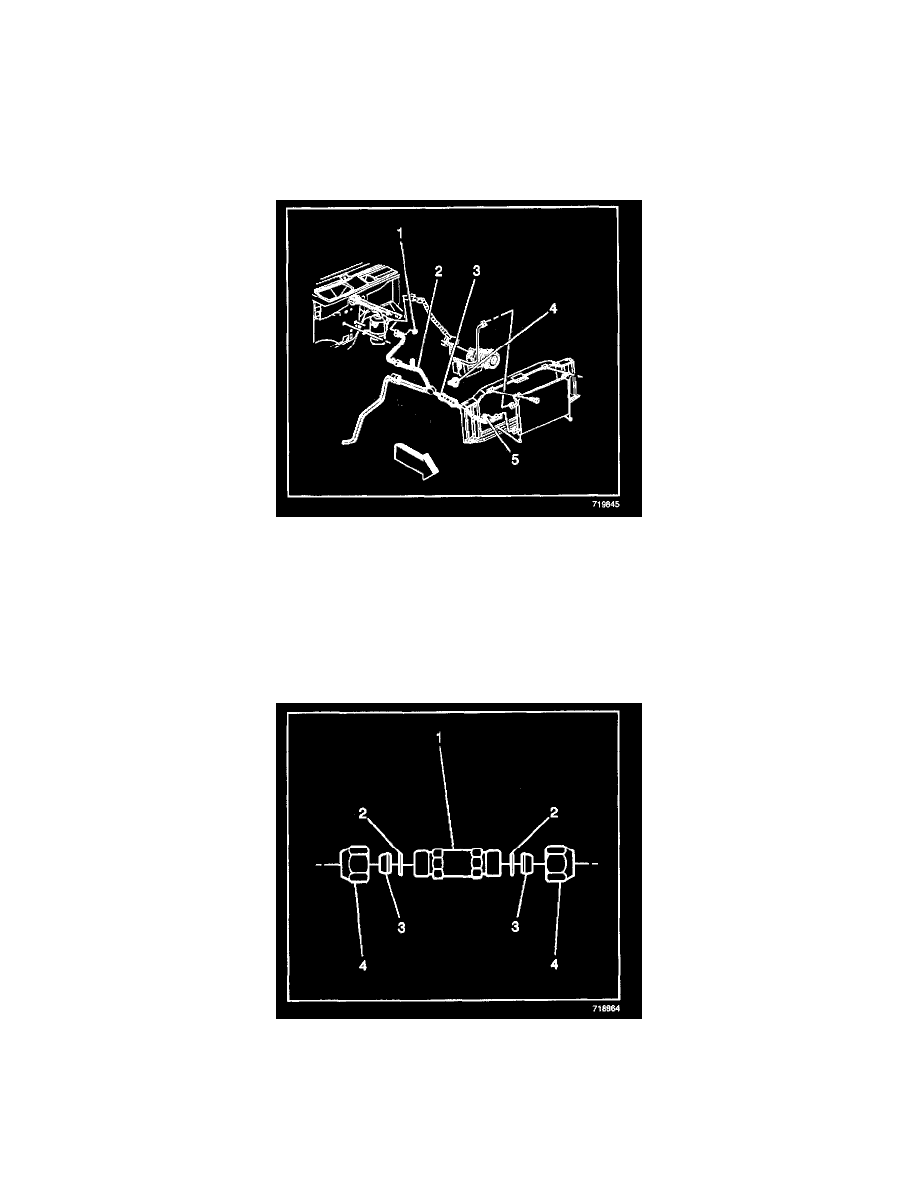
7. Remove the nuts (4), the ferrules (3), and the O-rings (2) from the A/C refrigerant filter (1).
IMPORTANT: Do Not install the O-rings (2) in this step.
8. Push the nuts (4) and ferrules (3) over each of the evaporator tube halves.
9. Install the ferrules (3) with the small end toward the nut (4).