
K 1500 Yukon Denali AWD V8-6.0L VIN U (2002)
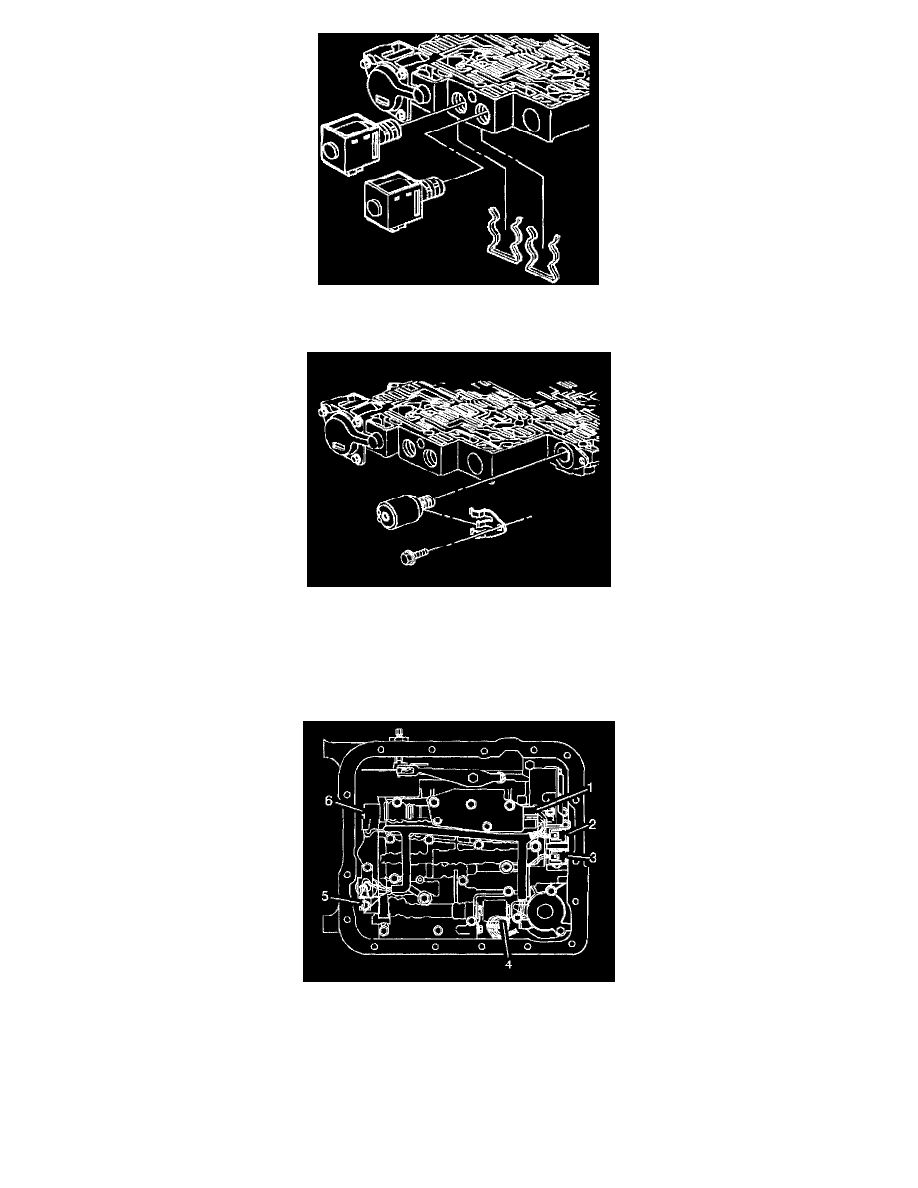
3. Install the 1-2 and 2-3 shift solenoids.
4. Install the 1-2 and 2-3 shift solenoid retainers.
5. Install the pressure control solenoid. Ensure that the electrical tabs are facing outboard.
Notice: Refer to Fastener Notice in Service Precautions.
6. Install the pressure control solenoid retainer and retaining bolt.
^
Tighten the pressure control solenoid retaining bolt to 11 Nm (97 inch lbs.).
7. Connect the internal wiring harness electrical connectors to the following components:
^
Transmission fluid pressure switch (1)
^
1-2 shift control solenoid (2)
^
2-3 shift control solenoid (3)
^
Pressure control solenoid (4)
^
TCC PWM solenoid (5)
^
3-2 control solenoid (6)
8. Install the 1-2 accumulator.
9. Install the transmission oil pan and filter.